 Brittany's Pantry
Ginger Chai Blondies
Brittany wrote this on 8 November 2012![]() chai, ginger, whole wheat flour
chai, ginger, whole wheat flour
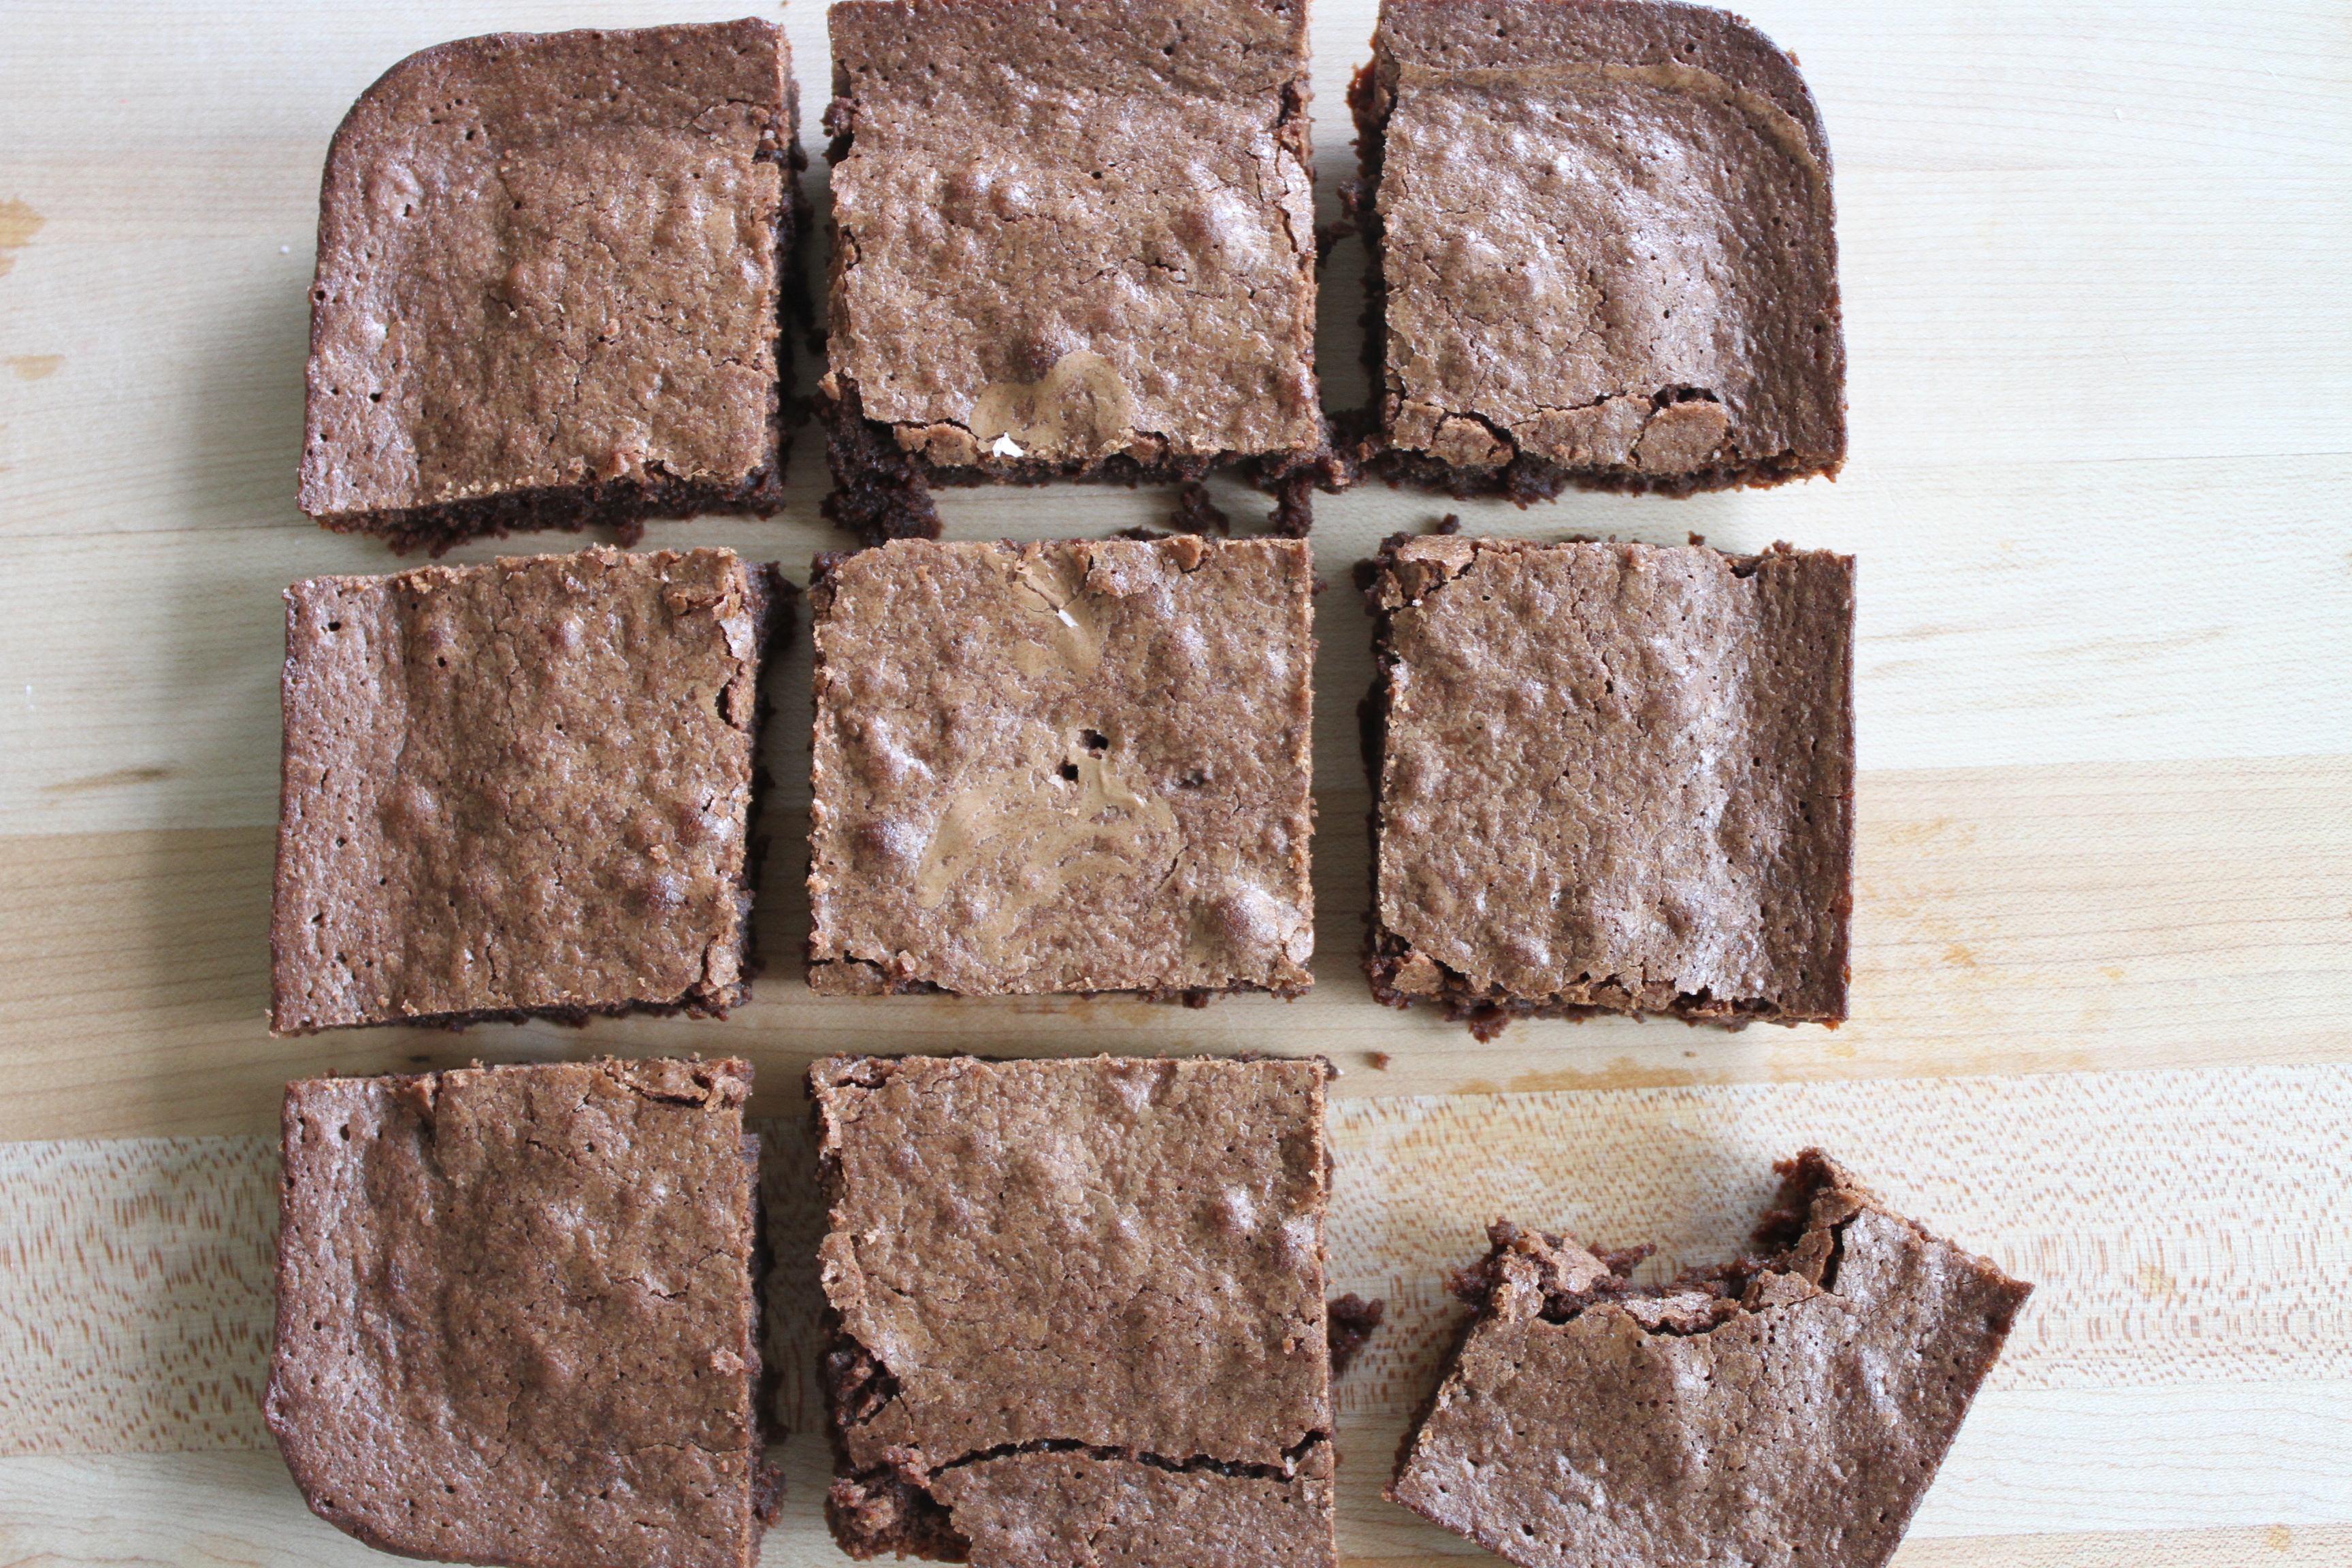
 My neighbor, who ate some of the bars you see in this picture, sent me a text later in the day. These taste like Christmas! And they do indeed.
These bars are kind of a cross between a blondie brownie and spicy cup of chai tea, but they aren’t as rich, heavy, or as overwhelmingly sweet as a brownie. They are simple to make and utterly fantastic with a hot drink. As in, I highly recommend sipping something steaming when you make these. This would be perfect! Although a huge glass of milk wouldn’t be terrible either. They are lovely and different without being so weird that everyone just passes them by. Don’t they just look like Fall? 🙂 Make them for a Holiday potluck, bring them to work, or pack them in your lunch all week. Either way, they are hard to resist! You, and maybe even your neighbor, will thank me.
 One Year Ago: Garlic Herb Bread
Two Years Ago: Piggy Pudding
Ginger Chai Blondies
Adapted from Cooking For Seven
Recipe Updated 11/11
In the bowl of an electric mixer, add:
1 c (2 sticks) butter, softened
1 c brown sugar
1/2 c white sugar
2 eggs
1 tsp vanilla
Mix with the paddle attatchment until smooth. Add:
1 c white whole wheat flour or whole wheat flour
1 c all purpose flour
1/2 tsp baking soda
1 tsp cinnamon
1 tsp allspice
1 1/2 tsp ground ginger
the contents of two chai tea bags
pinch of salt
Mix dough just until combined. Spread dough-it will be sticky!-into a sprayed 9X13 inch baking pan and bake at 350 for 20-25 minutes or until toothpick comes out clean, or with just a few crumbs attached. Cool slightly before cutting.

 I have come to accept the fact that I am somehow cursed when it comes to the drive-thru widows of restaurants. I know I mentioned it before in a previous post (don’t ask me which one-I am way too tired right now to try and figure that out) so I won’t rehash it all. But to sum up, I almost never get what I order. That is just the way it is. I accept it. My husband has come to accept it. My friends deal with it. It is a weird and yet totally normal phenomenon.
A few days ago, it was a chocolate cookie from Panera that I was after. Lunch, yes, but the cookie was what I wanted more than my next five minutes of air. I needed that chocolate cookie. A chocolate cookie that they assured me was in the bag. A half an hour later, when I arrived at home, it was of course, missing. My solution? Besides falling to my knees and throwing my hands to the sky, wailing, “Sweet Mary Mother of all the is good and Holy, WHY?!” My solution is this cookie.
It isn’t an equal swap out and this cookie is not as thick and hearty as a Panera cookie. But it is extremely chocolatey and that is what I wanted. Not a brownie or cake or candy. Just a rich, chewy, chocolate cookie. Yeeeeeees!
It may not come as any surprise when I say that this recipe is adapted from Hershey. Those people know chocolate. Who am I to second guess them? And I know there are superior chocolate cookie recipes out there. For example, I make a Ghiradelli chocolate cookie that has so much melted chocolate in it you have to chill the dough just to be able to portion it out on a pan and bake it. We are talking serious chocolate overload. But the beauty of this one is that it mixes up and bakes just like every other drop cookie you would make. No extra steps. No extra time to melt anything, chill anything, or roll anything. Just a lot of cocoa to give in that wonderful richness and flavor without an extra sweetness. So simple and so good. And bonus! You can add just about anything to the batter to customize for any event or craving. And I think we can all agree that is better than anything that comes through a car window.
One Year Ago: Ultimate Peanut Butter Cookies
Two Years Ago: Sweet Potato Biscuits
Dark Chocolate Cookies
Adapted from Hershey
Mix in whatever goodies you like!
2 sticks softened butter
1 c sugar
3/4 c brown sugar
1 tsp vanilla
2 eggs
1/2 c dark cocoa powder-regular is fine
2 c flour
1 tsp baking soda
In a mixer, combine the first 5 ingredients until well incorporated and creamy. Add the dry ingredients and combine. Fold in:
1/2 bag dark chocolate chips
1 c toffee pieces
Drop by rounded teaspoonfuls onto a greased or parchment lined sheet pan. Bake at 375 degrees for 8-10 minutes. Be careful! Do not over bake! Cool and enjoy! These freeze great!
Note: You can make any kind of chocolate cookie here. Try any or all of these combos!
White Chocolate Chips
Semi-Sweet Chocolate Chips
M&M’s
Reese Pieces
Peanut Butter Chips
Mini Chocolate Chips
Chopped Andes Mints
Gluten Free Apple Carrot Muffins
Brittany wrote this on 13 October 2012![]() almond flour, apples, carrots, flax, gluten-free, maple syrup, rice flour
almond flour, apples, carrots, flax, gluten-free, maple syrup, rice flour
 Sometimes, recipes just surprise you.
I had no idea I was going to love these so much. I had no idea that I would end up completely redoing these muffins over five different batches. I had no clue that I would grow kind of addicted to the texture of almond flour. I was completely taken aback by the fact that I did not like them at all when made with wheat flour. And I was totally surprised that I would eventually be worn down and actually succumb to the skinny jeans fashion craze, but that is a story for another blog…
Recently, I had two lovely house guests that avoid eating gluten, corn, and a variety of other foods due to certain medical conditions. Not wanting to let them down (they were on vacation, after all) I planned ahead and tried to create menus that would be easy, tasty, and hopefully a break from the normal fare they were eating. I mean, fun food is part of the experience of vaca, right? Due to my three little chitlins’, I didn’t get a chance to make, or experiment, with half the stuff I wanted to. But I did make them Asian Lettuce Wraps with gluten-free soy sauce, Roast Chicken & Mashed Potatoes, Sweet & Spicy Salmon with greens and Vinaigrette, Roast Broccoli, Autumn Minestrone, Scrambled Eggs W/Bacon and Avocado, Flax Wraps W/Hummus (although they actually made those themselves…), Baked Pumpkin Custards, Tofu Chocolate Pudding, and these muffins. They didn’t seem to suffer!
These muffins are extremely easy to throw together. Originally, I was working off of a recipe from Aran Goyoaga, the genius behind Canelle et Vanille, but ended up swapping out and adjusting so many of the ingredients that it is now a totally separate recipe. My version is much more streamlined, less sweet, easier and faster to prepare and uses more accessible ingredients. But no less tasty, I am sure!
Yes, these contain a few specialty flours that you may need to search out, but I found the almond meal and the tapioca starch at my local super market. And I live in the middle of nowhere. So chances are close by. The rice flour required a ride in to ‘town’ but now I have enough to keep me in these muffins for quite sometime. Thank goodness! That they are gluten-free is a bonus for any of you with celiac disease, but the fact that they are little gems of heart healthy goodness is a plus for the rest of us. They are totally worth adding to your list of things to bake this fall. Skinny jeans or no!
 One Year Ago: Mashed Sweet Potatoes, Salmon Nicoise, Maple Pecan Shortbread, & Chicken & Barley Soup
Two Years Ago: Apple Cider Syrup, Overnight Apple Cinnamon Oatmeal, Baked Macaroni & Cheese
Gluten-Free Apple Carrot Muffins
Inspired by these
I know the spice list sounds excessive, but when I tried to cut it down to just cinnamon and cardamom, we could totally tell. The flavors are much better balanced with all four in there!
In a medium bowl, whisk together:
1 c brown rice flour
1/2 c almond flour or almond meal
2 T tapioca starch, also called tapioca flour
1 T ground flax
1/4 c raw sugar or brown sugar
1 1/2 tsp baking powder
pinch of salt
3/4 tsp cinnamon
1/4 tsp nutmeg
1/4 tsp ginger
1/4 tsp cardamom (optional, but highly recommended)
Whisk until combined and set aside. In a large measuring cup, combine:
1/3 c pure maple syrup
1/3 c canola oil
1 tsp vanilla
2 eggs
Whisk until smooth and gently fold into the dry ingredients just until moist. Don’t over mix! You still have to add:
1 c grated carrot-about 3 small, 2 medium, or 1 large
1 apple, peeled, cored, and grated-I ALWAYS bake with golden delicious but it is up to you
Oh so gently, fold these in and divide among eleven lined or sprayed muffin cups. You heard me right. Eleven. No matter what I do, I can’t make this recipe come out to an even dozen! Anyway, bake at 350 for about 20 minutes, or until a toothpick comes out with just a crumb or two. Cool slightly. Enjoy!
Apple Butter Bran Muffins
Brittany wrote this on 24 September 2012![]() apple butter, bran, molasses, vegetarian, whole wheat flour
apple butter, bran, molasses, vegetarian, whole wheat flour
 Ah Fall. This time of year, on blogs especially, everyone is raving about how much they love cooler weather, how excited they are for this time of year (i.e. the beginning of ‘The Holidays’) and how wonderful it is to be able to indulge in Pumpkin Spice Lattes again. Don’t deny it. You were one of those people posting pics to Facebook while in the Starbucks drive thru, weren’t you? I know. Its all good. I am right there with ya. Except not on the whole coffee thing because I am still nursing, but I would be if I could. Except for me it will be a decaf Peppermint Mocha. Um num nahm num. *drool drool*
But I digress…
My point is, at the risk of sounding, well, like everyone else, this really is my favorite time of the year. It always has been. When I lived in San Diego, I didn’t crave snow at Christmas, but I desperately wished I could bundle up in a sweatshirt, blue jeans, a stout pair of boots, and a tote a thermos of hot chocolate while the brisk air turns the end of my nose red. Attractive I know, but THAT is what I wait for all year. And even though, as a foodie, I love the produce and bounty of the warmer months the most when it comes to my kitchen, it is autumn that my heart belongs too. The smells that waft from a kitchen in fall are unlike any others and these muffins contribute to that. Also, most of my wardrobe is in earth tones so I am much more fashionable after Labor Day…
Apple butter is what makes these muffins stand out, giving them a sweet spiciness that sets them apart. They are healthy and super good for your heart and your scarf and boot clad bod. They somehow go perfectly with every hot drink in creation (I know. I’ve tried.) and they make the perfect snack or breakfast for this time of year. And yes, while baking, will make your house smell beyond amazing. Throw in a latte and you just won’t be able to stand it.
 One Year Ago: Baja Fish Tacos, Double Chocolate Banana Bread & Pumpkin Pie Muffins
Apple Butter Bran Muffins
Idea from Eating Well
Of course, these freeze great. I recommend a double batch.
In a large bowl:
1 egg
1/2 c milk
1/2 c apple butter
1/3 c brown sugar or raw sugar
1/4 c canola oil
1/4 c molasses
Mix until completely incorporated. Add:
3/4 c wheat bran
3/4 c white whole wheat flour or whole wheat flour
3/4 c white flour
2 1/2 tsp baking powder
1/2 tsp cinnamon
pinch of salt
Fold ingredients gently, just until incorporated. Add:
1/2 c raisins
1/3 c chopped walnuts
Fold very gently just until mixed. Pour into greased or lined muffin cups (it seems to make exactly 10 every time I make these) and bake at 375 degrees for 18-20 minutes or until a toothpick inserted into the center comes out with just a crumb or two.
 Hello all! I am sorry to say I am still having issues with my site so postings might be a bit sporadic. I will keep you informed via Facebook with updates and maybe even recipes when I can’t get my blog site to work. So ‘like’ Brittany’s Pantry if you want to be kept in the loop! Right now, I am extremely grateful for our iPad since it seems to be the only electronic device that I can work from right now. Although today, I am not complaining! It is a beautiful, sixty degree morning with nary a cloud in sight! We have been to the Farmer’s Market, gorged ourselves on fresh baked croissants and sipped dark, creamy hot chocolates while we shopped, finished off the last of the seasons wild blueberries with our lunch, and now I am curled up on my screen porch in a fuzzy sweatshirt, listening to the afternoon breeze blow through the branches of the enormous, towering oak trees that surround our house. I plan on making and freezing some pasta sauce with the heirloom tomatoes we picked up this morning, but for now, I am snacking on these and loving the fact that I am practically forced to sit out here in this beautiful weather and write to you. Lots of arm twisting going on here….
These bars nearly have me at a loss for words. They are so good, so decadent, and so gooey, that they elicit groans from all who enjoy them. They are sweet and rich and absolutely indulgent. Make no mistake–these are definitely a treat. A pan of bars to make and share with those around you. Yes, I said share. You may want to eat a whole pan of these–and yes, you really are going to want to eat a whole pan of these–but resist! The satisfaction is temporary! Your bathroom scale and your cardiologist can confirm this! In this instance however, I will understand if you cave. This is a safe place. No judgement.
This recipe is from my neighbor, a wonderful baker who, I have mentioned before, is famous for her chocolate chip cookies. This same sort of recipe exists out there in a dozen different varieties, but this particular version is my favorite. A buttery, oatmeal crust, chocolate and caramel… straightforward and simply fantastic. There are a few separate steps, but nothing too time consuming or difficult. It is a fun recipe for kids to help with too. And it is a perfectly wonderful make-ahead dessert for company. Just don’t blame me if they try one and then never want to leave. Blame my neighbor!
 One Year Ago: Panzanella Salad, Granola, & Summer Berry Pudding
Two Years Ago: Good Lookin’ Man Potatoes
Oatmeal Caramel Bars
Adapted from Kathie Temple, friend of Brittany’s Pantry
Using a stand mixer, hand mixer, or wooden spoon, combine in a large bowl:
2 c flour
2 c rolled oats
1 1/2 c brown sugar
1 tsp baking soda
Pinch of salt
1 1/2 c very soft butter
When well combined, press two thirds of the mixture into a lightly sprayed 9X13 pan. Bake at 350 degrees for 12 minutes. Meanwhile, combine:
1 1/2 c caramel topping or 1-12 oz jar
1/3 c flour
Mix with a whisk until smooth. Remove crust from oven and sprinkle with:
Half a bag of chocolate chips
1/2 c chopped walnuts (optional)
Evenly pour the caramel mixture over the pan and sprinkle the reserved oat mixture over top. Bake for an additional 20-25 minutes or until golden brown. COOL COMPLETLY! If you try to cut these when warm they will ooze all over. Yummy, but not the effect we are looking for! These are best cut into 24 bars. Store in a cool place or the fridge.
Lunchbox Chocolate Chip Cookies
Brittany wrote this on 25 August 2012![]() chocolate
chocolate
We are back from vaca! Did you miss me?
The end of our time off signaled the beginning of the school year here and forty-eight hours after we returned I was waving goodbye to Evelyn as she marched into her first grade classroom. *sigh* This morning she rode the bus for the first time ever and I made my husband zip over to the school to make sure she was doing OK. I could practically hear her roll her eyes at me. Such a big girl!
My husband and I were recently blessed with an early Christmas present: an iPad! Although I am still trying to figure it all out and frankly am a bit intimidated by all it is capable of, I thoroughly enjoy the convenience of it. Apple sauce led to the demise of my last cell phone so I am looking for some kind of impenetrable case for the iPad that can withstand a nuclear blast and, of course, small children.
 The recipe I am sharing today is a simple chocolate chip cookie, but we have some chatting to do first! I would love to know what you thought of my Favorites post! I am already making notes for an Autumn addition. Also, I know that many of you have munchkins headed off to school soon (or like mine, have already started) and that means packing lunches. And speaking of bagged lunch, we like to use these bags instead of plastic. They last forever, look super cool, and are much better for the environment!
While Evelyn is the least picky six year old I know, she was still less than impressed with the food served at her school. Lack of flavor and canned veggies were at the top of her list of grievances so she bagged her lunch a lot last year. This year is looking like much of the same, but I am ready for it! Here are a few ideas if you are looking for some variety for your kids or your own bagged lunch!
Earth Bread– Make this now while zucchini is in season! Bake as loaves or muffins and freeze. I send Evelyn with a whole muffin, some fruit, and string cheese or cottage cheese. I also slice the bread and make a sandwich with cream cheese in the middle. My kids devour it for breakfast too.
Veggie Couscous– I make this all the time with whole wheat pasta. Mix it up the night before and pack it cold for lunch. Feel free to skip the veggies and pack what you like separately. My daughter asks for this at least once a week!
Banana Bran Muffins, Honey Bran Muffins, Pumpkin Pie Muffins– All of these are healthy enough that I pack them as a substitution for a sandwich. They are already portioned and can be pulled right from the freezer.
Homemade Granola Bars– I usually cut these a bit smaller when I put them in my daughters lunch. otherwise she doesn’t have an room for fruit or veggies! Individually wrapped in cellophane, they freeze great and go straight into her lunch box. They defrost perfectly by lunch time.
Chicken Salad Wraps– I pack these just like you seen in the picture, but I use a mini tortilla, whole wheat if I can find it. Some organic greens, chicken salad, and I wrap it tight in wax paper. I do the exact same thing for my husband to take to work or for the family when we go on a picnic. Crazy good. For a change of pace, I also pack it in a small dish with a fork and a separate little bag of whole wheat crackers.
Margarita Pasta Salad– Because this salad is so good cold, I save out a portion when I make it for dinner and then it is all ready to send with her the next day. Sometimes I give it to her plain, sometimes I add diced grilled chicken. Either way, super good when all the other kids are eating chicken nuggets.
Super Healthy Cookies– I like the combo of dried cranberries or cherries and dark chocolate chips, but feel free to vary this recipe to your tastes. A variety of dried fruit is particularly good. Thanks to the whole wheat flour, oatmeal, wheat germ, and canola oil, these cookies are healthy enough for the kids to have two! Freeze them and tuck them in lunches for a treat that tastes like dessert but is heart healthy and full of fiber.
Oatmeal Raisin Snack Bars– These are a great change of pace but taste so good you won’t believe it. I wrap them individually in plastic wrap and freeze them just like the granola bars. Make sure to save a few to eat right away. They are addicting!
Sweet Potato Fries– These are fantastic cold!
Asian Turkey Lettuce Wraps– These are good cold and pack surprisingly well. One of my daughters favorite meals!
Tofu Chocolate Pudding– Much better for you and/or your kids than the store bought stuff!
Also our faves…
-cottage cheese
-string cheese
-whatever fruit is in season
-carrot sticks, bell pepper strips, sliced cucumbers-my kids prefer these plain but this ranch dressing is great with veggies
-dried fruit and nuts
-crackers and cheese
-graham cracker, whipped cream cheese (it is easier to spread), and jam sandwiches-these taste just like cheesecake
-peanut butter and jelly whole wheat tortilla roll-ups, although I do the cream cheese and jam on these too
-hummus and pita chips (Evelyn is currently on a mission to perfect her own hummus recipe!)
-cubed salami or summer sausage and cubed cheese
-hard boiled eggs, cut in half and seasoned with salt and pepper
-graham crackers with yogurt or applesauce to dip them in
-leftover Salmon Nicoise, all diced into bite sized pieces
-rice cakes smeared with peanut butterI hope these ideas help! And please note that if I could find a thermos that my daughter could get the top off easily herself, she would probably eat soup twice a week. And now, on to the cookies!

 I like to call these cookies Lunchbox Chocolate Chip Cookies for a couple of reasons. First of all, they are super simple. Think of them as a streamlined version of a chocolate chip cookie. No extra ingredients and no extra steps. Second, this recipe makes exactly two dozen cookies. Every time. Perfect for a quick treat in the middle of the week, a speedy dessert for unexpected guests, or a snack for a class. This number will only be off if you eat too much dough. I speak from experience….
This recipe is in my daughters cookbook, Betty Crocker Kids Cook! And even though I have a bazillion cookie recipes to choose from, the kids wanted to make the one in their cookbook. Totally understandable. So we made them, and they were good. Quite good. Simple and good. With such a small ingredient list, I figured we could make them the old fashioned way and mix them in a bowl with a wooden spoon. Now, that is the only way we make these. No mixer, nothing to plug in. Just a bowl, a spoon, and some elbow grease!
Please know that these are in no way an ultimate or best chocolate chip cookie. We far prefer this cookie more. But these are just simple, fast, easy, and yummy. And sometimes, that is just what our families need.
One Year Ago: Pesto & Chocolate Zucchini Bread
Two Years Ago: Tortellini W/Shrimp, Zucchini and Tomato Cream Sauce
Lunchbox Chocolate Chip Cookies
Adapted from Betty Crocker
1 stick of butter, room temp
1/2 c sugar
1/2 c brown sugar
1 egg
1 1/2 c flour
1/2 tsp baking soda
pinch of salt
1 c chocolate chips-M&M’s would be nice too
In a large bowl, cream sugars and butter together with a wooden spoon until smooth. Add egg. Mix well. Add dry ingredients and mix until incorporated. Fold in chocolate chips. Drop by rounded teaspoonfuls into a greased or covered sheet pan and bake at 375 for 10 minutes or until golden brown.
 I absolutely love it when I find a recipe like this. A great concept that is easy, saves me time, makes just enough for our little family, and tastes spectacular.
While going through the BHG website, I came across a recipe for brownies in the archives. It had been published 80 or 90 years ago and was mentioned as one that deserved to be revisited. I added it to my ridiculously long list of brownie recipes, put the year 1930 at the top, and filed it away in my computer. When I came across it months later and read through the actual recipe, I was intrigued. I changed a few things to make it even easier and streamlined it a bit to allow for maximum brownie making ease. The result? Super fast, super chewy brownies that can be mixed entirely in one pan on the stove top. Less mess to clean up means more time for actually eating the bars. I find this a highly important part of the recipe. My husband says they are his favorite brownies ever so I have made this recipe a half a dozen times or so in the last 6 months, just to be sure. Oh the things I do for all of you!! And yes, it turns out great every time. Because this only makes a 9X9 pan, I usually save it for a weeknight treat or a last minute dessert for unexpected company. I have other, bigger, recipes for when I am expecting a crowd or need to bring a dish to pass. Like Buttermilk Brownies. I have no doubt these are just the first of many brownie recipes that I will share. But for now, this one is worthy of making soon. Like now. As in, what are you still sitting there for?
 One Year Ago: Cherry Hand Pies, Grilled Yogurt Chicken & Oatmeal Cherry Chocolate Chunk Cookies
Two Years Ago: Earth Bread & Banana Bran Muffins
Saucepan Brownies
Adapted from BHG
Place a medium sized saucepan over medium low heat and add:
1/2 c (1 stick) of butter
2 oz unsweetened chocolate
Stir gently until completely melted and smooth. Keep the temp low so that the chocolate doesn’t scorch.
Add 1 c sugar.
Stir just until the sugar starts to melt. This makes for a fudgey brownie, but if you want, you can just dump it in and keep going. It doesn’t have to melt. Off the heat, add:
1/2 tsp vanilla
2 eggs, beaten
3/4 c flour
pinch of salt
Stir until smooth and incorporated. Pour into a sprayed 9X9 pan and bake at 350 for 25 minutes. Be careful! Don’t over bake! A toothpick should come out with a just a crumb or two attached!
Sour Cream Cherry Bars
Brittany wrote this on 5 July 2012![]() cherries, oatmeal, sour cream
cherries, oatmeal, sour cream
 At the risk of stating the obvious, I just have to mention that it is hot. Really hot. Pleeeeeease tell me you are all staying cool out there. Pools, lakes, oceans, garden hose: whatever it takes to beat the heat! Here in the middle of Midwestern farmland we are not only feeling the heat, but the beginnings of a drought as well. Uhg. The heat was the reason our family decided to forgo our holiday plans this week. No parades, no festivals, no BBQ’s, and no celebrations. 104 degree heat index and an infant don’t mix.
These bars were one of the things that I had already made to bring to a pot luck that we never attended so we have been sharing them with our neighbors and eating them ourselves. Just think of them as a kind of easy cherry pie that feeds way more than six to eight! I have had this recipe for forever, randomly ripped out of a magazine years and years ago. I made it for Easter not long after we moved to IL and have been thinking about it ever since. Like…dreaming about it.
Because it makes a big pan, I usually only make it when I am having company. It goes together pretty fast and it is great warm with ice cream or even cold for breakfast. There are still a lot of weekends left in the summer to grill out and enjoy your friends and family! This dessert will feed them all and is just different enough to be interesting. And since it uses frozen cherries, you don’t have to limit yourself to when they are in season. So you-and I for that matter-can make it anytime. Heat wave or no. One Year Ago: Cobb Potato Salad
Sour Cream Cherry Bars
Adapted from Pillsbury
This recipe can be halved and baked in an oval casserole dish. You can cut it into squares or just dish it up with a spoon. I highly recommend vanilla ice cream to go with it!! Feel free to use tart, sweet, or a mixture of both kinds of cherries.
Crust and topping:
1 c (2 sticks) butter, room temp
1 c brown sugar
1 1/2 c flour
2 c rolled oats
1 tsp baking soda
pinch salt
Filling:
3/4 c sugar
1/4 c flour
1 egg
1 c sour cream
2-12 oz bags frozen cherries, thawed and drained of liquid
In a mixing bowl, cream the butter and brown sugar together for the crust. Add the rest of the ingredients and mix just until combined. Press 2/3 of the mixture into the bottom of a large, ungreased, 11×14 glass baking dish. Bake at 350 degrees for 10 minutes. Let cool for 5 minutes. Meanwhile, mix together all filling ingredients until smooth. Carefully stir in cherries. Pour filling over crust and crumble remaining third of oatmeal mixture evenly over top. Bake for an additional 30-35 minutes, or until golden brown and center is set. Cool to room temp and serve. Store in the refrigerator.
Snickerdoodles-A July 2nd Recipe
Brittany wrote this on 2 July 2012![]()
 Nope. Not a fourth of July recipe, but a second of July. I have a lot of cooking to do, but all of mine is happening in the next few weeks. If you are looking for fourth of July inspiration here is a link to last years list. Or you could make this. Or this. And I highly recommend you make this.
I have been under the weather this week and we were on vacation last week so my time in the kitchen has been sporadic, at best. But if you follow me on Facebook you know that I have been messing around with snickerdoodle cookie recipes lately. I have kind of a lot of different recipes stockpiled and even though they all seem pretty straightforward, every version is different. Some are super cakey and not cookie-like at all, some are super chewy, and some have so much cinnamon they are just one step down from a stick of Big Red. I didn’t add pumpkin snickerdoodles to the list to try just yet and the apple cider version will have to wait too. I just wanted to narrow things down so that when I wanted to make snickerdoodles, plain and classic, I had just one recipe to make. A recipe that I had made enough times that I knew it was going to turn out and be my ultimate version of a snickerdoodle. I believe I have found such a cookie!
My Mom used to make this kind of cookie a lot when I was a kid and they are one of my husband’s favorites. After making a ton of cookies from miscellaneous internet sites, The Joy of Cooking, Better Homes & Gardens, my own recipe, and even a version from Gale Gand, the winner ended up being from the blog Dinner: A Love Story. Their recipe has no origin but has been used for several generations, the ingredients scribbled on a splattered card. Turns out, it had the best texture and flavor. To us, anyway. Some people like their snickerdoodles almost like a muffin top; cake-like, soft, and super moist. Our family, our generous taste tester friends, and Mike’s co-workers who get all the leftovers, seem to prefer a true chewy cookie texture. Whichever you like, these are fantastic. And I have seven other batches of cookies to prove it!
 One Year Ago: Red Velvet Cupcakes & Sweet & Tangy Ribs
Snickerdoodles
Recipe adapted from DALS. Here is the link to the original post.
Cream together with a mixer:
1 c soft butter
1 1/2 c sugar
2 eggs
1 tsp vanilla
Add:
2 3/4 c flour
1 tsp baking soda
pinch of salt
Slowly mix until all ingredients are incorporated and then chill the dough in the fridge for about an hour. They will still turn out if you don’t chill it, but the texture is nicer if you do. Pinch or scoop dough and roll into 1 1/2 inch balls. Roll the balls in a mixture of ½ c sugar and 1 tsp cinnamon. Bake for 8 minutes at 400 degrees. This is a fantastic cookie to make with kids!
Baked Oatmeal
Brittany wrote this on 21 June 2012![]() apples, bananas, blueberries, eggs, gluten-free, milk, oatmeal
apples, bananas, blueberries, eggs, gluten-free, milk, oatmeal
 I know that this recipe works. I know without a shadow of a doubt that it is consistent, easy, streamlined, and adaptable to many different palettes. How do I know this? Because I have made this a CRAZY number of times in the last three months! There has been oatmeal coming out our ears over here! And we have loved every minute!
Other than the fact that it is just frustrating to photograph-How do you make it come out looking decent?-this recipe is perfect. Nutty, hearty, not too sweet, and oooooh so easy! I have made it plain and with three different types of fruits so I have you covered from all angles. If you have been trying to find a reliable recipe that is good for you and tastes fantastic too, look no further. I mean, I love a good muffin, but sometimes you need to shake it up a bit!
This is actually quite different from the Overnight Oatmeal recipe I have posted before. This is not creamy and I do not recommend adding milk or cream to it. Well, especially not cream, as that would defeat the purpose, right? Just scoop and eat! Your fruit and grain all in one.
Please Note:
In the recipe, I say you can use maple syrup or honey, but the general consensus was that we like the flavor of the maple syrup better. I have not tried it with agave or raw sugar but I have no doubt that either would work just fine.
Also, I list a few different fruit options. Amazingly (and I was the most shocked by this than anyone) we liked bananas the best. Weird, huh? The apple was fine, but the juice made it a bit watery on the bottom. Still very good though. Blueberries are my personal favorite and a close second of everyone else. Certainly the easiest to do. I didn’t bother with blackberries and raspberries because I thought they would just be way too juicy, but if that is how you roll, I doubt it would taste bad!
Bottom line: Make this oatmeal. So incredibly healthy. So easy. So yummy. You may even want to make so much that it is coming out your ears.
 One Year Ago: How To: Roast Asparagus
Baked Oatmeal
Adapted from Super Natural Everyday
If you want to make this plain, sans fruit, just omit the fruit layer and make it the same unless a different quantity is noted in parenthesis.
Spray a small casserole dish or 9X9 glass baking dish. In a single layer, add blueberries, fresh or frozen, sliced banana, or 1 grated apple that has been peeled and cored.
In a medium bowl melt 2 T (3T if making it plain) butter in the microwave. Add:
1 c rolled oats, not quick cooking (1 1/2 c)
1/4 c chopped walnuts or pecans
1/2 tsp baking powder (3/4 tsp)
3/4 tsp cinnamon (1 tsp)
pinch of salt
Mix well to evenly distribute the butter and carefully spread over the fruit. In a large, glass measuring cup, combine with a whisk:
1 c milk (1 1/2 c)
1/4 c pure maple syrup or honey (1/3 c)
1 egg (2)
1 tsp vanilla
Pour evenly over oatmeal and carefully slide into a 375 degree oven. Bake for 35-40 minutes or until lightly browned and oats have set.
Homemade Granola Bars
Brittany wrote this on 3 June 2012![]() almonds, apricots, cherries, chocolate, cranberries, honey, oatmeal, pistachios, wheat germ
almonds, apricots, cherries, chocolate, cranberries, honey, oatmeal, pistachios, wheat germ
 At the end of April my youngest sister came to visit, meet her newest nephew, and run a half marathon. Yeah, we like to test the physical endurance of our guests every now and then. Look! Aren’t they cute together?
 Nearly every spring since we moved to central IL my family, my husband, and sometimes friends, have run at least one of the races during the Illinois Marathon weekend. Usually the half marathon is the murderously torturous event of choice (Have I ever mentioned that I hate to run?) and this year my sister ran it for the second time. Mike ran it too-his third half marathon overall. Such craziness. I am actually kind of the odd one out. Between my husband, my sisters, all my sisters-in law, and some of my brothers, you would think I would join in too. Well forget it! You will never break me!!
But I digress…
Even though I don’t run, I have a deep respect for all of the severely misguided athletes that do. In fact, the spirit of racing is one of the things that make that race weekend one that we excitedly look forward to every year. The race finish line is at the fifty yard line inside the U of I stadium so it is as exciting for spectators as it is for runners. Isn’t that neat? The runners round a curve and the whole stadium is there before them with songs like Eye of the Tiger urging them on for those last fifty yards! It totally would make a person want to run…almost. My responsibilities include things much less sweaty. Like picture taking, runner chauffeuring, and cooking for body fueling-with the exception of the two years (’06 and this past spring) that I had just given birth a few weeks before. I stayed home then. But anyway, for my part, I like to research different foods that are good for pre-race fueling and post race recovery so that I know I am cooking something that is just what their bodies need. A few years ago when my other sister and her friend ran the full marathon, I really felt the pressure. I didn’t want to be responsible for runners that ate five pounds of BBQ Ribs the night before-not good running fuel-or worse, *gasp*, were hungry! “No one around here goes hungry!” I declare out loud, slamming my fist on the kitchen counter! These granola bars have made an appearance several times, as well as being part of our normal snacking repertoire year round. Mainly because they are fun to make, easy to freeze, you can pick your flavors, and..well…they are awesome. Oh yeah, and good for you. I recommend taking the time to just make a double batch. Kind of like a marathon granola bar making day. Blasting Eye of the Tiger is optional.

 One Year Ago: Fried Corn & Mocha Chocolate Chip Scones
Homemade Granola Bars
Adapted from Ina
In addition to having plain old granola around, these are fantastic to pull from the freezer for a quick breakfast, snack, or road trip munchie. Feel free to mix and match whatever kind of fruit and nuts you like. So far, these two combos seem to be universally pleasing and particularly gorgeous. Aren’t the colors awesome? And, I might add, they are addictively good.
Fruit & Nut
2 c rolled oats (not quick cooking)
3/4 c sliced almonds
3/4 c shredded coconut
1/2 c wheat germ
Place the above ingredients on a dry sheet pan and toast in a 350 degree oven for about 10 minutes, stirring occasionally. Beware! The coconut has a tendency to burn so watch it! When it is done, carefully pour into a large mixing bowl and reduce the oven temperature to 300 degrees.
Add:
1 c shelled pistachios
3/4 c dried cranberries
1/2 c chopped dried apricots
Toss all dry ingredients together.
Meanwhile, in a small saucepan, melt together:
4 T butter
3/4 c honey
1/3 c brown sugar
Once it is melted, bring to a slow boil and cook and stir it for about a minute.
Add 1 tsp vanilla and pour over the contents of the bowl. Stir carefully-its HOT!-until everything is coated and even. Pour into a greased 9X13 pan and with wet hands, pat mixture down to lightly flatten evenly. Bake for 20-25 minutes or until lightly golden brown. Cool completely before cutting. Twelve or sixteen bars seems to be the perfect size. Granola bars can be individually wrapped in plastic wrap, and frozen in a gallon freezer bag for up to 3 months.
Chocolate Cherry Almond
Make the bars the same as above but increase the almonds and coconut to 1 c each. Add 2 c of dried sour cherries to the mix instead of the cranberries, apricots and pistachios. Proceed with the recipe just as above and when the bars come out of the oven, sprinkle the top evenly with dark chocolate chips. I used about a cup or so, but it is up to you as to how thick you want the chocolate. Wait a minute for them to melt and then spread evenly over the top. Cool completely before cutting.
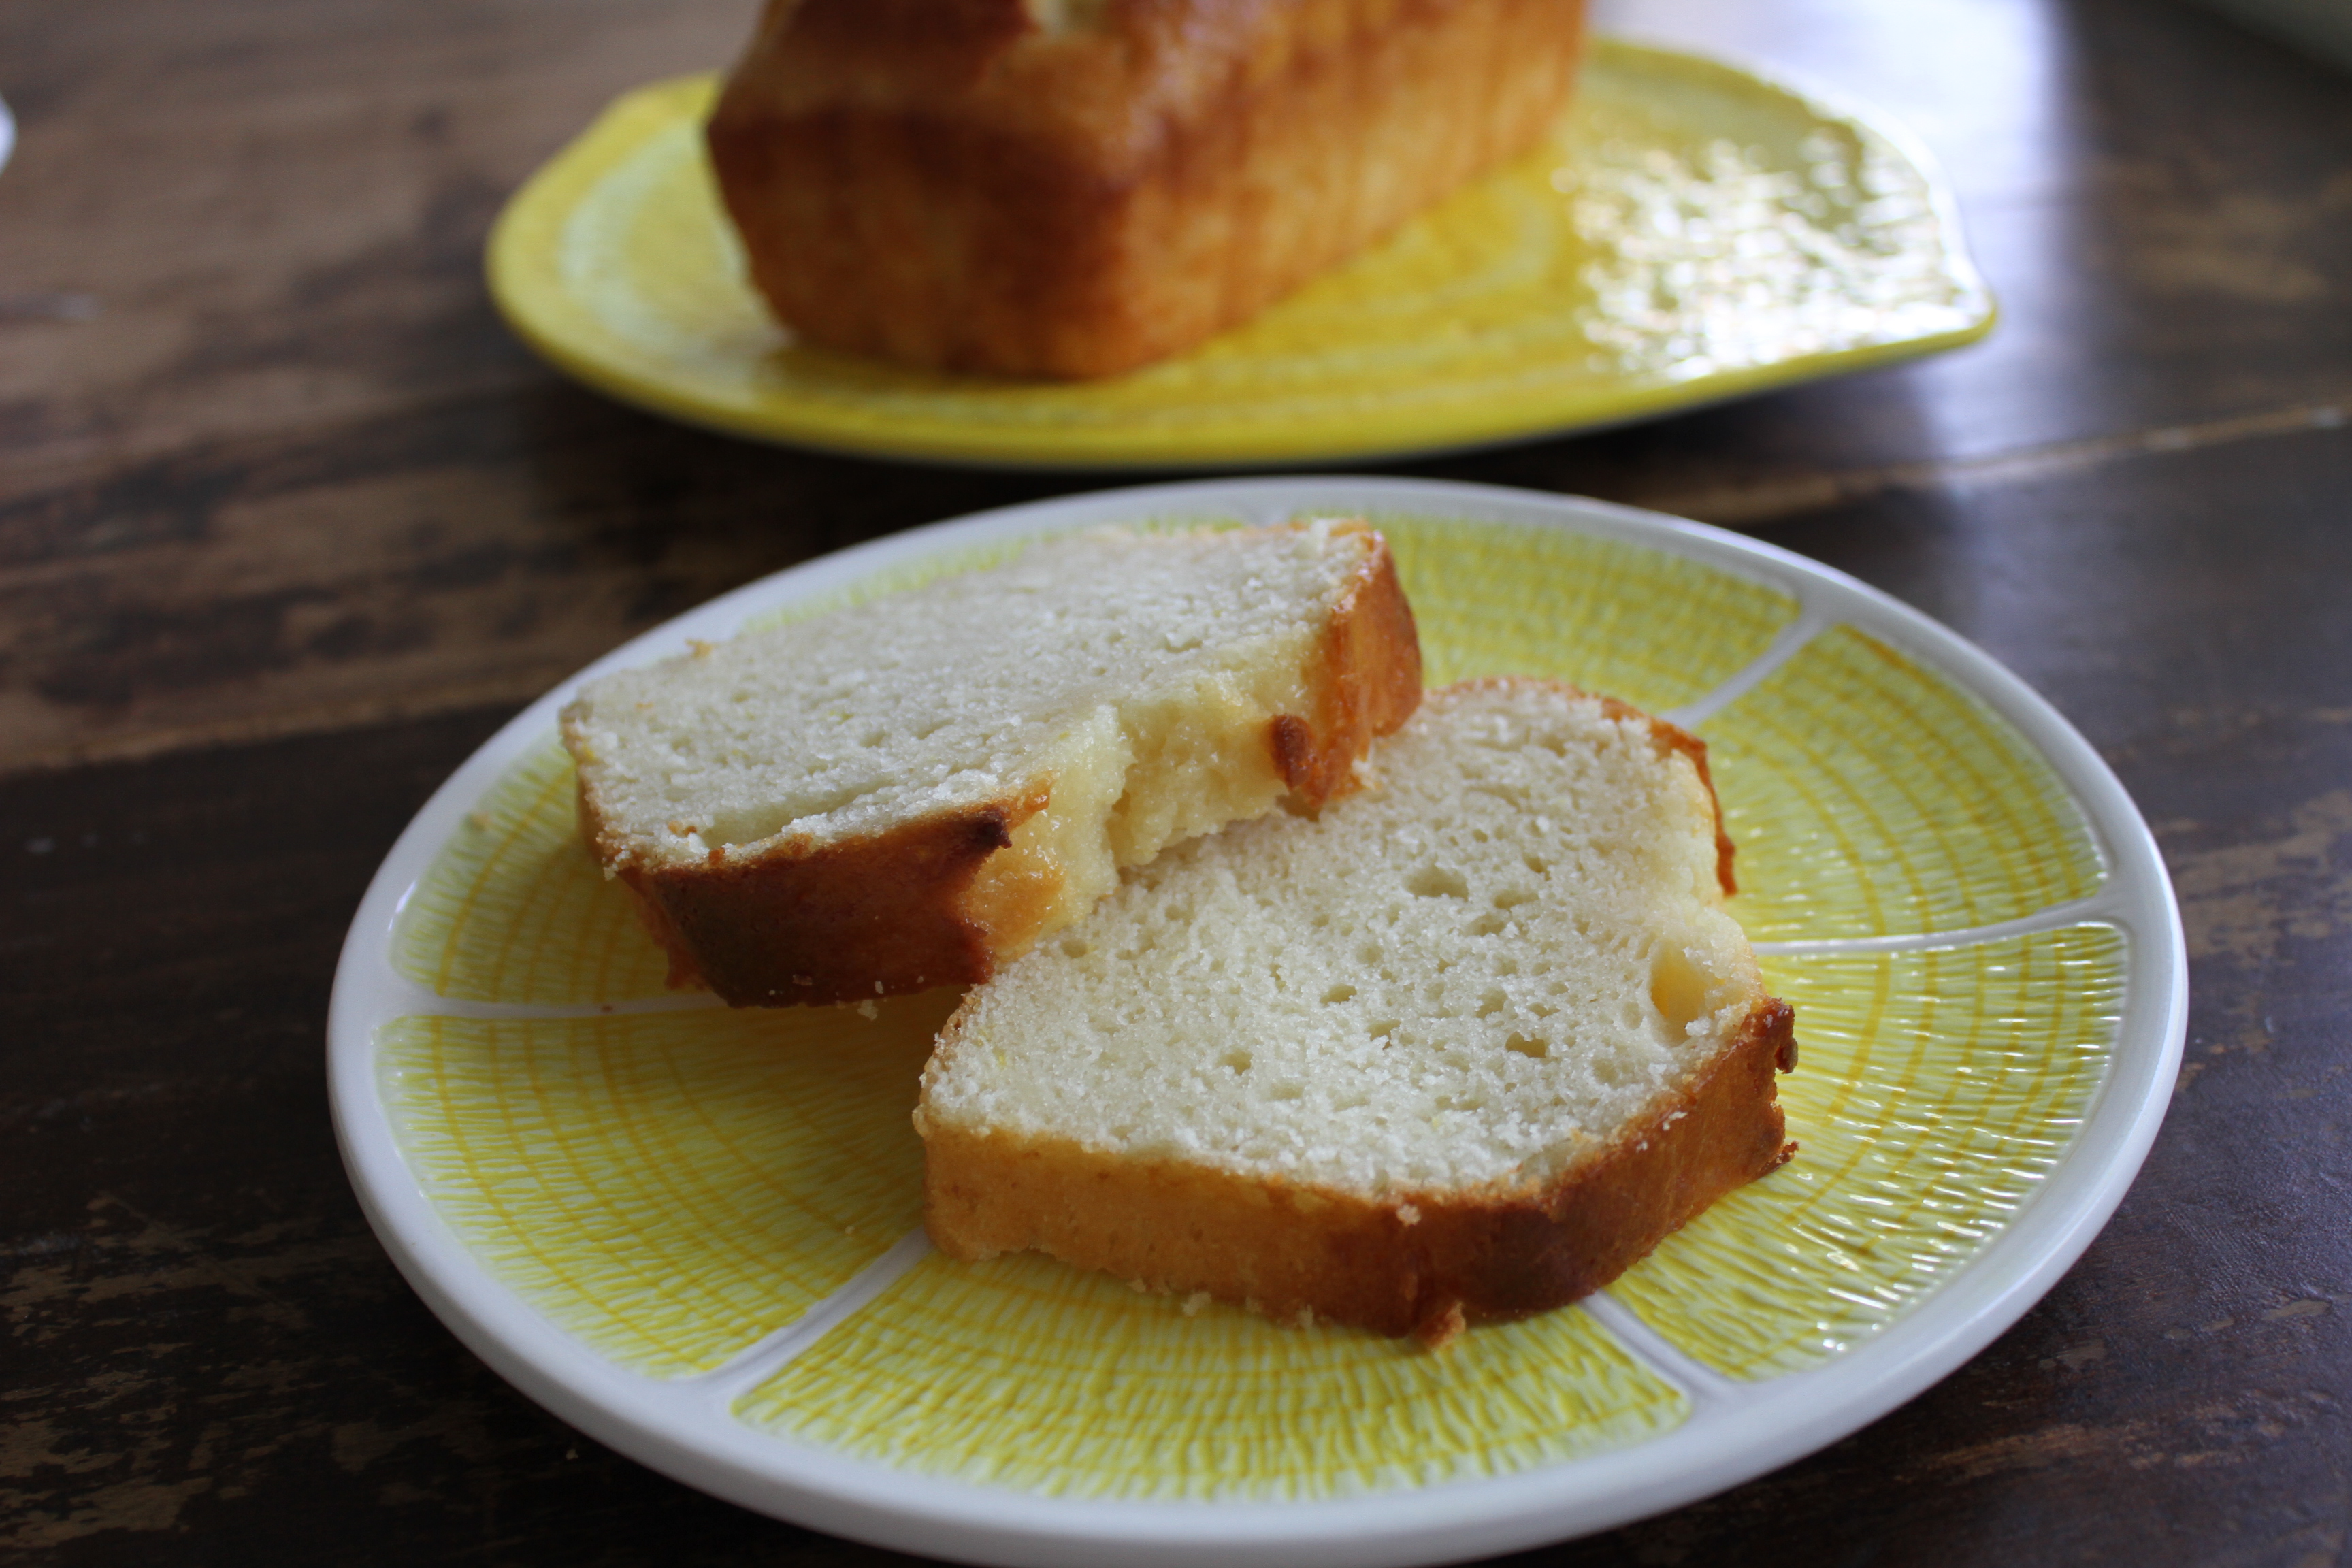
Lemon Quick Bread
Brittany wrote this on 15 May 2012![]() lemon
lemon
 Have I ever mentioned to you that I really love citrus? Mmmm, I do.
Anyway, years ago, just after my husband and I got married, I was finishing up my student teaching in a small town in Wisconsin. The home port of his submarine had just changed from Pearl Harbor to San Diego and I was counting down the days until I was done with college and could join him in California permanently! My best friend, Ashley, who happened to be a fellow Navy wife and married to my husband’s best friend and fellow sailor on the sub, flew out to road trip across the country with me and my last car load of belongings. There was one day left in the term and at 3:00 I would be free to go. Ashley was waiting at my apartment, cleaning and all prepared to cram a ridiculously large amount of stuff in my jeep and I was barely able to contain myself. Understandably so, right? I was about to embark on a legendary road trip and a tall, dark, and handsome sailor was waiting for me at the finish! Wouldn’t you be excited? Just before I finally left the school, my teaching supervisor gave me some parting gifts: a huge bag of candy for the road trip and a paperback Better Homes & Gardens New Cookbook for my kitchen. I tucked the cookbook in the glove box, the candy in the center console and we hit the road. I will spare you the details of the trip but suffice to say that we survived a blizzard in the Rockies, Vegas, and seven lanes of traffic that were bumper to bumper and yet traveling at over 80 miles an hour.
Due to the size of the closet apartment that we lived in, all of my books were packed in boxes and stored. This included every cookbook I owned, with the exception of BHG, which, as it happened, was still in the glove box of my jeep! I spent the next two years cooking for a lot of sailors and I used it constantly as a reference. Understand that this was over ten years ago, so the Internet was not as much of an enormous recipe reference like it is now. There was no Tastespotting, Foodgawker, Healthy Aperture, or Pinterest. So I took a lot of notes while watching Food Network! For some reason, lemon bread became one of those things that I really wanted to make, and I made it often. Since the BHG version was all I had access to it became my regular. And it still is. Even though the view out my window has changed from the Pacific to a sea of Midwestern corn and I am no longer feeding hungry sailors but instead my beautiful family, just using the cookbook makes me think of those days.
 Now, let me be clear. This recipe is just your basic quick bread. The flavor is mildly lemon with a sharp glaze brushed over top. The bread is not a delicate cake that you would serve for dessert, but instead is more of a snack kind of thing. Some other time I will post a recipe for a super lemony, delicate lemon loaf that you can serve with berries and cream. But for now, here is a version that you can whip up in a bowl with a wooden spoon. No creaming of butter and sugar and no alternating milk and dry ingredients while you mix. Just a regular quick bread. And I have no doubt that you will love it regardless of where you are and who you serve it to.

 One Year Ago: Black & White Angel Food Cake
Lemon Quick Bread
Adapted from BHG
Note that this bread has a lemon and sugar glaze that gets brushed on when it comes out of the oven. DO NOT SKIP THIS STEP! The glaze makes this bread and punches up the subtle lemon flavor. You won’t regret it!
In a large bowl:
2 c flour
3/4 c sugar
2 tsp baking powder
pinch of salt
Mix with a whisk until evenly combined. In a large measuring cup:
1 c milk
1/4 c canola oil
zest of half a lemon
juice of half a lemon, about 2 T
1 egg
Whisk together with a fork and add to the dry ingredients. Gently fold together and mix just until completely combined. Pour into a greased 8X4 inch loaf pan and bake at 350 for 50 minutes to an hour, or until toothpick comes out clean. I actually cover my bread lightly with foil at the end to prevent over browning. In the meantime, in a small bowl, combine the juice of the other half of the lemon (about 2 T) and 1 T of sugar, stirring every so often until sugar dissolves. When bread is done, brush evenly over the top of the loaf, continuing until all the syrup is gone. Let cool in the pan at least 10 minutes and then turn out onto a cooling rack and cool completely. This tastes even better the next day!
Chocolate Cheesecake Bars: An ‘Old Reliable’
Brittany wrote this on 11 May 2012![]() chocolate, cream cheese
chocolate, cream cheese
 Wow! What a week. I think I need to unwind and treat myself. Chocolate cheesecake anyone?
This recipe brings to mind one of my husbands biggest complaints. I have mentioned before that while he enjoys the variety in my cooking, he kind of wishes that I would bring back the favorites more often. When I make a dish that was particularly fantastic, it often gets marked with approval and then added to the archives. I really like to browse through my cookbooks and data base and randomly pick out something new to try instead of choosing something I have made before. At least half of my weekly menu is made up of recipes I have never made, or my notes and scribblings about one that I am creating. As a result, Michel-and this happens every few months or so :)-begs me for the basics. When I get excited about making Indian butter chicken, Mike says, “That sounds great! Maybe tomorrow we can just have meatloaf.” When I tell him I made dark chocolate sable cookies with Chinese five-spice powder, he eats them, tells me they are wonderful and then mentions, “You know what we haven’t had in awhile? My favorite plain ol’ chocolate chip cookies.” And when the urge to experiment with minestrone hits me, I hear, “Remember that stew you made with the pork and the polenta? We really loved that. Can you make that again instead of something new?” The poor guy. He eats everything I make, never complains, and continues to be the biggest fan of my cooking. And since it is him and the kids who I love to cook for more than anything, I want to keep them happy! If Michel wants something familiar and simple, than that is what he gets!
Chocolate cheesecake is simple and familiar, right…?
In this case, it is. I made these bars a gazillion years ago for my Mother-In-Law because, if you remember from my previous ramblings, she is a chocolate fanatic! I try to indulge this feeling as much as possible because it gives me a reason to experiment with new chocolate recipes whenever she is visiting! Which reminds me…I should have made her the Chocolate Croissant Bread Pudding when she was here last weekend…oh crumbs…Anyway, I did make her these bars and she liked them just as much now as she did then. I am not sure why, but I kind of stopped making them for a few years. Probably to try something new, heh heh. In some ways, these bars are similar to the Honey Cheesecake Bars in that they are simple and easy and a wonderful way to get your cheesecake fix without having to deal with all the effort a whole cheesecake requires. But that is where the similarities end. These are rich and creamy and oooooohhh so chocolaty. They need to chill until completely cold and this makes them the perfect make-ahead dessert.
So now that I have made something from the ‘old reliable’ category, tomorrow night? Soufflés!

 One Year Ago: Strawberry Ice Cream & Sweet Veggie Pasta Salad
Chocolate Cheesecake Bars
Adapted from Kraft
When made in an 8X8 pan, I cut these bars into 16 portions or 4 by 4. I recently made them for a social gathering and I wanted smaller bites so I cut them 5 by 5 into 25 little bars. Either is great. Also, this doubles easily for a 9X13 pan if you are serving a large group. Just add another 15 minutes or so to the cooking time.
14 chocolate sandwich cookies (such as OREO) crushed
3 T butter, melted
Mix these together and press into the bottom of a sprayed 8X8 square pan. Glass works particularly well. Bake at 325 for 10 minutes. Meanwhile, combine in the bowl of an electric mixer, or with a hand mixer:
2 pkg cream cheese
1/2 c sugar
1 T flour
Add, with the mixer running:
4 oz semi-sweet chocolate, chopped and melted until smooth-Baker’s chocolate works great for this
After chocolate is beaten in, beat in:
2 eggs, one at a time
Combine until smooth and creamy, scraping the sides of the bowl. Pour over crust, spread until even and bake for 30-35 minutes, or until the center is just barely set, but not completely firm. Cool to room temp and then chill until cold, preferably overnight.
Classic Buttermilk Biscuits
Brittany wrote this on 28 April 2012![]() buttermilk
buttermilk
 I feel like I start posts like this a lot, but…well…here it is. This is another one of those recipes that I have been meaning to post for over a year now. Why? Several reasons. Is the suspense driving you crazy? Heh heh.
First of all, it is classically plain. Nothing fancy or complicated and there are no unnecessary ingredients. As much as I love variety, I am always looking to test out the basics. Second, it makes a big batch. I consistently get about 18 biscuits out of a batch so I have enough for a holiday or large group. The great thing is that I can also freeze them and do the work once, but have enough for our family for two or even three meals. Which brings me to reason number three: freezable. I have made these ahead for Thanksgiving, Easter, Sunday Brunch, and just general usage. Instead of baking them and defrosting and reheating them later, these are frozen unbaked. Just pull them out of the freezer and bake them off and booyah! Fresh baked, hot and flaky biscuits. Because fresh out of the oven is nearly always better when it comes to baked goods, am I right? Virtual high five! Just freeze the cut, unbaked biscuits on a sheet pan and once frozen solid, pack in a zip top freezer bag. Like so:
 Yes, there is some labor involved. However, when it comes to a real, classic, buttermilk biscuit with rich, buttery flavor (drool, drool, drool) you are just going to have to suck it up and do it. While they don’t really take all that long to do, you will have to clean up the floury mess of rolling out dough. Totally. Worth it. In fact, make and freeze a double batch and you won’t have to make a big mess again for even longer! So really, what could be better? Rich, butter filled, flaky biscuits! *sigh* Wait. Whats that? Homemade jam could be better? Hmmm. OK. Stay tuned.


 Classic Buttermilk Biscuits
Adapted from Martha Stewart
In the bowl of a food processor, pulse until combined:
4 c flour
2 T baking powder
1 tsp baking soda
1 tsp salt
2 T sugar
Add: 2 sticks of cold butter, cut into cubes
Pulse the until the butter is evenly distributed and the size of small peas.
Add 1 1/2 c cold buttermilk (I use low fat)
Pulse until the dough just barely starts to come together, 3 or 4 times. Dump the mixture out onto a clean counter and gather it with your hands, kneading it VERY gently a half a dozen times until smooth and even. With a floured rolling pin, roll until the dough is a half an inch thick. Cut out biscuits with a 2 or 2 1/2 inch wide round. Place on a baking sheet, brush lightly with melted butter and freeze till firm. Or bake immediately in a 450 degree oven for 12-15 minutes, or until puffed and golden brown. Cool slightly. If baking from frozen (no need to thaw), extend the baking time to about 20 minutes.
Alternatively, if you do not have a food processor, cut the butter into the mixture with a pastry blender and mix in the buttermilk by hand.
Strawberry Shortcake Cake
Brittany wrote this on 25 April 2012![]() strawberries
strawberries
 Brace yourself. I have purchased a LOT of strawberries in the last few weeks and have been experimenting up the wazoo. For you, this means an abundance of really great ways to use everyones favorite spring fruit. Because sometimes you need to break away from the norm of strawberry shortcake! Hmm. Actually, today’s recipe is quite a bit like strawberry shortcake….I guess I haven’t strayed as far from the norm as I thought…
But anyway! In case you have already tried (and I hope you have!) the Strawberry & Avocado Salad and Strawberry Ice Cream recipes, I have one more for you! Actually, I have three more for you, but I will try and space them out! This gorgeous cake was very quick to throw together and tastes amazingly like strawberry shortcake. But without all the labor of rolling and cutting biscuits and assembling the desserts! A simple batter gets mixed up and spread in a pie plate then topped with halved strawberries. That is it! It will make your house smell absolutely heavenly! I know because when I make this cake I always pause for a moment just before I open the oven door. You know. Just to prepare myself for the loveliness of a golden vanilla cake topped with ruby fruit! A big spoonful of whipped cream over the top is all this needs. Of course, I like to eat it plain for breakfast the next day as well, but usually only because all the whipped cream is gone.
Also, just a little side note to mention that this would be super fun to serve Memorial Day weekend or for the Fourth of July. I only mention this because I inadvertently styled the above photograph in a patriotic sort of way and didn’t really notice that until just now. Oh hey! This would be fun to make this summer for an Olympics party too! GO USA!

 One Year Ago: Lemon & Herb Deviled Eggs
Strawberry Shortcake Cake
Adapted from Martha Stewart
This cake is not super light and fluffy. It is kind of like a soft biscuit; sweet yet strong enough to stand up to the juiciness of the berries!
6 T of soft butter
1 c sugar
1 egg
1/2 c milk
1 tsp vanilla
Cream the above ingredients with a hand-held mixer or in the bowl of an electric mixer. Add:
1 1/2 c flour
1 1/2 tsp baking powder
pinch of salt
Mix just until combined, scraping the sides of the bowl to ensure all ingredients are incorporated.
Butter or spray a glass pie plate and spread the batter in the bottom. Rinse, hull and halve enough strawberries for the top of your cake. This will vary depending on the size of your berries, but it is about 2 c or 1 lb. Lay them cut side down in circles, sprinkle the top of the cake lightly with sugar and bake at 325 for 45 minutes to an hour, or until cake is golden and toothpick in the center comes out with just a few moist crumbs attached. Let cool completely and cut into wedges.
Love a Good Recipe?

Then you’ve come to the right place! I’m Brittany, and I share tested, trusted recipes you’ll love. I prepare & photograph food, obsess over the perfect recipe, and enjoy grins of delight when I serve up something awesome. Enjoy!


