 Brittany's Pantry
This shop has been compensated by Collective Bias, Inc. and its advertiser, MARS Incorporated. All opinions are mine alone. #BakeInTheFun #CollectiveBias
 I have a slight obsession with those little tins you get at Christmas time filled with treats.
When I was a kid, my Mom used to have a stockpile of them because giving out homemade goodies was something we did every single year. We spent days baking and making candy and then packaged everything up to give to family and friends. I still use many of the same recipes that my Mom received from my Grandmother. Now, as an adult with a family of my own, I find myself collecting containers of all sizes and designs. We follow tradition and prepare edible gifts for teachers, bosses, volunteers, and everyone we want to show a little extra love. We make it together and we deliver it together. And that is what it is all about, right? Time with family and making sure that those who are most important in your life really know it. 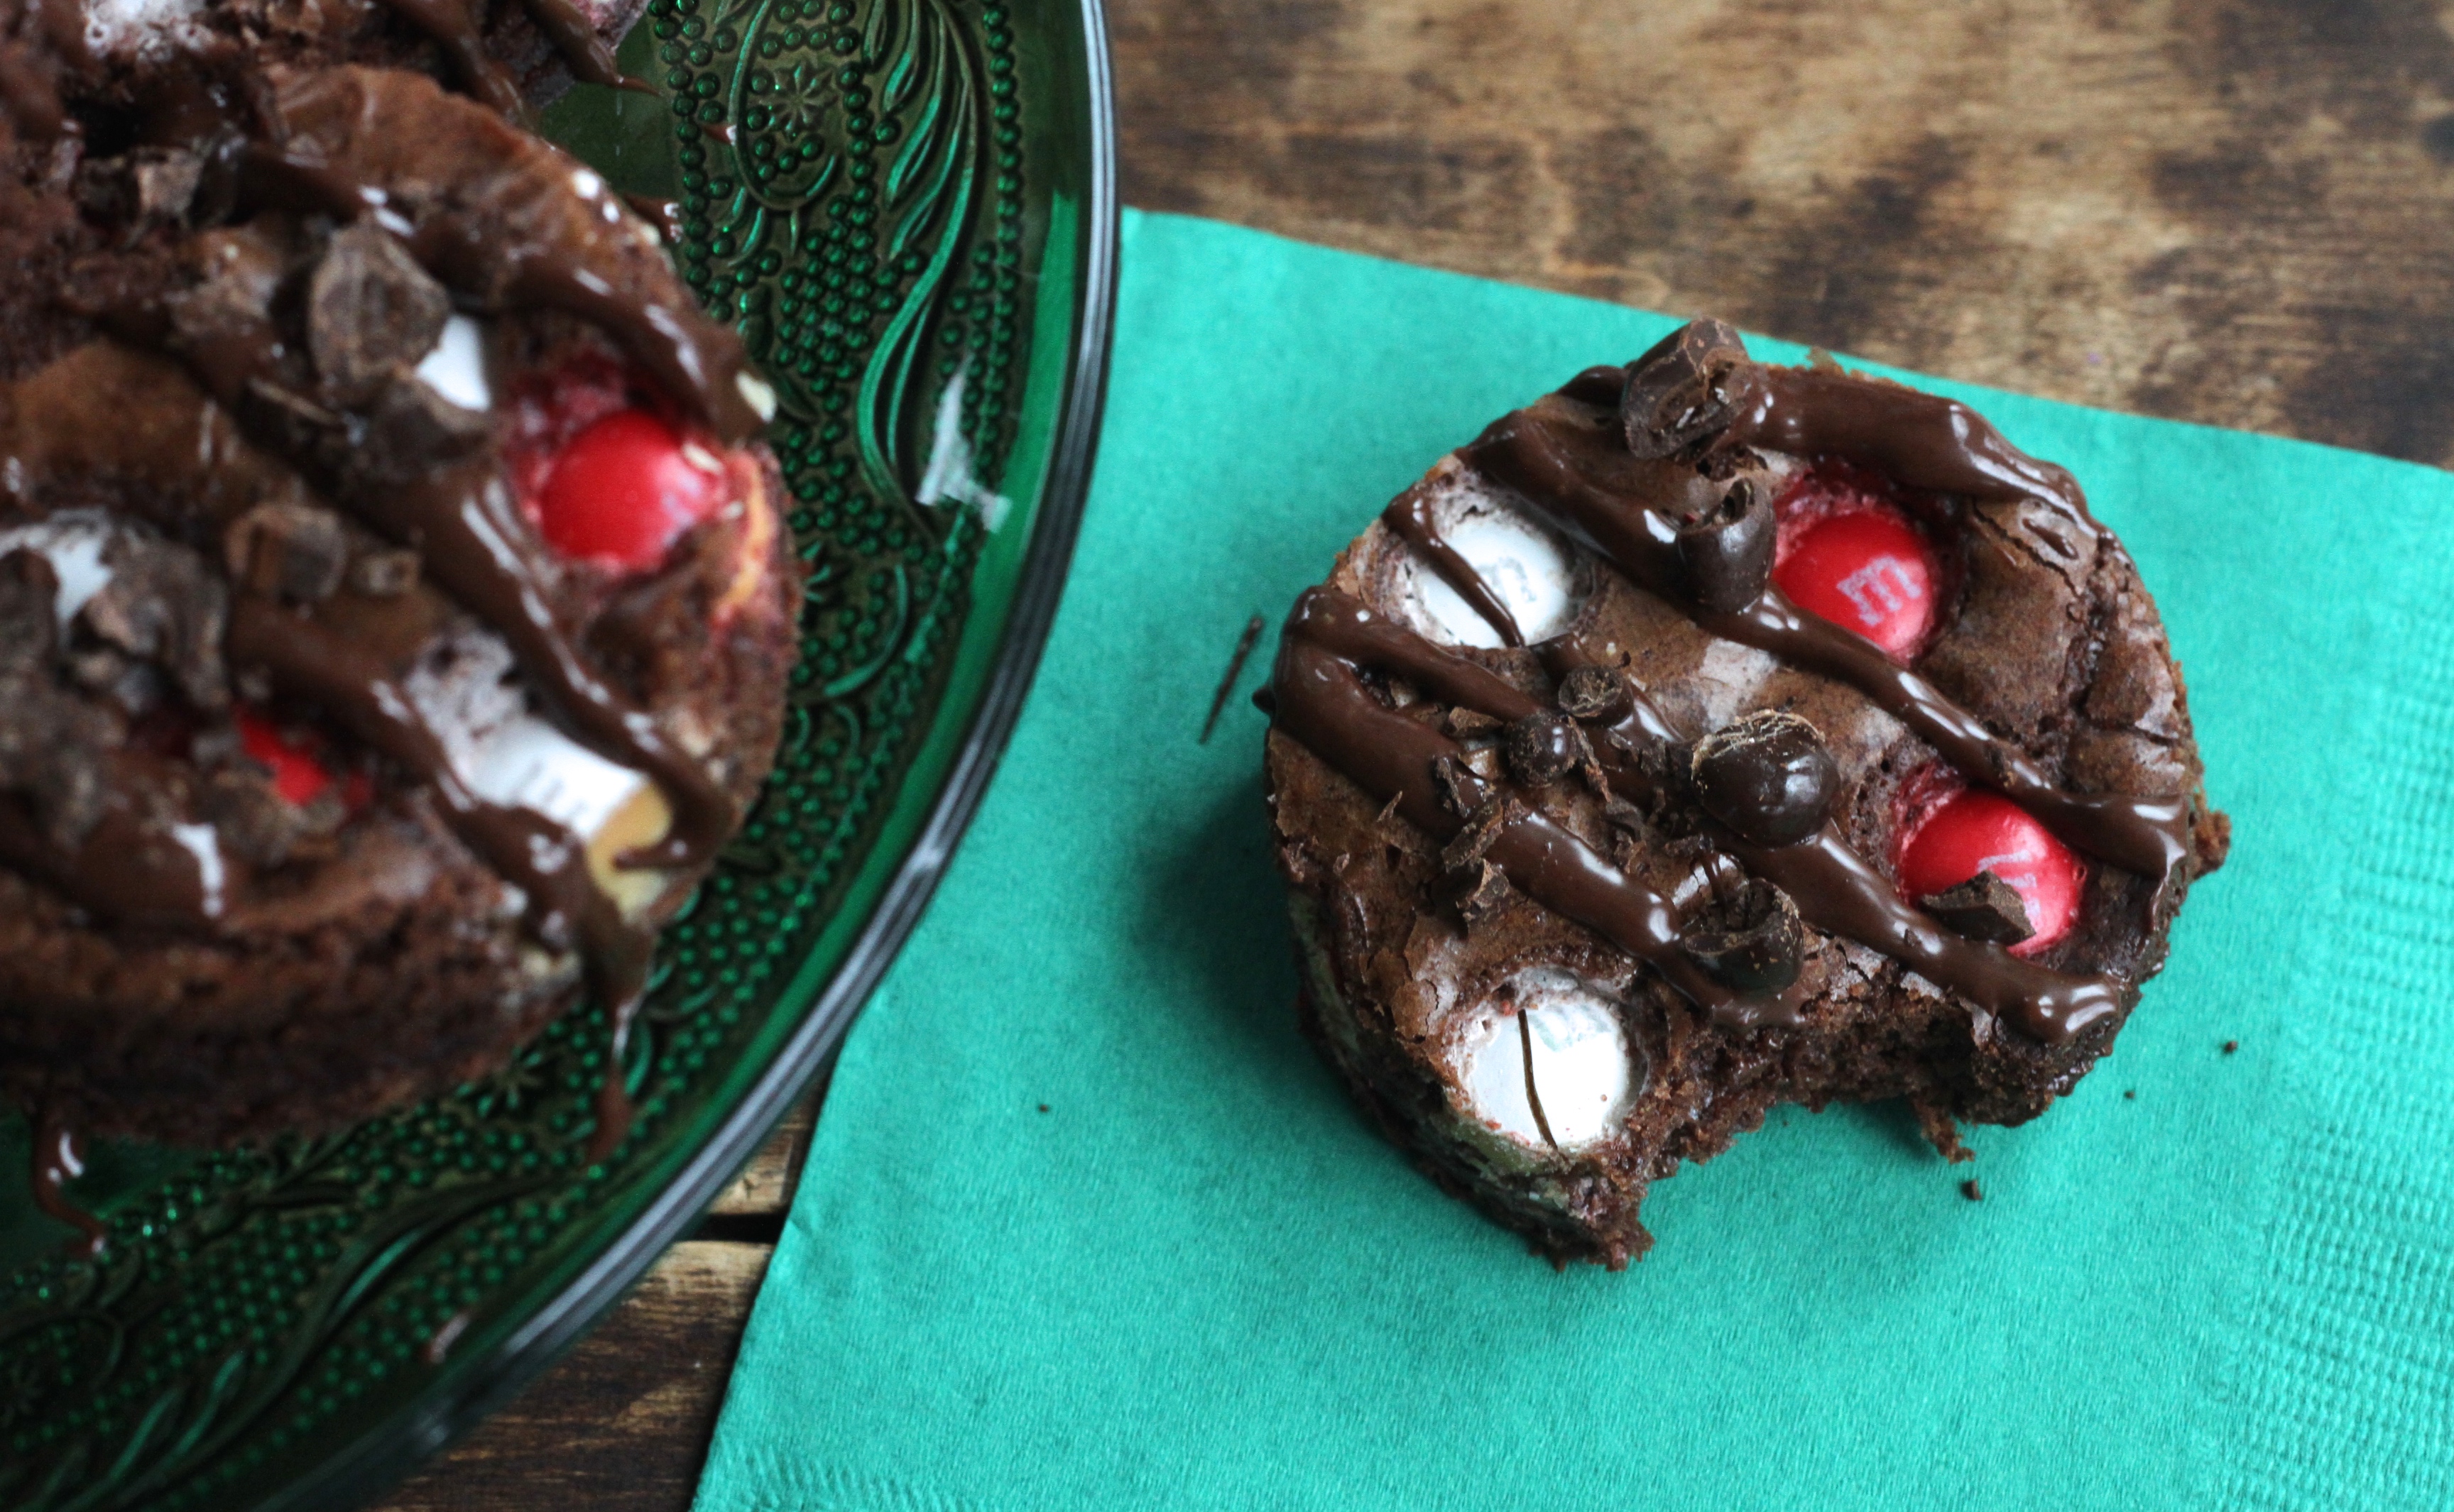 When making my list of treats this year, I found myself gravitating toward my favorite flavors: coffee, chocolate, and peppermint. I am guilty of drinking peppermint mochas year round (I never seem to get sick of them) and I love the fact that the holidays showcase them even more! When I saw these White Peppermint M&M’S® (available for a limited time!) I immediately thought of chocolate and coffee and these bars were born! With an M&M’S® in almost every bite, they are irresistibly minty! And can we just say, gorgeous? So festive! Be prepared to hear the shrieks of delight when you hand a Christmas tin of these babies to your boss/babysitter/piano teacher/ballet instructor.


 I picked up my ingredients at Walmart and stocked up on all kinds of goodies for snacking and baking! You can find the candies in the holiday isle! Such an easy thing to do with such a loving impact on those we care about. You know what else has an impact? Every time you buy M&M’S® candies at Walmart, milk is donated to local food shelfs through Feeding America*! Its true! Want to learn more about the Great American Milk Drive and how it is helping families this holiday season? Head to milklife.com/give to get details and donate. So each batch of goodies is the gift of quality time spent with family, the tangible gift of sweet treats, and even the gift of donation.


 Want to see what else is happening with the MARS company this season? Click here to follow along so you won’t miss a thing!
Peppermint Mocha Bars
These travel great!
1 box brownie mix for a 9X13 pan
1 T instant espresso powder or instant coffee
1 bag (9 oz) M&M’S® Brand White Peppermint (Limited Edition) Candies
1 c good quality semi-sweet chocolate chips or chopped chocolate
1 tsp canola oil
1/3 c chocolate covered coffee beans, chopped
Mix the brownies according to package directions. Stir in the instant coffee powder. Pour into prepared 9X13 pan and evenly sprinkle the bag of candy over the top. Bake as directed. Cool. Cut the bars into squares or use a cookie cutter to punch out shapes. Combine the chocolate and the oil in a microwave bowl and heat in 30 second intervals until JUST MELTED! Do not overheat! Drizzle the melted chocolate over the bars and sprinkle with chopped coffee beans. Let chocolate set and store in an airtight container for up to 4 days.
*For every purchase of M&M’S® Brand Chocolate Candies product purchased at Walmart between 11/7/16 and 12/25/16, Mars Chocolate, Inc.® will contribute $5.00 to Feeding America® on behalf of its national network of food banks to secure and deliver one (1) half-gallon of milk or more based on local markets. Maximum contribution is $100,000.

Guest Blogger Series & Maple Cranberry Cornmeal Coffeecake
Brittany wrote this on 5 December 2016![]() cornmeal, cranberries, maple syrup
cornmeal, cranberries, maple syrup

Happy holidays, friends! Just a quick post to let you know that yours truly is featured over at MJonesStyle!
Marsha has been showcasing bloggers and their recipes in a special Kitchen Keeping series. Fun questions and photos of our kitchens, along with an exclusive recipe! My Maple Cranberry Cornmeal Coffee Cake, only released in my new eCookbook, is now on her site! Click here to get all the details!
 Want to download my new Ebook? You can find it on Amazon here to get it for the kindle!
Want to download it directly to your computer or tablet? Click below!

Multigrain Bread For The Bread Machine
Brittany wrote this on 26 September 2016![]() whole wheat flour, yeast
whole wheat flour, yeast
 I have talked before about my love affair with homemade bread.
My very first blog post EVER was a recipe for the bread machine and this pillowy Buttermilk Yeast Bread has been know to send friends and family to their knees when I serve them a slice slathered in butter and honey. It is that good.
As much as I love both those recipes, I have been looking for a really good, really easy recipe for multigrain bread. The chewy, almost nutty texture of whole grains is a favorite of mine, but I didn’t want to have to spend the money and purchase multiple kinds of flour that I may not use for anything else. Years ago, I had seen a recipe using a 7-grain hot cereal mix to make bread and I never forgot about it! A few months ago, I started searching and testing recipes, and several loaves of bread later, I FINALLY have the perfect version!
 This is one of the easiest bread machine recipes you will ever make. There is no soaking of grains and no extra steps; the ingredients are just dumped in. It makes fantastic sandwiches, but toasted with butter and jam is nothing short of beautiful. Crusty and chewy on the inside and oh. my. GOSH! My Mom used to make homemade bread when I was a kid and we had hot bread as a bedtime snack on nights when we sat up and watched movies. With my kids, it is more likely that they will have it as an after school snack, opening the door to the scent of freshly baked bread. Either way its a memory that I hope always makes them think of home.
I would love to share with you too! I’ll keep the butter and honey pot on standby. 🙂
 Multigrain Bread For The Bread Machine
Recipe adapted from Betty Crocker
This recipe makes a 2 lb loaf. In the market for a bread machine or want to add it to your Christmas wishlist? Try this one!
1 1/2 c water
2 T coconut, canola, grapeseed, or vegetable oil
1 1/2 c bread flour or all-purpose flour
1 1/2 c white whole wheat flour, whole wheat pastry flour, or whole wheat flour
1 c 7-grain hot cereal (uncooked) such as Bob’s Red Mill brand
1/4 c brown sugar or honey
1 1/2 tsp salt
2 1/2 tsp bread machine yeast or 1-.25 oz packet
Place all ingredients in your bread machine according to manufacturers directions. Choose the 2 lb, whole wheat or standard loaf setting and I recommend the light or medium crust option if you have the choice. The whole wheat tends to really darken and you don’t want it to burn. This bakes up great on standard or rapid baking times. Remove to a cooling rack as soon as it is done and TRY not to cut into it until it has cooled a bit!
Cream Cheese & Blueberry Breakfast Bake
Brittany wrote this on 21 June 2016![]() blueberries, cream cheese, eggs, milk
blueberries, cream cheese, eggs, milk
 Ok friends. Here is the deal. This breakfast dish is da bomb. Do people still say that…?
Do you need another fruit and bread breakfast bake recipe? Definitely. If you were sitting across from me right now and we were chatting over a cup of coffee (you, no doubt with a trendy Americano, and me, sipping a non-fat frosted spicy mayan mocha, no whip) I would lean forward, look you in the eye and declare earnestly, “You have GOT to try this.” And because you have been making my recipes for years now, you trust my judgement and take my advice. Right? RIGHT? Exactly. Just trust me. The above picture is from the Brittany’s Pantry instagram feed, where I documented the bazillions of times I tested this recipe.
I have always loved a good breakfast dish that I can just throw in the oven. I host playdates at my house several times a month and this recipe has been tested again and again, adjusting it and trouble shooting the process. Thankfully, no one seemed to mind having to eat it over and over until I got the recipe juuuuuuuuust right. As with most recipes that contain cream cheese, it is the addition of that tangy goodness that makes this so…gaaaaaaaaaaaah. Rich and creamy, it stops just before it gets to dessert status. Not overly sweet, this really IS a good addition to a breakfast or brunch menu. It is always a breeze to throw together-my kids get the job of tearing up the croissants and it sits in the fridge all night and is ready to pop in the oven in the morning. Breakfast. BOOM!
Are you planning for company Fourth of July weekend? The addition of strawberries with the blueberries makes this perfect for a patriotic brunch! I have been meaning to try this with diced fresh peaches (a local staple here in South Carolina) but haven’t deviated from blueberries yet. As you can imagine, this would be wonderful for family/holiday mornings, or any time you need to bring something with you in the morning. Flaky. Creamy. Lovely. All good adjectives for food.
Trust me.

 Cream Cheese Blueberry Breakfast Bake
Recipe adapted from The Girl Who Ate Everything
I buy croissants when they are a day old and a little cheaper. Into my freezer they go until I need them for a recipe like this. Or to make this dessert. FYI, raspberries tend to be a bit too juicy for this dish, but still taste great. Give them a try if you like!
6-7 large croissants
2 c blueberries, diced strawberries, or blackberries (fresh or frozen)
2-8 oz packages cream cheese (I use the 1/3 less fat version) softened at room temp for a bit
1 c sugar
4 eggs
2 tsp vanilla
2 c milk
zest of 1 lemon, optional
Lightly spray or butter a 9X13 inch baking pan and set aside. Preheat the oven to 350 degrees.
Tear the croissants into one inch pieces or so and place in the baking dish. As I mentioned above, I let my kids do this part. The size of the pieces doesn’t matter much so it is impossible to screw up! Sprinkle fruit evenly over the top of the bread. In a separate, medium size bowl, beat the cream cheese with the sugar until smooth. Add the vanilla, and then the eggs, beating thoroughly after each one. You want to take it slow so that the mixture stays smooth and creamy. Any chunks will sit on the top of the pan and bake up dry and kinda weird. Slowly whisk in the milk and zest and pour evenly over the croissants. Let sit on the counter for 30 minutes to an hour and bake for 45-50 minutes, or until golden brown and set in the middle. OR, cover with plastic wrap and place in the fridge overnight. In the morning, let it sit on the counter while the oven preheats and bake as directed. After baking, let it sit for a few minutes to set, then scoop and enjoy! Leftovers are awesome cold the next day!
Repost: Saucepan Brownies
Brittany wrote this on 10 February 2016![]() chocolate
chocolate
 So, I have recently been taking stock of several things on this blog. One of them is the fact that there are several posts/recipes that are incredibly underrated. You may have deduced by the ‘repost’ in the title that this is one of them. The second thing is that I realized just how much I over use exclamation points. But that is neither here nor there…
It is true that as a food blogger, you won’t be able to guarantee that every single recipe you post is going to be a stunner. Some are underwhelming, some are rather ordinary, or some just don’t translate well through pictures and print. I have come to accept this as part of the gig. However, in some cases, as with these brownies, it is just a blatant injustice that this recipe is not more popular.
You can find the original post here. It hasn’t been pinned much and the only comment is from a family member. It is practically invisible amongst all the other recipes on my blog and close to impossible to find out in the world wide web unless you knew exactly where to look.
And I have no idea why.
This recipe can be made in just a few minutes (I know because I timed myself), turns out exactly the same every time (I know because I have made about a bazillion batches), and they are really really good (I know because I have eaten said bazillion batches, at least in part). These are easily one of the most fudgy brownies I have ever had and paired with that crinkle on the top, they are as classic as they can be.
Speaking of classic, my favorite part is that this recipe is adapted from an old Better Homes & Gardens recipe that was originally published in the 30’s. There is a reason we are still baking them today, people! Trust me when I say these just may become your new go-to for a quick chocolate fix. Hopefully, together, we can keep this recipe around for another 80+ years.
Saucepan Brownies
Adapted from BHG
Place a medium sized saucepan over medium low heat and add:
1/2 c (1 stick) of butter
2 oz unsweetened chocolate
Stir gently until completely melted and smooth. Keep the temp low so that the chocolate doesn’t scorch.
Add 1 c sugar
Stir just until the sugar starts to melt, about one minute or so. This makes for a fudgey brownie! Turn off the heat and add:
1/2 tsp vanilla
2 eggs, beaten
3/4 c flour
pinch of salt
Stir until smooth and incorporated. Pour into a sprayed 9X9 pan and bake at 350 for 25 minutes. Be careful! Don’t over bake! A toothpick should come out with a just a crumb or two attached! I usually cut them into 16 pieces.
Peanut Butter Cinnamon Granola
Brittany wrote this on 15 January 2016![]() bananas, flax, maple syrup, oatmeal, peanuts
bananas, flax, maple syrup, oatmeal, peanuts
This shop has been compensated by Collective Bias, Inc. and its advertiser. All opinions are mine alone. #StartWithJifPowder #CollectiveBias I know I have mentioned my
 obsession love of peanut butter on previous accounts and I have no intention of changing that attitude. At all. My unofficial mantra is ‘All peanut butter, All the time.’ I really really love peanut butter. I always have and I assume I always will. When I got to college and was buying groceries for myself, I quickly discovered that JIF was quite possibly the best peanut butter ever. I have not strayed from them since. So when I found out that they were releasing a new product, Jif™ Peanut Powder, I was positively giddy.
The calories of a traditional peanut butter are really the only thing that gives me pause. I could eat it several times a day, and while I know that some is beneficial, the fat content has me stopping one step from just eating it straight out of the jar for breakfast. Ok, sometimes I still do that, but I have really cut back…
As I approach the end of my 30’s, I am aware that while it is still worth it to eat the things I really love, I could definitely be making adjustments. I have been trying to drink more water and I plan to run my first 5k this year. More veggies and less meat. All kinds of little things to improve my health and well-being. Jif™ Peanut Powder is part of that. It is a new year people! I am making some changes!

 See that package in the picture above? That is the peanut powder. It is made from only one ingredient-peanuts. Thats it! All the protein but much less fat than traditional peanut butter. No added salt and no added sugar; two ingredients often hiding in foods. Not here. Just. Peanuts. I add a scoop to my smoothies and wow. Thick and creamy. I have even stir it into my oatmeal. Then I got really smart and created this peanut butter granola. Simply outstanding. A great breakfast or snack, now even better for me!

 I easily located this new product at my local Walmart, snuggled in with all the other kinds of peanut butter, making it very convenient to grab some. And yes, as you can see above, they have a chocolate version as well. Either flavor is perfect to add to baked goods like muffins or scones and it fits nicely into your meals if you are dieting or just trying to eat a bit better. Like this recipe. We make granola on a regular basis in my house, but I like to switch things up so we don’t get bored. Different mix ins, different spices, that kind of thing. Not to be cliche, but a banana with a scoop of peanut butter is something I regularly enjoy so I figured I would just combine my loves to save time.
Booya! This granola is full of good things for your body, but warm and scrumptious at the same time. Toasty oats and ground flax are mixed with Jif™ Peanut Powder and an extra dose of cinnamon. So easy and so ridiculously crunchy, we can’t stop eating it. We love to eat it as is with dried bananas added and sprinkled over yogurt, or in a bowl with milk and a whole sliced banana. The flavors of the fruit with the peanuts and the cinnamon…..gaaaaah. Mouth watering.
 Granola freezes wonderfully, so be sure to make an extra batch so that you have it on hand for a quick, protein packed option for breakfast or a quick snack. Then you can see what else you can make with Jif™ Peanut Powder. How would YOU use it in your kitchen? Post in the comments below! Because us peanut butter fanatics have to ‘stick’ together.
Peanut Butter Cinnamon Granola
2 c rolled oats (not quick cooking)
1/3 c Jif™ Peanut Powder
1/4 c ground flaxseed
1/4 c brown sugar
2 tsp cinnamon
1/4 c canola, grapeseed, or coconut oil
1/4 c pure maple syrup
dried bananas, fresh bananas, optional
Preheat the oven to 300 degrees. In a medium bowl, combine the first 5 ingredients. Add the oil and syrup and stir well, mixing completely and evenly coating the oat mixture. Spread the oats on a parchment lined baking sheet and bake for 10 minutes. Stir well, spreading out into a thin layer again, and bake for another 10 minutes. Stir well and bake for a final 5 minutes. Granola should be slightly darker and nice and crunchy. Let cool on sheet completely and it will crisp up even more! Stir in dried bananas or serve with fresh bananas, if desired. Store in an airtight container for up to 2 weeks or well sealed in the freezer for several months.
Traditional Snowballs (Russian Tea Cakes)
Brittany wrote this on 22 December 2015![]() pecans
pecans
 These cookies will no doubt bring back a flood of memories for many of you. Christmas baking sessions of yesteryear, cookie exchanges of your youth, or church parties in the basement. Few trays of holiday delights would be complete without these little bites of shortbread.
Snowballs are often called Mexican wedding cookies, Russian tea cakes, or jumbles. All are correct and all refer to the same kind of cookie. Originally from Europe and dating back to the middle ages, these all contain butter, flour, and a bit of sugar. The nuts and flavorings mixed in vary by region and, well, century. These days almond flavoring is often added, but I prefer to let the flavor of the pecans come through. Sometimes these can be hard and dense, but this recipe is light and tender and absolutely melt in your mouth. The pecans inside are like toasted little bits of crunchy goodness. Festive and wonderfully delightful.
 Years ago, I was at a family Christmas celebration that was being hosted by my sister-in-law. She had a huge rubbermaid container of these cookies sitting on the counter and while the family tucked into them, I held back. The last I remembered, those cookies were tasteless and dry. Definitely not good eats. But I had one anyway (it WAS Christmas after all…) and it was fantastic. The best little snowball cookie ever. When I started experimenting to get the most perfect version to post here, I compared all recipes to the cookies from that one special Christmas. Turns out, the recipe from Land O’Lakes was the front runner and I never changed it. Classic and simple, these come together super fast. They look festive and absolutely lovely on a platter during the holidays and are a great recipe to make with your kids. Tasty and fantastic, they are great-no matter what you call them!


 Snowballs (Russian Tea Cakes)
Recipe from Land O’Lakes
2 c flour
2 c finely chopped pecans
1/4 c sugar
1 c (2 sticks) softened butter
1 tsp vanilla
powdered sugar
Preheat the oven to 325.
In the large bowl of a mixer, combine all ingredients except powdered sugar, just until blended well. Scoop by heaping teaspoonfuls and roll between your hands to form a smooth ball. Place on a lined sheet pan. These cookies won’t spread so I place them 4 by 5 on the pan. Bake for 18-20 minutes, or until the tops are just BARELY starting to brown. Remove, let cool for a few minutes, and then gently toss in powdered sugar. Set on a rack and let cool completely. If desired, roll again in powdered sugar to achieve a full on white ‘snowball’ look. Store at room temperature, tightly sealed, for up to 5 days, or freeze for several months. Enjoy!
Christmas Cracker Toffee
Brittany wrote this on 29 November 2015![]() chocolate
chocolate
 I have no fancy words or clever lead in to this post. So I’m just going to lay it out straight for you.
This stuff is awesome. End of story.
Lots of you probably grew up with these treats during the holidays, and too, probably have your own recipe to make it. However, for those of you who, like me, missed out on a childhood with cracker toffee, I will save your holiday season by giving you this. It has the unfortunate nickname of being called ‘Christmas Crack’ but I have to say, its rather fitting.
There are less than 5 ingredients, if you skip the sprinkles. Cheap to make and easy to do, it makes a huge pan so you can serve it at a party AND give some away to your piano teacher or favorite neighbor. It is so darn festive it is re-DONK-ulous. My kids help make them too, although I keep them away from the hot toffee portion of the recipe. They help lay out crackers, sprinkle chocolate chips, and sprinkle…well…sprinkles.
 These are forever a part of my holiday traditions now and if you spend ANY amount of time with me this Christmas season, there is a 100% chance that I will serve these to you at some point. If I spend time with you and YOU serve me some? Even better. Merry Christmas everyone!
Christmas Cracker Toffee Treats
1 1/2 sleeves of soda crackers, such as Saltines
1 c (2 sticks) butter
1 c packed brown sugar
1 (10 oz) bag of semi-sweet or dark chocolate chips
holiday sprinkles, optional
Preheat the oven to 350.
Line a half sheet pan (jelly roll pan, cookie sheet) with parchment paper, letting it extend over all the edges. In a pinch, you can use foil too, but be sure to spray the foil very well with cooking spray. Line the pan with crackers, taking care to set them edge to edge and cover the pan well with no gaps. In a small saucepan, combine the butter and sugar over medium heat. Melt the butter, then bring to a slow boil. Let bubble for 2 minutes, then immediately pour over the crackers. Carefully spread the toffee evenly over the crackers, working quickly so the toffee doesn’t harden. Pop the pan in the oven and bake for 5 minutes. The toffee will spread, bubble a LOT, and get slightly darker. Watch it so it doesn’t start to burn! Remove from the oven, let the crazy bubbling stop 🙂 and then sprinkle the entire bag of chocolate chips evenly over the toffee. Let the chocolate sit for a few minutes and melt, then carefully just spread the melted chocolate over the pan. Let sit at room temperature for several minutes to cool, then set the whole pan in your fridge (if you live where its cold, set it on your porch, in your garage, etc) to cool completely. When it is good and cold, simply lift the parchment paper off the pan and set the whole thing in a cutting board. With a large knife, cut the treats into desired shapes-I like them irregular like broken shards-and serve! Store in the fridge so they stay firm. Enjoy!
Soft Batch Cream Cheese Chocolate Chip Cookies
Brittany wrote this on 11 November 2015![]() chocolate, cream cheese
chocolate, cream cheese
 These cookies sound incredible, don’t they? Well, it is true. They are incredible. Was it the cream cheese in the title that tipped you off…?
Some recipes taste just like they sound and this is one of those recipes. You expect them to be soft, pillowy cookies that are moist and rich, but chocolatey too. And they are. All of that. Exactly that. *sigh* So cozy. I tend to prefer my cookies chewy and crispy, but there is always room to branch out. I have been wanting to add a soft batch chocolate chip cookie to my recipe library, and these have been perfect every time. Plus, THERE IS CREAM CHEESE IN THEM! A detail that speaks for itself, obviously, but I thought I would write it in all caps anyway.
Speaking of cozy, we are in the middle of a giveaway right now! Enter to win snuggly, handmade items by Pine Tree Goods, and if you are one of the two winners, these cookies will just complete the whole scene. Cozy cowl or mittens + warm cookies = a good good day. Heck! If you don’t win, these cookies will make you feel better! So its all good. They have to be chilled before they bake so you can mix them up now, and then bake them when you get home from work/school/errands tomorrow!
A few things to remember about these: Don’t skip the ‘chill in the fridge’ step, and don’t add more cream cheese than it calls for. I may or may not have done both of these things at various times, and both ended in an unfixable disaster. More cream cheese creates soup, not cookies. And not chilling the dough makes soup, not cookies. Follow the recipe and all will be well. Go figure! Soft Batch, Cream Cheese Chocolate Chip Cookies
Recipe adapted from here.
1 stick (1/2 c) softened butter
1/4 c cream cheese, not fat free or spreadable
3/4 c brown sugar
1/4 c sugar
1 tsp vanilla
1 egg
2 1/4 c flour
1 tsp baking soda
2 tsp cornstarch
pinch of salt
2 c dark or semi-sweet chocolate chips
In a large mixing bowl, or in the bowl of a stand mixer, combine butter and cream cheese until creamy and mixed VERY well. Add the sugars, vanilla, and egg, mixing well after each addition and scraping down the bowl between. When thoroughly combined, add the dry ingredients and mix well. Gently stir in the chocolate chips. Refrigerated dough until very cold or scoop dough into a sprayed or lined cookie sheet and THEN chill. The key here is to bake the dough COLD. Bake at 350 for 9 minutes, or until the edges are brown and the centers are still soft. Let cool on the pan until just warm, then remove to a cooling rack. Cookies keep sealed at room temp for 3 days or frozen for several months. The dough can also be portioned into cookies and then frozen to be baked later. Just let the frozen dough balls defrost in the fridge for a bit before baking. Enjoy!
Classic Monkey Bread
Brittany wrote this on 26 October 2015![]() caramel
caramel
 You may have already noticed that I don’t have a recipe on this blog for caramel rolls or cinnamon rolls. After several years of posting recipes, I decided to remedy that fact. Honey Buns are the closest I have come, and as good as they are, sometimes you just need a good, gooey, caramel laden treat.
These are those. Or this is them. Or that is thus. Caramel laden treats. Right here.
 I haven’t always been a baker of Monkey Bread. I didn’t grow up eating it, and had no idea of its existence until college. However, sometime in the last few years, after seeing various kinds plastered all over Pinterest, I figured I better find a master recipe to keep in my menu arsenal. Nothing fancy, nothing pumpkin spice or that trendy salted caramel, and no crazy amount of extra steps. Just a straight up, classic and easy recipe.
Ok fine. To be completely transparent with all of you, I am going to have a house full of guests at Christmas and I really wanted to get this dish down pat so that I can serve it with ease to a crowd. Ulterior motives, yes, but it all leads to the same thing. Really good Monkey Bread.
I tried several (Oofdah! Recipe testing for this was tough!) and made adjustments as I went based on personal taste and preference. For example, most recipes call for canned biscuits as the bread in here, but the texture of actual bread dough is SO much better and much less salty. It is just as simple to use, but less expensive, and you get a better quality to your food. So in the end, I just kind of went with the basics and kept it simple. Turns out that is what makes this the best.
 Fresh out of the oven and ready to be turned out! Careful! Its hot!
 Classic Monkey Bread
2 lbs (loaves) frozen bread dough, thawed
1 c granulated sugar
2 tsp cinnamon
1/2 c (1 stick) butter
1/2 c brown sugar
Preheat the oven to 350 degrees. Butter a bundt pan and combine the white sugar and cinnamon in a small bowl. Cut each bread dough loaf into 16 pieces and toss the pieces in the cinnamon and sugar. Shake off the excess and place them evenly in the bundt pan. Meanwhile, in a small sauce pan, warm the butter, brown sugar, and 1/2 c of the leftover cinnamon/sugar mixture. Heat over medium heat until it JUST comes to a boil. Immediately remove and carefully pour evenly over the bread dough pieces. Bake for 30 minutes until risen and evenly browned. Remove from the oven and carefully invert onto a deep plate or platter to catch the extra caramel! Let cool a bit and enjoy!
Maple-Almond Granola
Brittany wrote this on 19 October 2015![]() almond flour, almonds, gluten-free, maple syrup, oatmeal
almond flour, almonds, gluten-free, maple syrup, oatmeal
 As I type this post, I am sitting at my dining room table and gazing out the window. Now that hurricane Joaquin is gone and the rain has stayed away from South Carolina for a week, we have dried out a bit and the leaves are starting to turn. I could sit here and stare at the trees all day, provided there were plenty of snacks within arms reach. There is quite a nip in the air (a bit odd for this time of year in the South), but this Minnesota gal is thrilled. My friends, it actually feels like fall here right now and I am positively giddy.
While some people crave cozy casseroles, hearty soups, and pumpkin spice lattes at this time of year, I have been craving granola.
Is that weird?
I’m not sure why, but every time I have seen it in the store, I commence to drooling. Its embarrassing really. I see those toasted oats and nuts studded with colorful dried fruits and it sets my stomach to growling. I refuse to buy it because I can make it so easily, but I haven’t had time. This past weekend I was sure to MAKE time, and after a lot of experimentation, I made exactly the kind of granola I have been yearning for. This version is crispy, but not so crunchy that it will shake loose a filling. Its spiced, but just enough to add a fantastic warmth to the food, not enough to overwhelm. And the maple? Gaaaah. Its lovely. When you bake this it will smell like your house has been invaded by a stack of syrup drowned pancakes, but the end result is much more subtle.
I took to Instagram on Saturday to share my success with the world.
 After this picture was taken I added a banana. Stupendous is the only word I can use to describe it. Absolutely stupendous.
If you have never made granola at home before, I highly recommend giving it a try. It is ridiculously easy and you can customize it to your own tastes. In addition, it is just fun to share with people. Throw it in a jar with a ribbon around the top and VOILA! Instant gift. It would be a fantastic thing to bring to the host or hostess of a party this holiday season instead of the usual bottle of wine. Personally, I would rather have granola under the tree than a reindeer sweater so consider sending some to long lost relatives. It travels well and smells so good, it will make the security dogs at the post office go berserk! 🙂 Because nothing says ‘I love you’ like crunchy, nutty, cinnamon-y food. Right? I thought so.
 Maple-Almond Granola
Several weeks ago we made homemade almond milk here at our house. We had quite a bit of ground almonds leftover after draining off the ‘milk’ so we dried them out in the oven and stored them in the freezer until we could decided what to do with them. They were PERFECT in this granola, so keep that in mind if you make your own almond milk!
Preheat the oven to 300 degrees.
In a large bowl, add:
2 c rolled oats
1 c ground almonds or almond flour
1 c sliced almonds
2 tsp ground cinnamon
1/4 c brown sugar
Mix all ingredients together until thoroughly blended.
In a glass measuring cup, combine:
1/4 c coconut, canola, or grapeseed oil
1/3 c pure (real) maple syrup
1/2 tsp maple extract
Mix and pour over oat mixture. Combine well, making sure the moisture is evenly distributed. This will take a bit. Dump onto a dry, unlined sheet pan and spread out into an even layer. Toast in the oven for 15 minutes, stir well, toast for another 15 minutes, stir, and toast final 15 minutes. The granola should be dry and crunchy and slightly browned. Remove and let it cool on the pan. It will continue to crisp a bit as it cools. Once cool, feel free to add the dried fruits of your choice. Cranberries are especially fantastic with this. Store in an airtight container.
Gluten Free Zucchini Spice Muffins
Brittany wrote this on 8 September 2015![]() cranberries, gluten-free, raisins, walnuts, zucchini
cranberries, gluten-free, raisins, walnuts, zucchini
 My sister is staying with us for awhile. Did I mention that before?
We get her as a house guest for a few months while she finishes settling into employment here on the East Coast. We kind of love it and while there are always adjustments with long term visitors, most of the adjusting is happening on her end, I assure you. To go from living on your own in downtown Seattle, to sharing a house with three kids in the steamy South is quite the change of scenery. My sister is a very healthy eater, skipping dairy due to an allergy and avoiding gluten because she just feels so darn better when she does! She does regular workouts, she runs, and is currently training to be a personal trainer while simultaneously working full time.
In short, she is my hero. 🙂
Here at our house, we generally eat…okay. My husband and I don’t drink pop, we limit fruit juice with our kids, and the majority of bread in our house is whole grain. We like natural sweeteners, low fat dairy, and snack on whole fruits and fresh veggies as much as we can. Ultimately, we just do our best, because that is all we can do, right? And most of the time, thats good enough.
But I know that my sister misses her pristine diet. She never complains, but I kinda like the gal so I try to accommodate her as well as I can. The dairy free thing is no problem, but cooking gluten free is not my normal practice. I do it, but not exclusively. Enter-THESE MUFFINS! Everyone should be able enjoy a good spiced muffin in the fall and these darlings are my contribution. I bake them up (beat my kids away from the kitchen with a stick because they try to steal them) and tuck them in the freezer just for her! My next gluten-free endeavor? Pumpkin muffins!! Gluten Free Zucchini Spice Muffins
1 c sugar, granulated or raw
2 eggs
1/2 c canola, coconut, or grapeseed oil
1/4 c unsweetened applesauce
1 tsp vanilla
Whisk together above ingredients until smooth.
Fold in:
1 1/4 c all-purpose GF flour
1 tsp baking powder
1/2 tsp baking soda
pinch of salt
1 1/2 tsp cinnamon
1/2 tsp EACH of ground ginger, cloves, and nutmeg
Mix two or three times (it will not be combined yet) and add:
1 small zucchini, shredded
1/2 c dried, unsweetened cranberries
1/2 c chopped walnuts
Continue to fold together until combined but JUST MIXED! Bake in paper lined muffin cups at 350 degrees for 15 minutes, or until set and a toothpick inserted in the center comes out clean. Cool on a wire rack and enjoy!
Super Gooey Peanut Butter Brownies
Brittany wrote this on 31 August 2015![]() chocolate, marshmallow creme, peanut butter
chocolate, marshmallow creme, peanut butter
 Sometimes, there just aren’t adequate words to describe something.
I could tell you that these brownies are the chewiest, gooiest brownies you will ever eat, but that wouldn’t do them justice. I could tell you that people gasp when they see them (they are that decadent) and that they will be devoured faster than any other treat, but you need to see that for yourself. I could tell you that while they look a bit complicated, they really are fairly easy with only an extra step or two, but you should just make them.
Well, hey! Look at that! I guess I did have adequate words to tell you all of that! 🙂
But gosh darn it, its true. I have been making these brownies for over a decade and they have come along with me to many a pot luck and game day party. I have tucked them in lunches and sent whole batches with my husband to share at work. I have served them at Christmas parties and barbecues. Always the same. Always good. Always scrumptious. I don’t cook with mixes all that often (Actually, I just realized I have another recipe coming up that uses a mix… 🙂 ), but sometimes I need the time saver and convenience the most at that moment. Ere go, one of the reasons I have been making these for so long.
I figured it was time that you got to make them too! Yes?

 Ooey Gooey Peanut Butter Marshmallow Swirl Brownies
Inspired by Cooking Light
3/4 c sweetened condensed milk, divided
1/4 c canola or grape seed oil
1/4 c milk
1 box devils food cake mix
1 egg
1 jar (7 oz) marshmallow fluff
3/4 c peanut butter chips
Preheat the oven to 350 degrees. Lightly spray a 9X13 inch baking pan and set aside.
In a large bowl, using a hand mixer or stand mixer, combine 1/4 c of the sweetened condensed milk and the next 4 ingredients. The batter will be VERY sticky! Spread 2/3 of the batter in the bottom of the prepared pan. The layer will be thin, but keep at it! 🙂 Bake for 10 minutes, until just set. Meanwhile, combine the remaining 1/2 c of condensed milk and the marshmallow fluff until smooth. Fold in the peanut butter chips. When the crust comes out of the oven, pour on the marshmallow mixture and carefully smooth and spread to the edges. Drop the remaining chocolate batter evenly over the marshmallow stuff. Gently swirl with a toothpick, if desired. Its all pretty thick, so you just want to make sure everything is even. It will all bake together anyway. Return the pan to the oven and bake for an additional 25-30 minutes, or until dry and set in the middle. Let brownies cool almost completely and cut into SMALL squares. These are UBER rich so resist the urge to make them giant and ere on the smaller side. Besides….you know you are going to eat two anyway….
My Favorite Peach Cobbler
Brittany wrote this on 3 August 2015![]() peaches
peaches
 Confession.
I am having a major case of writers block right now.
I keep staring at this picture of sweet, warm, peach cobbler and all witty and inspiring thoughts are replaced with the desire to lick the screen. So far, I have resisted. Generally, cobblers have a biscuit or scone like topping on them, but many versions, including those seen here in the South, are topped with more of a batter. My recipe is kind of a cross between the two. I don’t like my topping to be hard like a biscuit, but I don’t want it cake-like either. This is a good balance that ends up wonderfully thick and crisp, but not heavy. It is also fantastically easy to make and doesn’t require anything more complicated than just mixing. SCORE!
But greatness (or great recipes) are not without their complications! My biggest issue with this treat was getting the underside of the topping completely cooked. It kept turning out gooey and doughy and the edges would be too dark. NOT good eats. But after dozens and dozens of cobblers over years and years of baking, I fixed it. Now, easily one of my favorite desserts to make, this cobbler is perfectly delightful. The fact that peaches are in season right now just happens to make this even better. Take advantage of it, people!
Yes, you can make this with pears or plums, but anything firmer-say, apples- wouldn’t quite work. The fruit wouldn’t be cooked in the time the topping was baked. Stick to juicy stone fruits, but feel free to stir in a bit of berries to give it some variation. As for me, I like it classic. Classic and peachy. Peachy and juicy. Juicy and sweet.

 The BEST Peach Cobbler
I have no idea if cinnamon is a classic cobbler ingredient, but my Mom taught me to ALWAYS put a bit of cinnamon with peaches. And so I do! Because she was right. The warm spice isn’t overpowering or even really noticeable. It just pairs so well here you won’t want to leave it out!
Filling:
8 large ripe peaches, cored and cut into 8ths
1/4 c flour
1/4 c sugar
1 tsp cinnamon
Topping:
1 c flour
2 T cornmeal
1 c sugar
1 1/2 tsp baking powder
large pinch of salt
4 T (1/2 of a stick or 1/4 c) of room temp butter
2 eggs
Preheat the oven to 375. Spray or butter a large, 9X13 glass baking dish. In a large bowl, gently mix the filling ingredients, tossing until mixed and evenly coated. The juices of the fruit will help it all coat. Dump into prepared baking dish and snuggle all the fruit down until its even. In the same bowl, mix the dry ingredients of the topping together. Add the butter and eggs and mix with a spoon until smooth and it forms a stiff batter. Drop by large dollops all over the top of the fruit, spreading a bit to cover as much area as you can. The batter will spread and cover wonderfully as it bakes! If desired, sprinkle a tablespoon of granulated sugar over the top, just to give it a bit of sparkle!
Place in the preheated oven and bake for 30 minutes, or until evenly golden brown and bubbly in the center. Remove and let cook for at least a half an hour so that the filling sets a bit. Too hot makes for a messy cobbler on your plate (not a bad thing, just not as easy to serve). Serve warm, room temp, or even cold. Vanilla ice cream on the side is always a good thing.
 This recipe will make your house smell amazing.
Yes, I am choosing to open this post with that statement because that is what immediately comes to mind as I write this. It practically wraps your house in a hug. As cheesy as that sounds, its absolutely true. Make no mistake that it will totally lift your mood to have this baking in your oven.
Due to the fact that our household goes through a LOT of bananas, it stands to reason that we will occasionally have overripe fruit on our hands. I never count this as a burden… 🙂 All you have to do is type ‘banana’ in the ingredient search option on the right side of this screen to find out how much I like to bake with them. Like, really enjoy baking with bananas. A few months ago, when trying to decide what to throw together with my extras, I decided to just start paging through my cookbooks to find something new. My kids got into the hunt and they unanimously agreed that these chocolate chip banana bars were the obvious choice.
The flavor of these bars, though similar to a banana bread, have the added bonus of butter (mmmmm…..buttaaaaaaah…) They are moist and rich and deserve a plate and fork. I’ve made them several times in the last few months and they are reliable and delightful and wonderful. A fantastic treat to bring to a game night, pot luck, or to just bake on a rainy weekend! Enjoy friends!
What is YOUR favorite banana baked good??
 Chocolate Chip Banana Bars
Recipe adapted from BHG
These bars are so moist, they only last a day or two at room temperature. Store them in the fridge to get an extra day out of them, or better yet, wrap each bar individually in plastic and freeze for later. Usually, I make them for a crowd and make them the day of the event for best results. Or I bake them for no reason and just eat them all….
3/4 c (1 1/2 sticks) room temperature butter
1/2 sugar
1/2 c brown sugar
3 small bananas
1 egg
1 tsp vanilla
2 c flour
2 tsp baking powder
pinch of salt
1 c chocolate chips
Preheat oven to 350 degrees. Lightly spray an 11X14 glass pyrex dish.
Cream the butter and sugars together in the bowl of an electric mixer until smooth. Add the bananas, egg, and vanilla, and beat until fruit is mashed and mixture is combined. Add the flour, baking powder and salt and mix until just combined, scraping the sides of the bowl if necessary. Fold in chocolate chips by hand. Spread the thick batter evenly into the prepared pan, and bake at 350 degrees for 30 minutes, or until golden brown. Remove from the oven and let cool. These are great when they are just slightly warm, but room temp is good too!
Love a Good Recipe?

Then you’ve come to the right place! I’m Brittany, and I share tested, trusted recipes you’ll love. I prepare & photograph food, obsess over the perfect recipe, and enjoy grins of delight when I serve up something awesome. Enjoy!


