 Brittany's Pantry
 The feel like I should start by saying that the relationship between cabbage and I is still in the infancy stage.
I didn’t eat much of it growing up and soggy coleslaw from the deli was certainly not going to sway me toward this rubbery, bitter vegetable. But slowly, with much cajoling and the promise of something fresh, crisp, and crunchy, I have begun to warm up the idea of adding cabbage into my regular menus. I started with it piled on these BBQ Chicken Sandwiches and now I can’t make it without the slaw. I moved on to this stellar take on fresh cole slaw and am now ready to embark on recipes that surpass just condiments or side dishes. Soon, when cabbage is so prevalent in the markets because of St. Patricks Day, I plan to experiment with a lovely dish I saw once that had bacon, caramelized onions, cabbage, and pasta. Doesn’t that sound awesome?
Until then, I am sharing my version of a Chinese Chicken Salad I pulled off the Eating Well website about a bazillion years ago. Again, this is not anything I would ever have ordered in a restaurant, but something about the ingredients in this salad made me…well…just feel healthier reading the recipe. Kinda like I was absorbing the nutrients by osmosis! Soaking in the vitamin C and fiber like rays of the sun on a June day!
And then I ate it. Forget osmosis! I want to EAT this stuff! The mix of textures and flavors in this are so spot on it is a full celebration on a plate. It has a bit of an asian bite, a great toasty crunch, and a freshness that is sweet and tart. I can’t even find the words to explain how welcome its lightness is here at the tail end of January. I usually make this in the summer because it is so great on a hot day, but since it doesn’t rely on summer veggies like tomatoes, fresh zucchini, or crisp greens, it is perfectly suitable to these cold frigid months.
So now, you can get back on track with any healthy New Years vows that you have probably already abandoned and I can add another successful and reliable cabbage recipe to my permanent stash. Win win all around.

 One Year Ago: Banana Sour Cream Pancakes
Two Years Ago: Gringo Chicken Soup & Asian Turkey Lettuce Wraps
Three Years Ago: Midnight Crunchies & Crispy Bars
Chinese Chicken Salad
Adapted from Eating Well
I like to save myself some time by getting the pre-packaged shredded cabbage but if it doesn’t look promising during your shopping day, or you have the time to spare, pick up a medium head of green cabbage to shred yourself here. Cabbage should be medium sized and in a bright, heavy, tight ball with no discoloration or wilting on the outside. Napa cabbage is nice to use, but plain old cheap green cabbage tastes just as fantastic in this. To make this gluten-free, omit the ramen noodles.
Salad:
1-3 oz- pkg ramen, season packet discarded
1/3 c sliced almonds
1 T sesame seeds
2 tsp canola oil
3 c cooked chicken, preferably white meat, diced or shredded into bite sized pieces
1 pkg shredded cole slaw mix or 1/2 of a medium head of green or nappa cabbage, shredded
1 large carrot, peeled and shredded
3 scallions, chopped
Dressing:
1/4 c orange juice
1/4 c rice or white wine vinegar
2 T honey
2 T of soy sauce
1 tsp toasted sesame oil
large pinch of crushed red pepper flakes, or to taste
Whisk together dressing ingredients and set aside.
Preheat the oven to 350. Crush and break up the dried ramen noodles into a small bowl and toss with almonds, sesame seeds, and canola oil. Spread onto a baking sheet and toast for 4 minutes, tossing a bit, and toasting for 3 more, just until crisp and lightly browned-DO NOT LET THEM BURN! Set aside until ready to eat. Just before serving, toss all salad ingredients together with the toasted crunchy mixture, drizzle on some dressing (you won’t use it all), taking care not to drown the salad, and toss, season with salt and pepper if necessary, and serve immediately.

 Technically, I don’t know that I can call these ‘grilled’ cheese panini sticks, as they are not on a griddle, but are in fact, made on a panini maker. In any case, this is what my family has decided to name them after eating them over and over the last few weeks. We are in the middle of a kind of soup marathon here at the house and what tastes better in soup than crispy, cheesy, dunk-able sandwiches?!
My parents rarely made grilled cheese when I was a kid so I don’t seem to have the nostalgic and emotional attachment that some of the rest of you do. I don’t want to get any heated emails about how I have desecrated the sanctity of Wonderbread and Kraft singles sandwiches that seem to be present in most average American households. And sorry, but we don’t buy white bread either. So the classic grilled cheese dunked in canned soup will have to be upgraded to the above picture; Easy Homemade Tomato Soup and three cheeses on ciabatta bread. And if I may be so bold, it tastes better too. Fresh and hearty, you can taste each individual ingredient while still keeping things a bit light. I always cut these cheese panini into sticks because they are perfect for dunking that way (obviously) but it also stretches the ingredients a bit. We don’t all eat a huge bread and cheese sandwich each, but instead, munch on just a few sticks, rounding out our soup with a bit if texture. We ate these sandwiches with a creamy, thai flavored carrot soup last week and it was out of this world. Tomato soup is of course classic, but a brothy veggie soup is also great with this robust ciabatta to soak it up.
 Mmm. Now this is a meal I want my kids to be nostalgic for while eating ramen noodles and Cheetos during their college years.
One Year Ago: Chicken Tamale Casserole
Two Years Ago: Beef Bourguignon & Tilapia W/Citrus Sauce
Three Years Ago: Buttermilk Bread & S’Mores Bars
Grilled Cheese Panini Sticks
You can make this with any kind of bread and cheese combination you like, but this is a good recipe to start with. The bread holds up to the panini maker and this combination of cheese made us swoon. We keep garlic grape seed oil in the house for lots of things, but we ALWAYS use it for brushing the outside of paninis before toasting.
ciabatta bread-whole loaves or individual rolls, cut in half
mayo, optional
sliced provolone
sliced cheddar, preferably sharp
sliced colby/jack
softened butter, nonstick spray, or oil for brushing
Spread both halves of the bread with a thin coat of mayo, if desired. I like the extra bite of flavor it gives, but it is totally up to you. Layer on a slice of each of the cheeses on the bottom half of the bread and top with the other half of ciabatta. Brush or spread the outside of the bread with the butter or oil, or spray your panini maker, and toast until crispy on the outside and melty on the inside. Cool slightly and cut into strips for dunking. Alternatively, just set the sandwich in a heavy skillet over medium heat and weigh it down with another pan. Flip it when the underside is brown and toasted, letting it brown on the other side.
Baked Sweet Potatoes W/Apples & Onions
Brittany wrote this on 9 January 2014![]() apples, gluten-free, onions, sweet potatoes
apples, gluten-free, onions, sweet potatoes
 This recipe absolutely falls into the category of ‘Things I make without thinking about and therefore never post on the blog’. I have been making it so long and without any type of recipe that I never give it a second thought! And then someone asks me about it, assuming they can find it here, and I smack my forehead in frustration. Why have I never shared this?
You certainly don’t know. Why am I asking you?
So. Here it is. One of my longest running go-to side dishes that pairs with just about anything you can throw at it; a menu multitasker, if you will. It is healthy, easy, and just may become a go-to for you as well!
And just FYI: The pictures are a bit fuzzy because it was so freaking hot, the steam kept rising and clouding my lens. My husband knelt on the floor next to it and tried to fan it away while I was shooting, but it was fresh from the oven and at nuclear temperatures. The things my hubs will do for love.

 One Year Ago: Baked Garlic Brown Rice
Three Years Ago: Laura’s Salad
Sweet Potatoes Baked W/Apples & Onions
Recipe inspired by something I read on the internet circa 1997
I have used every kind of apple imaginable in this recipe and it always turns out great. Use whatever you have in your crisper drawer. This side is especially great with anything roasted.
two firm apples, peeled, cored and sliced
1 medium onion, halved and sliced into half moons
3 medium or two large sweet potatoes, peeled
2 T butter
1/4 c apple cider, preferably all natural and no sugar added
salt and pepper
1 T of brown sugar, optional
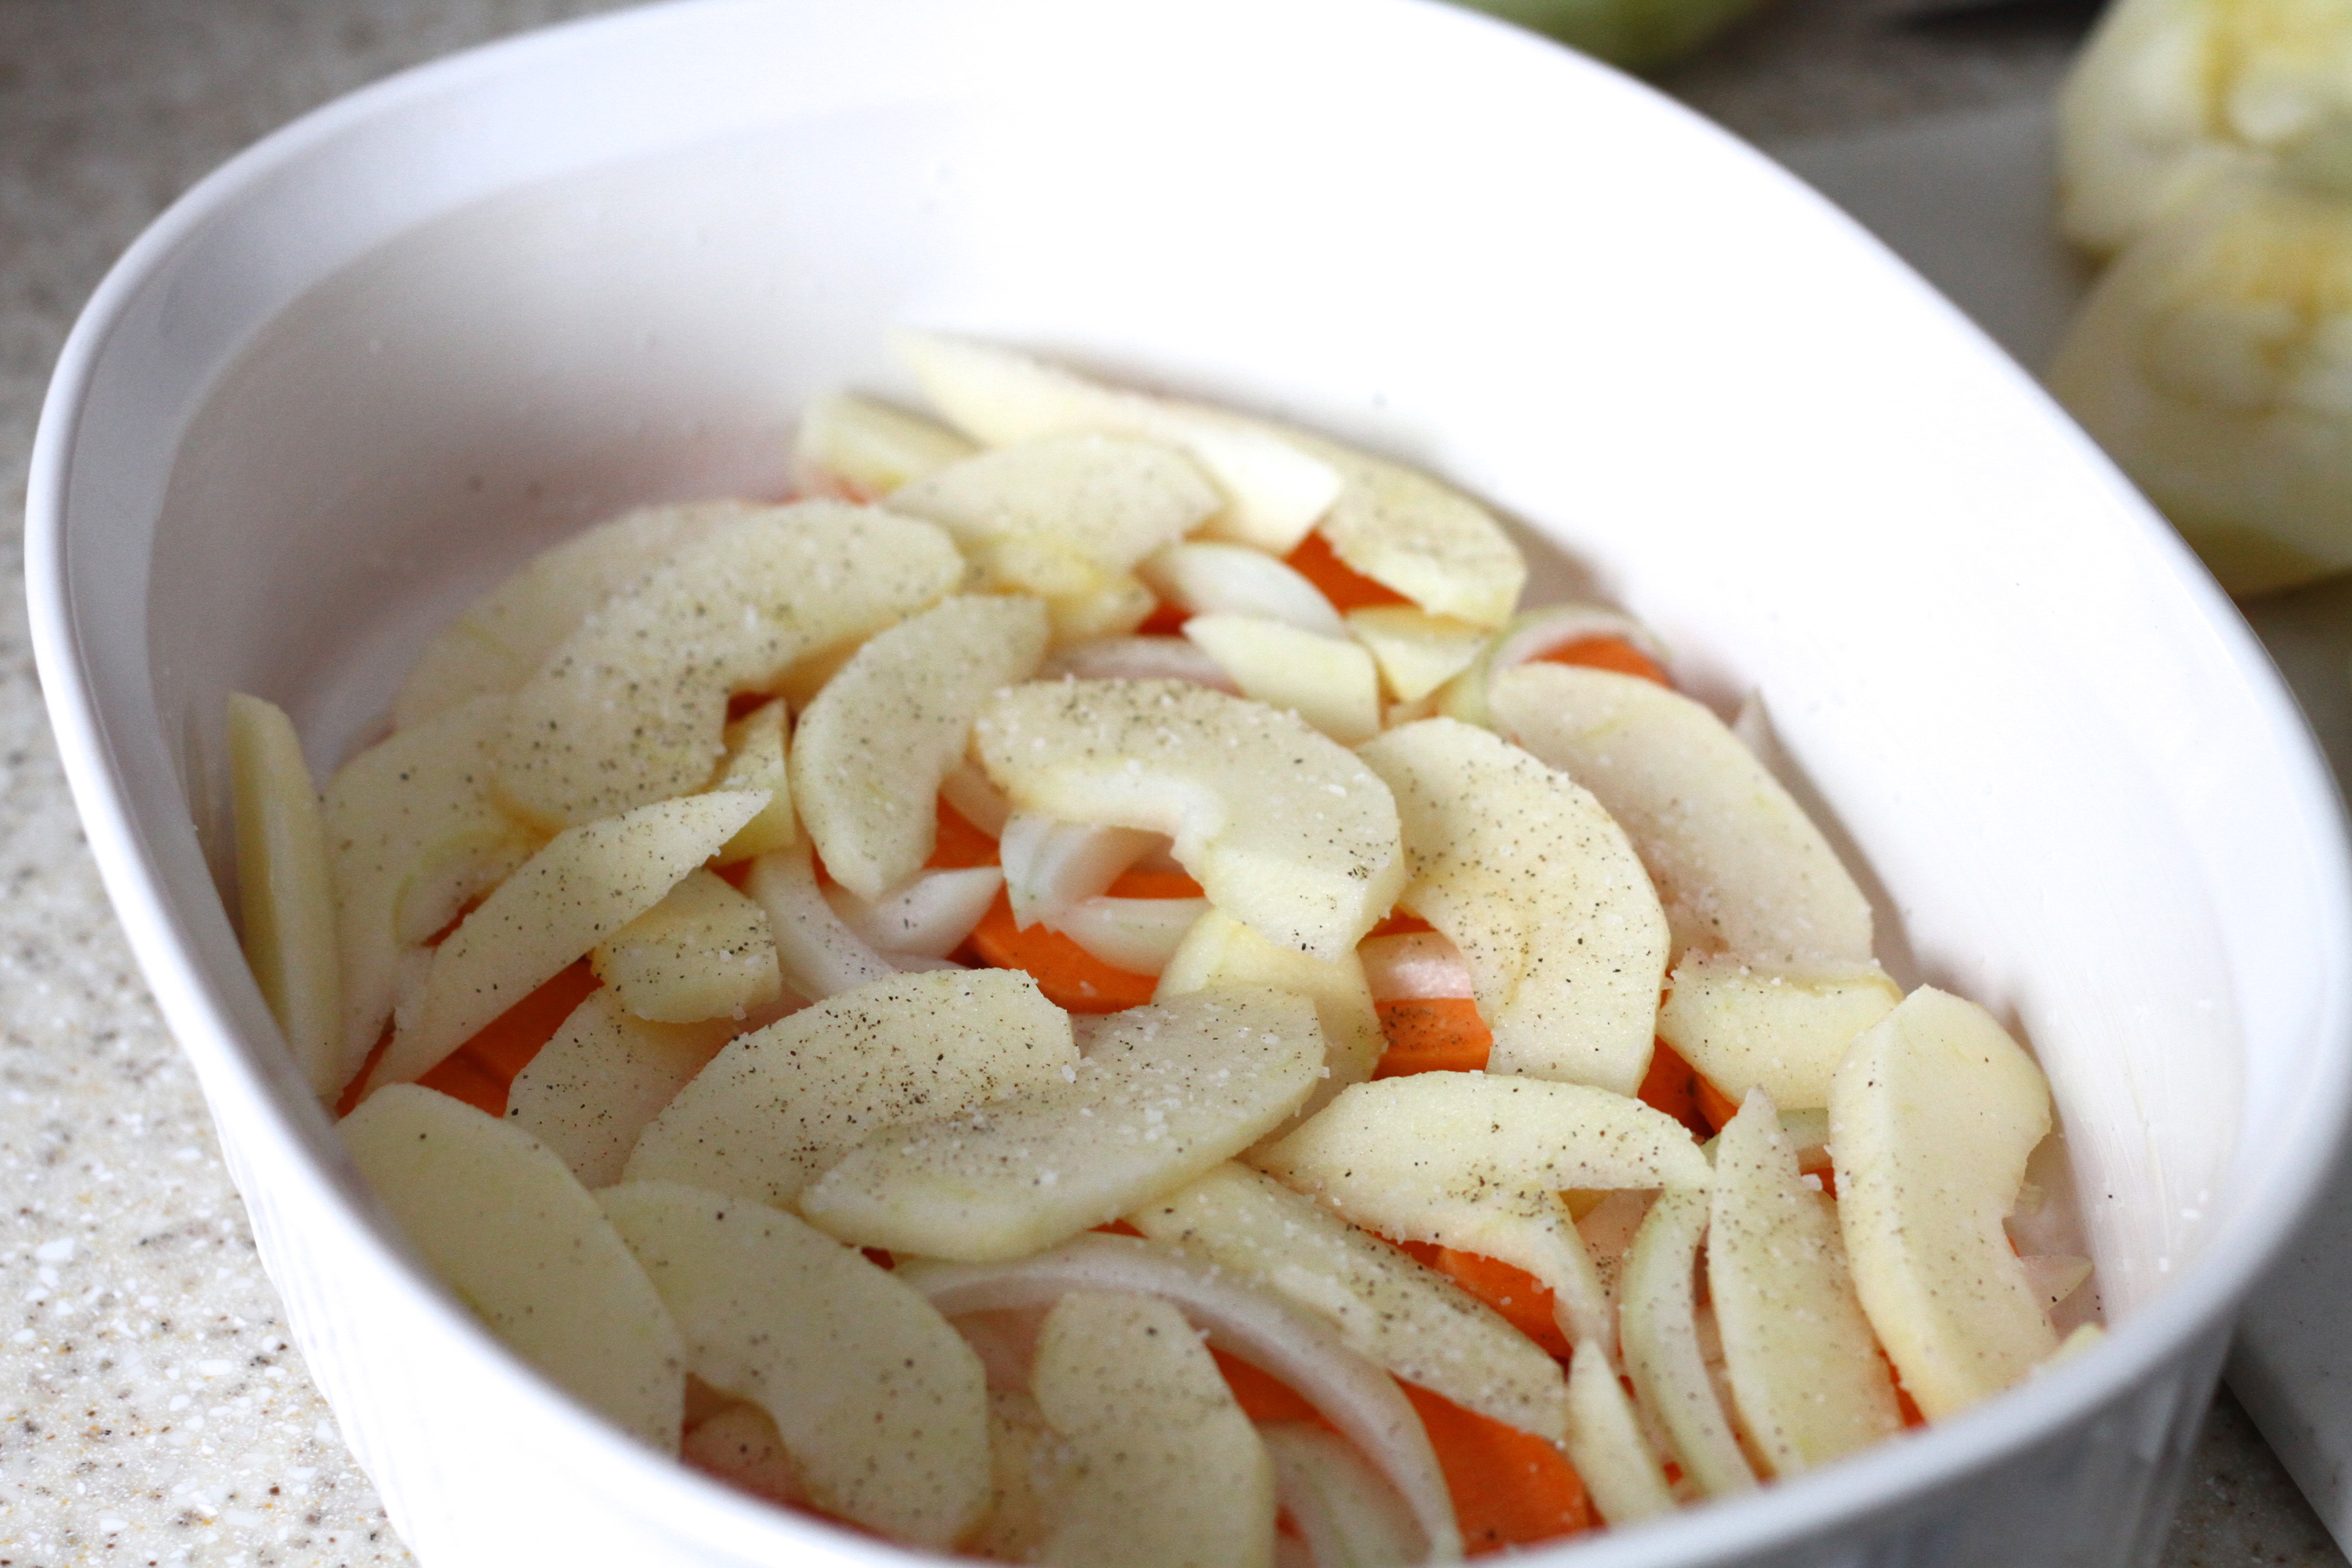
Butter a large, deep, oval or round casserole dish. Preheat the oven to 350 degrees.
Slice the peeled sweet potatoes into coins 1/8 to a 1/4 inch thick. Just eyeball it, but keep in mind that the thinner you cut them, the faster they will bake and vice versa. Layer about 1/3 of your sweet potatoes on the bottom of the dish, letting some overlap. I just dump in a handful and spread them out, covering all spots. Then add half your sliced apples and then 1/2 your onions. You don’t have to cover every single inch here as it will all bake together. Just spread evenly. Sprinkle lightly with salt and pepper. Then add potatoes, the rest of your apples, the last of your onions, sprinkle with salt and pepper, and then top with the last of your sweet potatoes. I usually guess wrong and end up with a bit less than a third, but it will all taste good! Sprinkle lightly with salt and pepper. Pour your apple cider evenly over the top and sprinkle lightly with a bit of brown sugar, if desired. In the pictures above, you can see that I did, but my apples were so sweet, I really didn’t need it. I recommend skipping it all together unless your apples have little flavor or are really sour. Dot with butter, cover with foil, and bake for 30-40 minutes, or until a knife or fork easily cuts through the layers. This will stay warm for quite awhile if it is kept covered and it reheats wonderfully!
 As I look at this picture above, I can’t help but smile.
Yes, it is a pile of saucy pasta with spicy sausage and fresh, sweet bell peppers (read: plate full of goodness) but that isn’t the reason for the grin stretching across my face. Ok. Fine. It is a part of the reason. But mainly it is because it reminds me of happy nights in high school.
I was a diver and a synchronized swimmer in my younger years and as any good swimmer will tell you, carbo feeds the night before big meets were part of the season. When my parents would host, this pasta is what my Dad served. Essentially it is a plain marinara loaded with italian sausage and tons of sweet bell peppers. For some reason, he always served it over fettuccini instead of spaghetti. As you may have heard me mention before, I am my Father’s daughter, ergo, I serve this over fettuccini as well. I swear it tastes better that way, but having never eaten it with any other kind of pasta, I am only speculating. However, my Dad knew his stuff, since the wide pasta stands up much better to big chunks of sausage and bite sized pieces of vegetables than a smaller pasta would. Its hearty, but not altogether unhealthy, and the bell peppers add a good dose of nutrients but also just look awesome.
Originally, this dish was always made with green and red bell peppers, but I like to use yellow or orange peppers instead of green because the flavor is better. But if you do use red and green, this is certainly the month to serve it! You can easily whip this up on a weeknight but it is special enough to put in front of company. And definitely special enough to put in front of a group of teenage girls who have more swim suits than shoes and smell like chlorine.

 One Year Ago: Rum Banana Bread
Two Years Ago: Sweet & Savory Mixed Nuts, Parmesan Dip & Butternut Squash Crostini
Fettuccini W/Sausage & Bell Peppers
Adding sautéed mushrooms to this is a wonderful idea.
two large sweet bell peppers, cored and sliced
1 lb sweet or spicy italian sausage links
2 quart jars of marinara, store-bought or homemade-I like this recipe
1 lb dried fettuccini, cooked according to package directions
Brown the sausage links in a large pan until seared on all sides. They don’t have to be cooked all the way through, as they will finish cooking in the sauce. Slice 1/2 inch thick on the bias and add to a large sauce pan. Add the bell peppers and marinara sauce and heat over medium low heat until just starting to bubble. Continue to cook until good and hot and the sausage is fully cooked. You want everything to be heated, but you want to barely cook the peppers so they are still firm and sweet when you serve it! Pour over fettuccini and serve with a green salad and a big hunk of bread! Leftover sauce freezes great.
Turkey Apple Panini
Brittany wrote this on 29 November 2013![]() apple butter, apples, cheese, dijon mustard, turkey
apple butter, apples, cheese, dijon mustard, turkey
 Greetings!
I hope your Thanksgiving was blessed with family, friends, great food, and a wonderful spirit of gratefulness!
Before we get to the eats, I wanted to mention that Brittany’s Pantry has officially joined the land of INSTAGRAM!!! I am fully equipped to snap pictures of good food, culinary adventures, and other things gastronomically related. A cute little icon will eventually be added to the rest of the social media symbols on the top right, but for now, you can just click here to follow!!!
This recipe, of course, is posted today because using your leftover holiday turkey is what makes this sandwich so unbelievable scrumptious that is just may make your toes curl. If you have been reading this blog lately you know that my affinity for Apple Butter knows no bounds. The spices and richness of it make it such a great accompaniment to so many different foods. Apple butter on toast is one of my favorites, but I love the flavors paired with savory foods as well. When I thought about adding it to a sandwich with mustard, I immediately headed to my panini maker. I was once again reminded of my genius at getting one of those lovely little sandwich toasting appliances for my husband for Christmas last year. Smart move, Brittany. Smart move.
I will argue that this sandwich, although undoubtably autumnal themed, is good anytime you can get a fresh crunchy apple and decent sliced turkey. With the amount of scary chemicals used in commercially grown apples these days (it is quite frightening), we have switched to organic, a move that has prompted my four year old to say, “Why are these apples so good? They taste better than any apples we have ever had before!” Its organic, Baby!! Regardless, the tangy/sour snap of a cold, juicy apple with the salty turkey and then the creaminess of the melted cheese…gaaaaaah. That would be swoon worthy on its own. But then you have the chewiness of the bread and the vinegary bite of the mustard in there, only to top it all off with the spiced sweetness of the apple butter! It is texture and flavor explosion overload. In a good way. In a way that works. And makes your mouth water. And gives you goosebumps. And makes your socks roll up and down.
Shouldn’t all our meals do that?
 Two Years Ago: Baked Doughnuts
Turkey Apple Panini
Wether you use sliced deli turkey, or thick slabs of a bird you roasted just a day or two ago (or even leftover roast chicken!) it is ALL good in this sandwich. A good dill pickle on the side is highly recommended.
sliced turkey
granny smith-or other tart apple-cored and thinly sliced
apple butter
dijon or grainy mustard
swiss cheese
loaf of ciabatta bread, individual ciabatta rolls, or other thick and hearty crusty bread
garlic oil, olive oil, or grape seed oil
If using a loaf of bread, cut into thick slices, or halve the ciabatta, cutting into individual sandwich sizes if needed. Smear one half of the bread with mustard and the other half generously with apple butter. Lay a slice of swiss on the top and bottom. On the bottom half of the sandwich, layer on your turkey and then your apple slices. Top with the cheese/apple butter half and brush the outsides of the bread (top and bottom) with the garlic, olive, or grape seed oil. Press into a panini maker until the sandwich is flattened, toasted, and heated all the way through, melting the cheese. Remove carefully with a spatula and enjoy immediately! Alternatively, set the sandwiches in a hot skillet or cast iron pan and weight it down with another heavy pot or pan. Leave for three or four minutes and flip, weighing it down again. Serve immediately.
Parmesan Roasted Cauliflower
Brittany wrote this on 16 November 2013![]() cauliflower, cheese, gluten-free, parmesan cheese
cauliflower, cheese, gluten-free, parmesan cheese
 As Thanksgiving, the holiday of food, approaches, everyone is looking for interesting/original/uncomplicated items to add to the menu. But wouldn’t it be nice if the new recipe you tried was so easy and so delicious, that you just ended up making it all the time? I think that would be a beautiful thing.
Don’t get me wrong! Brussels sprout gratin with gruyere, fresh herbs, and toasted anchovy bread crumbs sounds good too. I just don’t always have time for a side dish that requires that many steps and that level of energy. I’ll do a Thanksgiving round-up in the next post, but you can rest assured that my desserts will be make-ahead but that I will have way too many things on the menu. I’m reliable that way. Because…you know….its good to be consistent….
This recipe is basically the exact same way I make my roasted broccoli. Of course, using cauliflower gives it a whole different flavor. The vegetables get nice and sweet and the parmesan adds a nice salty texture. It is quite lovely and it is incredibly hard to keep your fingers out of the bowl. Being nice and light comes in handy so you can load up on the butter smothered mashed potatoes. The perfect part, is that it tastes special, but only requires the effort of a typical quick dish for a weeknight meal. It roasts so fast you can pop it into the oven at the very very last minute and let it do its thing while you round up the troops to eat. By the time everyone washes hands, finds a seat, and the noise level cools off so that you can hear the blessing of the food, your dish is done and steaming hot on the table
 One Year Ago: Green Beans W/Mushrooms & Bacon
Two Years Ago: Rum Pumpkin Pie
Three Years Ago: Marshmallow Pumpkin Dip
Parmesan Roasted Cauliflower
This recipe doubles easily and reheats great. Don’t skimp on the fresh cracked black pepper. It makes all the difference.
1 large head of fresh cauliflower, trimmed, rinsed, and cut into bite-sized florets
extra virgin olive oil
salt and fresh cracked black pepper
2 T grated parmesan cheese
Preheat the oven to 425. Toss the cauliflower and oil together sprinkle with salt and pepper together, coating the vegetables evenly and spread out in a single layer on a sheet pan. Roast for 10 minutes, then toss lightly with a spatula to let them toast evenly. Return them to the oven for another five minutes, or until evenly browned and the largest pieces are just starting to lose their firmness, but aren’t getting mushy. Immediately sprinkle with parmesan and toss together, letting the heat of the pan and the veggies warm the cheese. Serve immediately.
Simple Beef Stew
Brittany wrote this on 29 October 2013![]() beef, beef broth, carrots, gluten-free, onions, potatoes, rosemary, sweet potatoes, thyme
beef, beef broth, carrots, gluten-free, onions, potatoes, rosemary, sweet potatoes, thyme
 The weather here has finally turned a bit chilly (woohoo!) so comfort food is what I’m all about.
I am sitting on my couch as I type this and Eli, my four year old, is sitting at my feet and going through the ToysRUs catalog that came in the mail today. He is rotating between shrieking and pointing, having conversations with the characters on the pages, and repeating the phrase, “Mom. Mom. Okay, Mom. Look at this.” Nice and snuggly, we are. It is overcast, a bit breezy, and very quiet outside. Otherwise known as fuzzy sweatshirt-jean-scraf-chai tea-weather. I suppose you could add Beef Stew to that list as well.
What can I say. I’m predictable that way. The temp drops and I start to live on nothing but hot chocolate. I like to curl up in woven blankets and put together puzzles with a bowl of peanut M&M’s within reach. My menu lists for the coming weeks start to say things like Roast Chicken with Glazed Honey Squash, Gringo Chicken Soup, and Enchilada Pie.
The bummer about this time of year, and as we head into the holidays and subzero temps, is that the food can be kind of heavy. Casseroles loaded with pasta, fat, carbs and cheese might warm us to our toes (and taste really really good), but on a regular basis, is not so good for the body. So good news! Comfort food doesn’t have to be heavy and heart attack inducing!! Hooray!
While this stew isn’t exactly health/spa food, it isn’t all that bad either. Loaded with veggies and beef broth it has a simple ingredient list that keeps it on the lighter side while still reminding you of the classic stew you had as a kid! This makes me feel infinitely better when I serve it with crusty bread slathered with salty butter. One Year Ago: Killer Fries & Dark Chocolate Cookies
Two Years Ago: Heather’s Dip & Fluffy Caramel Apple Dip & Ultimate Peanut Butter Cookies
Three Years Ago: Roasted Pumpkin Seeds & Fried Noodles & Sweet Potato Biscuits
Simple Beef Stew
I have made three batches of this in the last two weeks in an effort to get the spices and flavors juuuuuuuust right. In the pictures above, I used more tomato paste than is in the final version of the recipe. I decided I liked the ratio in a previous batch better but didn’t want to make a fourth stew just to rephotograph it. Sooooo… your stew will turn out less red. Either way it is fantastic. Also, don’t let the broth in the bowl above fool you. This thickens up wonderfully. What you can’t see in the picture is that it is SCREAMING hot!
2 lbs beef chuck roast, trimmed of large sections of fat and cut into 1 inch chunks
olive, canola, or vegetable oil
salt and pepper
1 large onion, diced
3 large carrots
3 large white potatoes
2 large sweet potatoes
1 tsp dried thyme or 1 large sprig fresh thyme
1 large sprig fresh rosemary (dried tends to be to tough in the stew so I don’t recommend it)
2 (14 oz) cans good quality beef broth, preferably low fat/low salt
1/2 of a 6 oz can of tomato paste, about 2 rounded T
2 bay leaves
In a large dutch oven or heavy bottomed pot that is OVEN SAFE WITH A LID, brown the beef in batches in a bit of oil over medium or medium/high heat. Season with salt and pepper and be careful not to crowd the pan or they will steam instead of sear. You just want them to get good color on them. Remove the beef to a plate and set aside. Meanwhile, peel and chunk the potatoes and carrots, cutting them into 1 1/2 inch pieces. Add the vegetables all at once to the pot after the beef is done, turning the heat down to medium. Give them a toss now and then, letting them pull all the good flavors up off the bottom of the pan. Season again with salt and pepper. Cook for 5 or 6 minutes, or until the onions are just starting to cook through. Add the broth and tomato paste, letting the liquid deglaze the bottom. Add the meat back in and then the herbs. Give it a slow stir to distribute the flavors then cover and slide into a 300 degree oven for 1 1/2 hours. Remove, stir carefully, and check to see if the largest potatoes and carrots are cooked through and if the meat is soft and tender. If not, return to the oven for another 15 minutes. Check for seasoning. Serve with crusty bread for dipping. Sourdough is especially fabulous. Once cool, you can freeze this stew. Just know that the potatoes might break down a bit when reheated. Tastes great, just a bit thicker.
 In general and on the whole, I am not a huge coleslaw fan. I think it is the cabbage that gets me; the bitterness of it. We never ate it all that much when I was a kid and if I came across it at a social event (i.e. potluck, family reunion, or picnic) it always seemed to be dripping in dressing with limp, soggy vegetables. Cabbage in general has never been very high on my list of favorite vegetables, but in the last few years, I have been making an effort and have since learned to like the crunch! I don’t hesitate to add this version to my BBQ Chicken Sandwiches and coleslaw is so darn pretty on the plate, wether I eat it or not, I like to make it and serve it.
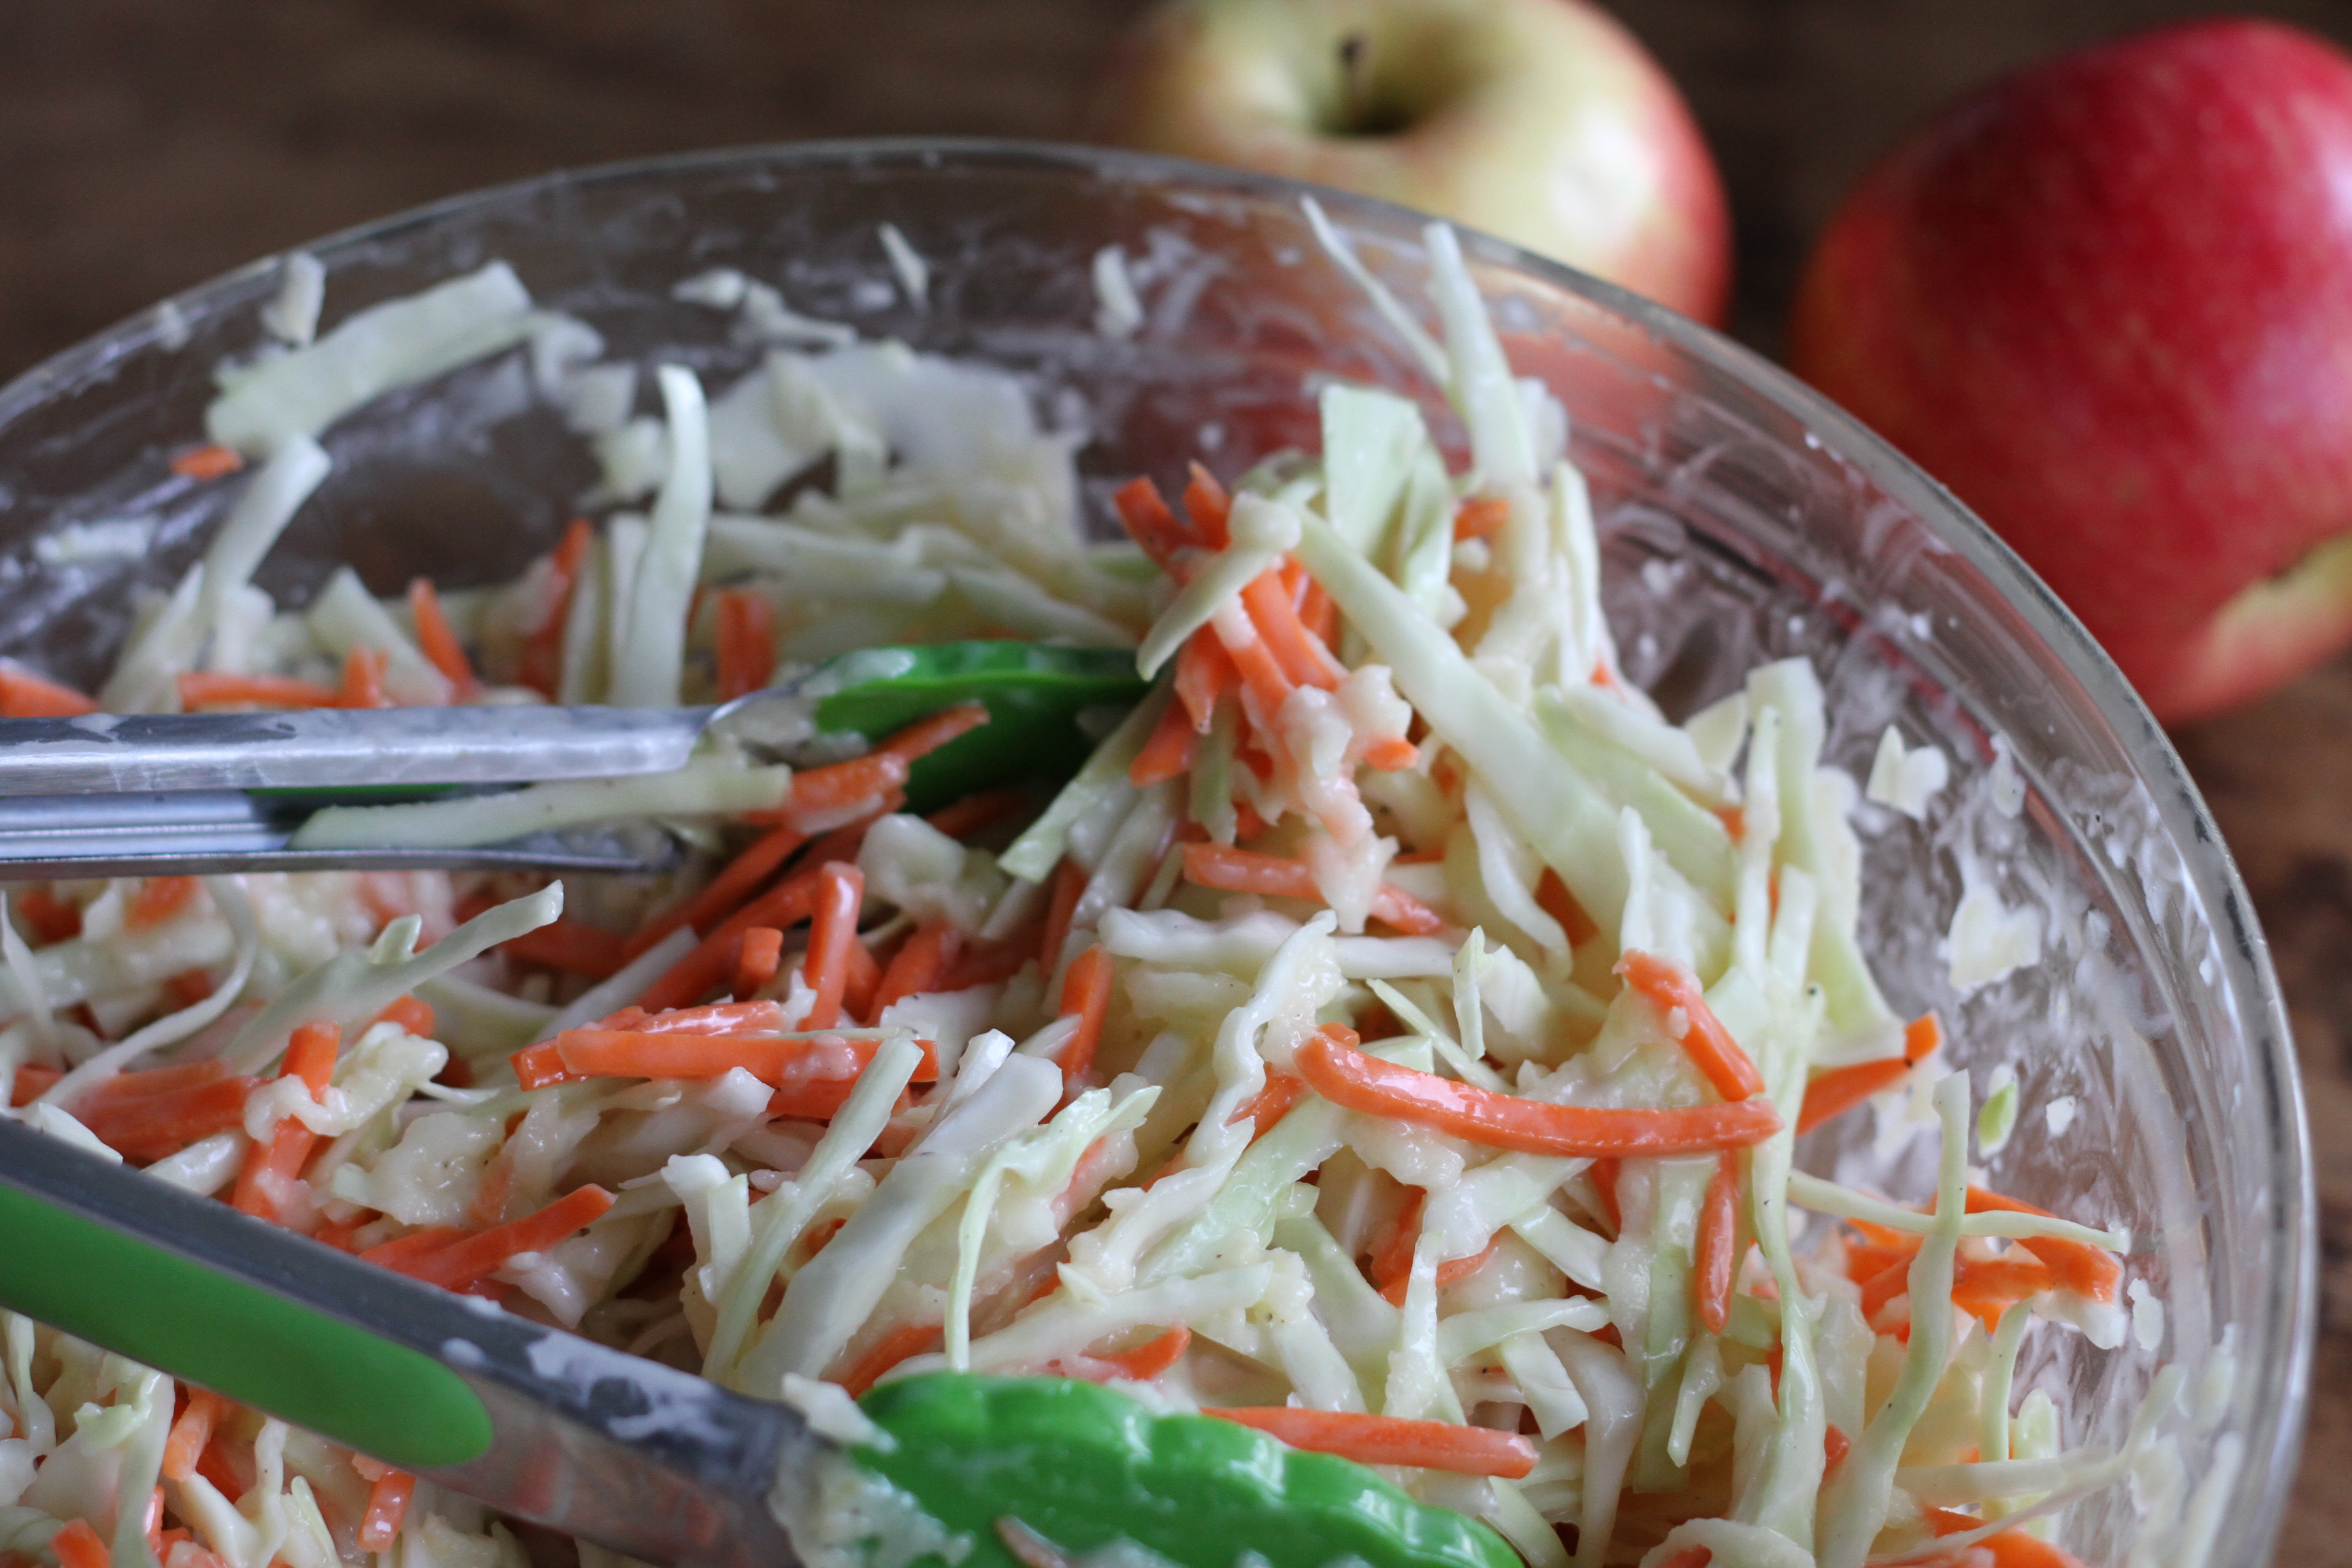
When apples are in season, this is the one I like to make. It is the very first coleslaw recipe I ever made waaaaaaaaaaaay back in my twenties and it is still my favorite. Apples and cabbage are paired up together all the time with pork chops and roasts and other applications where they are actually cooked together. I thought it was kind of genius-and painfully obvious-that they would be great together in a cabbages’ most famous role-coleslaw!! It just makes sense, ya know?!
And they do. Taste good together, I mean. Perfectly matched with a dressing that is just a smidge sweeter than your classic coleslaw and with more simple flavors to let the apple-i-ness shine through. Like its more classic cousin, this Sour Apple Coleslaw goes great with just about anything grilled or roasted, but brats are particularly fantastic. When we are surrounded by apple cake and apple pies and apple strudel and baked apples and have crazy apple overload from September through November, this is a refreshing and healthy way to vary autumns favorite fruit. I guess I can’t really say that I am not a coleslaw fan anymore, huh…?
 One Year Ago: Caramelized Onion Crostini
Two Years Ago: Spice Muffins W/Pumpkin Chocolate & Streusel
Three Years Ago: Veggies W/Pasta
Sour Apple Coleslaw
Adapted from Wolfgang Puck
With just a few ingredients, this salad comes together fast. It is wonderful with roast chicken. Make sure that your apples are nice and firm and crunchy. Mushy apples make for a mushy coleslaw.
1 bag (14 oz) shredded cabbage and carrot mix or 1/2 small green cabbage shredded and 2 large carrots, scraped and shredded
2 large tart apples, such as fuji or granny smith
1/2 c mayo-I use canola
2 T apple cider vinegar
3 T honey
salt and pepper to taste
Whisk the last four ingredients together to make the dressing, starting with just a half teaspoon or so each of salt and pepper. You can always add more later. Set it aside and dump the cabbage and carrots in a large bowl. Peel and core the apples and either shred them on the largest side of your box grater, or cut them into thin julienne strips. If you have a mandolin that will do this, that will be even better. Immediately toss the apples with a the cabbage and drizzle on a bit of the dressing, being careful not to squish the apples into applesauce! Taste for seasoning and dress until the slaw is just barely coated with dressing. Enjoy!
 I am pausing in the middle of my Back To School Series and my self proclaimed honey phase, to post this recipe. We have ben devouring it at our house. And I do mean devour, with no conversation and just the sounds of lips smacking and forks hitting the plates echoing off the dining room walls. My 18 month old polished off a plate the same size as mine. I’m not going to promise you that your family will like it because it has a bit of a kick to it and I know that not all kiddos go in for that kind of thing. However, the heat is easily controlled so you could absolutely make this with no spice at all. But what the hay! We all need a bit of zip in our lives, right? No one wants to waste their time on food that is just…okay. Our meals should be GREAT as often as we can make them that way!
The fact that this is fast, simple, and reliable is what deems this a shareable recipe on this blog. Again, I will say that I don’t post anything here that I haven’t made several times myself and this one is now in our regular weeknight rotation. The first time I threw it together, we all ate it so fast I didn’t even have time to think about what I had done! It is not super sweet and also has a bit of tang. The combo is so wonderfully appealing. I would recommend this if you are looking to expand your family’s culinary horizons, but don’t want to serve something really unfamiliar. If are cooking for just one or two, this reheats great but is good cold right from the fridge too. You could make all your co-workers crazy jealous (and hungry!) by nuking this in the break room!
 One Year Ago: Tangy Chicken Salad W/Avocado
Three Years Ago: Tator-Tot Hotdish
Sweet & Spicy Shrimp
This recipe is adapted from another source, but I have no idea what it is. I have changed it quite a bit, but the original inspiration is not my own. It IS however, great over brown rice, making it gluten-free. This would also be fantastic made with chicken if you are not a fan of seafood.
1 lb shrimp, peeled and deveined
2 large carrots, scraped and cut into large matchsticks
1 sweet bell pepper-yellow, orange, or red, sliced
2 cloves garlic, minced
1 T freshly grated ginger
1/2 lb cooked linguine noodles, soba noodles or 4 c cooked brown rice
Sauce:
1/3 c OJ
1/4 c apricot or peach preserves
3 T ketchup
2 T apple cider or red wine vinegar
1 T soy sauce
the zest of 1 orange
1 tsp red curry paste
1/2 tsp red pepper flakes (1/4 tsp if you are worried about the heat)
Combine all ingredients in a large measuring cup. Set aside.
In a large skillet, quickly sauté the carrots and peppers in 1 T of olive oil over medium to med-high heat until crisp tender. Add the garlic, ginger, and shrimp and toss together quickly until the shrimp are just barely opaque, a minute to a minute and a half. Pour the sauce in and let the whole mixture bubble together until hot, another 2 minutes or so. Dump in the cooked noodles and toss together, or spoon over plates of rice. Garnish with chopped scallions, chopped parsley, or both.
 One of my favorite things about food are the associations that you make with it. A certain dish or meal that makes you think of a time or place in your life, triggering a memory.
I love that.
This is one of those foods for me. Years ago, while catering with two especially lovely ladies, I learned this super quick, make-ahead dish. One bite takes me back to those crazy, fun years of my youth. When I found out that the secret to making them so blasted addicting was taco seasoning, I couldn’t believe it! How simple! How easy! How genius. It lands on the Back To School Series list because it travels well and can be made the night before you need it; two things that make it prefect for the inevitable early morning dash to the school bus.
Today’s recipe is just one way to use up that taco seasoning we talked about a few days ago. You can sprinkle that spice mix in chili, marinade chicken or skirt steak with it before grilling for fajitas, or fold it into your favorite hot and cheesy dip. This sandwich roll-up is just to get you started. Please don’t limit these to just the lunchbox! These make a great snack for a party. Since you can make them the day before, it frees up your time to do other things. You just slice them up and set them out on a pretty platter. I have made these for hundreds of people and for just a few. They are so easy, the effort is about the same and they are usually one of the first things to go! My kids think it is kinda special to have them show up in their lunches, but what they don’t know is that it is just as easy as pb & j. And just a bit more memorable.

 One Year Ago: Oatmeal Caramel Bars
Two Years Ago: Summer Berry Pudding
Three Years Ago: Good Lookin’ Man Potatoes
Spicy Meat & Cheese Roll-Ups
Assuming that you aren’t making these for dozens of people, you will have leftover spread. It is fabulous smeared on a hamburger or as a quick dressing and tossed with hot roasted potatoes.
1 c mayo
1 T taco seasoning
thinly sliced ham, turkey, or roast beef
sliced cheese-cheddar, colby, provolone, or swiss
baby spinach
large tortillas-any variety
Mix together the mayo and taco seasoning until well incorporated. Smear thinly, but evenly over the surface of the tortilla, nearly to the edges.
 Layer on your meat, then cheese, then spinach last.
 Roll this up as tightly as you can.
 If making these ahead of time (as in the night before a party or school day) wrap individually in plastic wrap, or if you are doing several, store in a large zip top bag and chill overnight.
 When ready to serve, place toothpicks across the roll-up about an inch apart and trim off the ends, if desired.
 Slice between the toothpicks, keeping the roll-up secured and together.
 Plate or pack them up and enjoy!
Homemade Taco Seasoning Mix
Brittany wrote this on 4 September 2013![]() beef, garlic, gluten-free, onions, turkey
beef, garlic, gluten-free, onions, turkey
 This is just a simple recipe I am sharing. No grand story, no anecdotes. Just a practical list of ingredients that you may use to replace the chemical laden alternative in the little pouches on the grocery store shelves. But remember. This will not taste like the salty packets you are used to, but rather will be smokey and peppery and straight up earthy flavor. Enjoy the welcome contrast of the pure herbs and spices.
Two Years Ago: Basic Granola
Three Years Ago: Spiced Peach Jam & Stuffed Shells
Homemade Taco Seasoning Mix
This is a good list to start with. Adjust quantities to suit your own tastes. I like to buy my spices in bulk and then transfer them to their own container. These are perfect for that! Easy to clean and should last forever!
4 T chili powder
2 T cumin
2 T paprika
2 T dried oregano
1 T onion powder
1 T garlic powder
2 tsp kosher salt
1 tsp black pepper
1/2 tsp cayenne pepper
Mix all ingredients together and store in an airtight container. Add 3 level tablespoonfuls of the mix and 1/2 c of water to 1 lb of ground beef or turkey that has been cooked with 1/2 diced onion. Stir well and let simmer a bit for the spices to rehydrate, distribute, and the water to evaporate. Taste for seasoning and add salt if needed.
Grilled Ribeye W/Rosemary & Dijon
Brittany wrote this on 31 August 2013![]() beef, dijon mustard, garlic, gluten-free, rosemary
beef, dijon mustard, garlic, gluten-free, rosemary
 I’ve said it before and I’ll say it again: When it comes to steak, I am kind of a purist. I know that my past grilled beef recipes kind of contradict that, but honestly, as my Father’s daughter, I like it grilled with salt and pepper. So much that 99.9 percent of the times I order steak at a restaurant, I double check that they aren’t going to fancify (yes, that is a real food word…) my meat. I like to actually taste the beef itself and that can be difficult when it is smothered in too sweet sauces, salty spice mixes, or *gasp* God forbid, cheese! Cheese and beef have a place in this world people, but that is only on a homemade roll and preferably with the Rocky statue in the background. Read: Philadelphia.
But! I was throwing dinner together recently and was looking for a way to give my bea-U-tiful ribeyes a bit of a creative boost in preparation for this Labor Day weekend. Now, of course, when it comes to steak, a ribeye is about as good as it gets. Lots of fat marbled through, i.e. flavor galore, and a moderately tender cut if it is cooked around medium rare. Typically, it is one of my favorite steaks. I decided to experiment with some leftover herbs (leftovers-the great catalyst to wonderful creations) and struck gold.
Mustard and herb gold, that is! Just a few ingredients gives this steak an earthy boost that doesn’t mask, but enhances the wonderful beefy taste of the meat. It doesn’t do it with salt or super strong sauces. It just simply tastes like the best steak you have ever had. Spectacular. I would even go so far as to say that I would have no reservations about serving this to my fellow steak purist Dad. It is that good. The perfect example of how simple dishes can be the best. No frills required.
 Two Years Ago: Panzanella Salad
Three Years Ago: Dippin’ Biscuits
Grilled Ribeye W/Rosemary & Dijon
Serve this with roasted potatoes and an enormous salad piled high with garden tomatoes and tangy vinaigrette. A slice or two of watermelon wouldn’t hurt anything either.
4 ribeye or T-bone steaks
1 T dijon mustard
4 cloves minced garlic
1/4 c extra virgin olive oil
2 T fresh rosemary leaves, removed from stems, but left whole
1 tsp kosher salt
lots of black pepper-to taste
Combine all ingredients in a large zip-top bag, or bowl, tossing over and over to make sure that the meat is evenly coated. Let marinate for 2 hours, turning the steaks occasionally to redistribute the rosemary. When ready to grill, remove the large sprigs of herbs (they will burn) and grill over direct, medium high heat. Sear one side for 3-4 minutes for steaks that are at least 1 inch thick, a minute less of they are a bit thinner. Turn once, searing the other side for another 3 minutes, or until medium rare. Let rest for 5 minutes before cutting.
Grilled Steak W/Balsamic Drizzle & Bleu Cheese
Brittany wrote this on 27 July 2013![]() balsamic vinegar, beef, cheese, gluten-free
balsamic vinegar, beef, cheese, gluten-free
 Years ago-and I just realized how many posts I begin with those words-I watched Giada make something similar to this recipe. I like my steak straight up and pure; grilled with just salt and pepper, but every once in awhile, I recognize that change might be good. I try to embrace change in my cooking and menus and I am always up to doing something different. This Filet Au Poivre was a change for me and is now part of my regular ‘special occasion’ rotation. This one is too.
The summer before my daughter was born, my husband and I went on a hiking trip to the Smokey Mountains with another couple. We were supposed to camp for a few nights while we hit the trails, went site seeing, and basically marveled at the mountains. It was beautiful, amazing, and just thinking about it makes me want to go back! Unfortunately, on day two, we got word that an enormous summer storm was to hit our area. Not wanting to sleep in a wet tent, nor pack up soggy gear the following day, the four of us threw everything in the car and headed into Pigeon Forge to find a hotel for the night. By the time we got to town, it was pouring. As in, the end times type of pouring. We were more than a little bummed about the trip when we happened to glance at a sign for mountain cabin rentals. Our visibility was rapidly deteriorating so we quickly pulled over and our brave husbands ventured into the monsoon to inquire.
Eureka! They had a vacancy! We drove straight up the mountain for almost an hour and darted into the coolest cabin we had ever seen. Two bedrooms, a kitchen, a hot tub-so neat!! It was fresh and clean and soooo much better than a floating down the mountain in our sleeping bags. We ran around the house like kids, while the storm raged outside. We were so grateful we weren’t in a tent at the top of the mountain, but an air conditioned, quant little cabin on the top of the mountain! It was late so we played cards and snacked and crashed, only to wake up the next morning and unanimously agree to extend our vacation just so we could stay one more night there! And we did! We shopped all day in Pigeon Forge, bought oodles of pottery, and ate at the gristmill in the middle of town. If you have ever been there you know how awesome the food is. Being the resident foodie of the group, I told them I had dinner covered. I needed something worthy of that spectacular day, but able to be made with limited ingredients, prep, and utensils. This steak is what we had for dinner.
I have no idea what else we ate that night, but it was the perfect ending to a fantastic couple of days. It tastes special, but is really just a stellar combination of great flavors. Simple and easy. Definitely add it to your list of things to whip up these last weeks of summer. Or even last minute on the top of a mountain.
One Year Ago: Steak Salad
Two Years Ago: Zucchini & Corn W/Basil, Chocolate Chip Cherry Snack Cake, The Best BBQ Chicken
Three Years Ago: Basic Wheat Bread, Three Lemon Chicken, Turkey Meatballs, Margarita Pasta Salad, California Chopped Salad, Matt’s Pancakes
Grilled Steak W/Balsamic Drizzle and Bleu Cheese
Adapted from Giada DeLaurentiis
This recipe makes enough syrup for 6 steaks. If you aren’t cooking for a crowd, it is absolutely outrageous drizzled over a salad with grilled chicken and your extra bleu cheese.
6 steaks of your own choosing (filet, rib-eye, and NY strip are the best for this)
1 1/2 c balsamic vinegar
3 T sugar
crumbled bleu cheese
In a small, heavy bottomed sauce pan, bring the vinegar and sugar to a low boil over medium heat. Stirring often, let continue to cook down until syrupy. The length of time this will take depends on your pan, what kind of balsamic you are using, and your stove, but about 15 minutes is close. Don’t cook it too long! It will thicken a bit as it cools too. If you cook it too long, you will have balsamic candy-yummy, but not pourable over your steak! Meanwhile, salt and pepper your steaks and grill them on a screaming hot grill, about 4 minutes per side for medium rare. Let the steaks rest, and then drizzle with balsamic syrup and sprinkle with bleu cheese. Enjoy!
Iceberg Slaw
Brittany wrote this on 13 July 2013![]() buttermilk, gluten-free, lettuce, yogurt
buttermilk, gluten-free, lettuce, yogurt
 Everyone needs a fall back recipe. Something that is cheap, easy, and goes with everything. Like a perfume that you can wear to the beach or to brunch with your in-laws. This, my friends, is one of mine.
It has very few ingredients, all of which I generally have on hand. And hello!! It uses iceberg lettuce! Other than a wedge salad, how many recipes do you come across nowadays that actually call for iceberg lettuce. Not many. For several reasons I’m sure, not the least of which is the fact that iceberg is practically flavorless and has little or no nutritional value. Sounds so appealing, doesn’t it? But, in this case, that is OK. In fact, it is exactly what you want. Because iceberg lettuce has something you need to make this recipe a success.
Crunch.
Crunch makes all the difference in the world as we are looking for texture here, people. You could use romaine if you wanted, but it just doesn’t shred like a good head of iceberg. The beauty of this is that you are taking something that is…well…rather boring, and making it pretty great. And you are doing it without throwing it in a bowl all ripped up and looking like a cheap salad bar item. No minute pieces of carrot and purple cabbage here kiddos. We are going for pure. Simple. Fresh. Pale. Like spa food. I mean, practically.
 One Year Ago: Snickerdoodles, Sour Cream Cherry Bars, Maple Glazed Ribs, & The Best Banana Pudding
Two years Ago: Sweet & Tangy Ribs, Cobb Potato Salad, Plum Crunch, Pasta Scuie Scuie, & Sweet and Spicy Salmon
Iceberg Slaw
Adapted from Martha Stewart
This side goes great with pretty much anything, but grilled food is particularly good. Also, this is totally bare bones kinda food and that is why it works so nice. But if you have some grated carrot laying around, throw it in there.
1 head iceberg lettuce, cut into fourths and sliced thin into shreds
1/4 c sour cream or plain yogurt
1/4 c buttermilk or milk
1 tsp dried dill
salt and pepper to taste
1 T chopped fresh parsley, optional
Whisk all ingredients together, except the lettuce. Taste for seasoning. Drizzle just enough dressing on the lettuce to coat-you will have leftovers. Toss gently and taste again for seasoning. Serve immediately.
Classic Potato Salad
Brittany wrote this on 24 June 2013![]() chives, dijon mustard, eggs, gluten-free, mayo, pickles, potatoes
chives, dijon mustard, eggs, gluten-free, mayo, pickles, potatoes
 If you have glanced at your calendar lately, you know that July 4th is right around the corner. But really, whether you are celebrating Independence Day with family and friends, or you have a slew of pot luck dinners and barbecues to attend, potato salad always seems to make its way into the line-up!
As well it should! With the exception of the fact that it has to be kept chilled, it is easily the most popular side with grilled food. It practically begs to be spooned onto a paper plate. I would like you to consider skipping the deli counter to pick up your vat-o-salad, and instead, make this!
I learned how to make potato salad from my parents and have made very few modifications to the recipe over the years. There was no pickle in their version, but my family and I kind of love it this way, so it stays. I was born in the 70’s so yes, my potato salad has the quintessential slices of hardboiled egg sprinkled with paprika. The pictures on this blog show us eating it with dinner (which we did, that wasn’t staged or anything…:) but if I was bringing it as a dish to pass, I would layer egg prettily over the top and dust the whole thing with red. And you know what? It is usually the first thing a guest dips a spoon into. And you know why? Because potato salad is safe. It is safe and expected. Like…Smurfs. Very safe. It rarely contains weird ingredients, and you know that it will at least be passable.
But the thing is…you see…is that I don’t really like passable potato salad. I have had it with hunks of onion in it that were the size of quarters, so dry it was hard to chew, and so bland I could have been eating cardboard salad and not known the difference. Potato salad with so much pickle relish in it that it should have topped a hot dog! And potato salad that was actually sweet! As in, with the addition of sugar! For shame! We’ve all been there and I know that you know what I mean!
Good potato salad is not hard, people! It isn’t complicated or tricky. It has few ingredients and should be straight up, classic, and American. If I could insert a little electronic image of a flag waving in the breeze here and a recording of me singing the National Anthem, I would. You can vary it a little, but potato salad shouldn’t be scary; nor should you have to play ‘guess the ingredient’ when eating it. Just simple. Just basic. Just good.
And I swear that if you hum ‘Hail To The Chief’ whilst whipping this up, it will taste even better.
 One Year Ago: Baked Oatmeal
Two Years Ago: Rum Raisin Rice Pudding & Garden Salsa
Classic Potato Salad
There are a few additions that I consider acceptable when making a classic potato salad. Finely diced sweet bell pepper, a small amount of minced onion, and/or a bit of finely diced celery. Anything more than that and you are too far out of ‘classic’ territory and you are into something else entirely. That is fine, just as long as you recognize it as such. This potato salad, for example, isn’t trying to be classic but instead is putting its differences front and center. Bottom line? Classics are that way for a reason, but don’t be afraid to try something new.
3-4 pounds russet potatoes, peeled and cut into bite sized chunks
2 T red wine or apple cider vinegar
2 T extra virgin olive oil
salt and pepper
3/4-1 c good mayo
1 T yellow mustard
3 hardboiled eggs, diced, plus more for garnish, if desired
1 T snipped chives
1/4 c minced dill pickle
In a large saucepan, cover the potatoes with an inch of water and simmer gently until cooked through and a fork pierces easily, but the potatoes do not fall apart. Drain them gently, splash the vinegar and olive oil evenly over the potatoes, season them with salt and pepper, stir gently, and chill. DO NOT SKIP THIS STEP! This is what gives all potato salad incredible flavor! You won’t taste the vinegar and oil specifically, but it means the difference between flat, bland potatoes, and a salad that is addictively good! Once chilled, add the rest of the ingredients, stirring carefully so as not to break up the potatoes. If your salad seems a bit dry, add a bit more mayo, or a tiny splash of milk. Taste for seasoning. Garnish with sliced egg and sprinkle with paprika if desired.
Love a Good Recipe?

Then you’ve come to the right place! I’m Brittany, and I share tested, trusted recipes you’ll love. I prepare & photograph food, obsess over the perfect recipe, and enjoy grins of delight when I serve up something awesome. Enjoy!


