 Brittany's Pantry
 I know pumpkin has been on the radar for a month or so, but with Thanksgiving right around the corner, it seems that now, more than ever, it has the potential to be a star at your table. Yes, I am talking about pumpkin pie and soon I will share with you my favorite recipe for it but for now, I wanted to give you a quick How To on baking your own pumpkins. Making mashed pumpkin for baking is extremely easy and inexpensive. If you have never tried it, welcome to your tutorial! Doesn’t that bowl look awesome?! I love the color of pumpkin!
Just to be clear, let me reiterate that using canned pumpkin for any recipe at any time is just fine. I do it myself, especially during the off months when I can’t get a fresh pumpkin and I want to make muffins or pancakes or something. If you are reading this and thinking to yourself, “Yeah right. I will never do this. Bring on the canned stuff!” that is totally OK. But if you ever really wanted to make something totally from scratch and you kept seeing these pumpkins at the farmer’s market/grocery/pumpkin patch and wondered how hard it would be to do, let me put your mind at ease. It is ridiculously easy. Check it out! So this is a sugar pumpkin. Or pie pumpkin or baking pumpkin. It depends on how they are labeled where you pick it up but they are usually a little darker in color than your regular carving pumpkin a bit smaller than a volleyball. These pumpkins are less stringy and the flesh has a sweeter flavor and smoother texture than your average garden pumpkin. They are also much easier to manage than an enormous Jack-O-Lantern size pumpkin!
 I have two here and they have just been washed off. Please please please rinse of your pumpkins, watermelons, cantaloupes, honey dew, etc before you cut them up and eat them! No, you don’t eat the outside, but that is the part that is now sitting on your clean counter and you have no idea who has handled it, where it has rolled around, what it was exposed to, or how far it has traveled! I don’t want that unknown grime on my cutting board. Eew Eew Eew.
 Cut them in half from top to bottom. Over the years I have discovered this seems to be the easiest way to get the seeds out and scoop out the flesh. Use a large sharp knife and be very careful! Some varieties of pumpkins have a thicker shell or rind on them than others so this may be easy to do and it might be tough. I usually have my husband cut them in half for me because his hands are bigger, he has better upper body strength to keep the knife steady, and also so I can give him smooches of thanks when he is done. Ahem.
Anyway, scoop out the guts and save the seeds! This is your opportunity to make Roasted Pumpkin Seeds, an extremely healthy snack! Don’t let the opportunity pass you by to try these if you have never done it! It always makes me feel all resourceful and stuff. Scrape the stingy membrane away with a spoon until the inside is smooth and clean.
 Finish cleaning all your pumpkin halves and then place them on a sheet pan lined with foil.
 Place them cut side down. I have discovered that they steam nicely this way instead of actually roasting. This is perfect since you want the flesh to be nice and smooth, not browned or crispy on the edges. Bake the halves in the oven at 350 degrees for 45 minutes to an hour, or until the flesh gives easily when pierced with a knife. Some pumpkins have a harder shell on them than others so you may need to turn a half over to see if it is nice and soft.
 Scoop the flesh out of the shell and into a large bowl.
 Isn’t that a beautiful big bowl of pumpkin? Mmmm. Smells good.
 This is where people differ a bit. Some people put the pumpkin in a food processor and whiz till it is baby food. I prefer to just mash the heck out of it with a potato masher. If you have cooked your pumpkin until it is good and soft, it will smooth out just fine. See?
 Nice and smooth. Now just cool it to room temperature and chill in a covered container in the fridge. If your pumpkin collects a bit of moisture around the edges, just pour it off. I like to do this while it cools in a bowl on the counter. You don’t want it to be soupy so I don’t like to stir in any of the excess water that surfaces. But it really doesn’t matter. Unless your puree is really watery, it should be just fine as is. Measure it out just like you would the stuff from the store in a can! Mashed pumpkin will last at least a week in the fridge but feel free to freeze any you don’t use. It is super easy to just thaw it out and bake with it at a later date.
 Lovely. Now you can make Pumpkin Pie Muffins or Marshmallow Pumpkin Dip. You could also make Sweet Potato Biscuits, but replace the potato with mashed pumpkin. Scrumptious!
Stay tuned for more recipe ideas to use up your pumpkin puree!

Salmon Nicoise
Brittany wrote this on 7 October 2011![]() avocado, dijon mustard, eggs, garlic, gluten-free, green beans, lemon, potatoes, salmon, tomatoes
avocado, dijon mustard, eggs, garlic, gluten-free, green beans, lemon, potatoes, salmon, tomatoes
 It isn’t you. Do not be alarmed. Don’t bother to rub your eyes and blink rapidly. What you are seeing is real. This is most definitely not an autumnal dish. I am slightly embarrassed to even post this right now as it uses several ingredients that aren’t exactly in season and can be hard to find when the temperature dips below 50 degrees. But let me plead my case…
The temperature right now is definitely not below 50-in fact it isn’t even below 80! And the thought of roasting something in the oven for several hours or putting together a heavy, multi-course meal makes me want to find the nearest couch and put my feet up. The other day we grilled brats and ate them with beans. Summer is kind of holding on here folks. That is why I decided to take advantage of the last of the available tomatoes, the Yukon gold potatoes that are in season now, and the haricot verts (green beans) that are most definitely NOT in season, but my store had anyway. This is a totally summer dish, and while I wouldn’t serve it in January, a little bending of the rules is allowed. A summer supper for summer temperatures.
This meal is as scrumptious as it is beautiful. Traditionally, it is served with fresh tuna instead of salmon, but…well…99 percent of people would rather eat salmon than tuna. Wouldn’t you? The combination of flavors is so fresh and so flavorful, most people are a little shocked when they eat it the first time. Then they usually say, “This is the best salmon I have ever had.” Then I smile, because I totally agree with them. If there is any one way for you to eat salmon the rest of your life, this is it. This is easily up there with one of my favorite meals of all time. Great for a group and just right for a family meal too. Just adjust the quantities. Even though I am so full right now having eaten what is pictured above, I could fill my plate again when I look at the picture above. Sooo goood. Just perfect for the freakishly warm day in October, coming to a weekend near you.
 One Year Ago: Apple Cider Syrup
Salmon Nicoise
Adapted From Ina Garten
This recipe serves 4-6 people. Leftovers are outstanding, cold, straight from the fridge.
2 1/2-3 lbs salmon fillets, rinsed and patted dry
In a small bowl, whisk together:
3 lemons, zested and then juiced
1/4 c olive oil
1/4 c Dijon mustard
1 tsp salt and 1/2 tsp pepper
4 cloves fresh garlic minced
Place salmon in a shallow, foil lined baking dish and pour sauce over top. Let sit for 15-20 minutes then bake at 450 degrees for about 15 minutes, or until fish is just done and flakes in the middle. Remove and let sit for a few minutes while you assemble the salad.
Yukon Gold Potatoes, cooked and sliced
Kalamata Olives
Tomatoes
Hard Boiled Eggs, cut into wedges
Green Beans, steamed and drained
I don’t have quantities for you because it varies depending on how many you make it for or how much you like tomatoes or beans or whatever. Assemble your platter with the roasted salmon, arranging the rest of the ingredients in piles.
Mix together:
1/3 c olive oil
3 T white wine or champagne vinegar
1 tsp Dijon mustard
salt and pepper
Whisk well and drizzle over the beans, tomatoes, and potatoes. Serve.
Note: There are a few ways to do this dish. The salmon, beans, and potatoes can all be warm, or everything can be made ahead of time and you can serve the whole she-bang cold. This is great anywhere in between so do what you have time for. Also, I like to use asparagus in place of the green beans when it is in season in early spring. The addition of a sliced avocado or two is also absolutely stellar. Any kind of tomato works. Little cherry tomatoes, wedges of big tomatoes, doesn’t matter. It all tastes wonderful.
How To: Make Vinaigrette
Brittany wrote this on 15 September 2011![]() balsamic vinegar, gluten-free, honey, How To, lettuce
balsamic vinegar, gluten-free, honey, How To, lettuce
Hello again! I have returned after a long vacation, international travel (we went to Canada), and some life changing events! I should probably let you all know that my husband and I are expecting baby #3 next spring, just in case you wonder why the food I am cooking might be a little random. If I post a recipe for garlic ice cream in February, now you know why. Also, I can pretty much guarantee some future posts about homemade baby food!
So thank you for your patience! With the exception of some nausea that may interrupt the regularity of my recipe posting, food will once again come at you more frequently. Just in time too! We are officially at the start of my favorite season-FALL! Even if the 50 degree day today didn’t convince me of it, the acorns hitting my roof like hail would definitely clue me in! I am positively giddy with all the recipes I want to test, create, and make again to share with all of you! Spices, roasting meats, baked fruit concoctions, pastas, and of course, holiday food! Just in case you are cringing at the future calorie total of all this food, don’t be alarmed yet. While I can guarantee that there will be dishes and desserts that are definitely…well…indulgent-i.e. Farmer’s Pasta with four cheeses will make you absolutely swoon!-I just don’t cook that way all the time. There will be plenty of food that won’t weigh you down during the chilly months! As for today’s recipe, making homemade salad dressing is one of those things that I think people are kind of scared of! Am I right? Years ago, when I was younger, thinner, and less wise, I sent a summer working in a fine dining restaurant. I was a daytime sous (prep) chef and spent my mornings making salads and cassoulet, peeling 5 gallon buckets of onions, sneaking tastes of the chocolate ganache, whipping up chutneys and sauces, cleaning calamari, peeling and deveining shrimp, roasting insane amounts of garlic potatoes, tackling a plethora of other tasks….and making salad dressings. When I was first given a stack of secret recipes and told to “make these” I wasn’t too alarmed. The top of the list was a ranch-style dressing and then a bleu cheese. Mmmm…bleu cheese dressing. I had sort of thrown those together before so no surprise there. But the third recipe in the pile was French. I just stared at it and blinked. Homemade French dressing? Seriously? Did people really make this stuff themselves? Apparently they did! I skimmed the recipe, wondering what all went into French dressing other than something red and obviously some sugar. Thirty minutes later with my half dozen bowls of homemade dressings, I was totally converted. Made from scratch dressing, French or otherwise, was absolutely fantastic. It made a big impression on me and even though I do not currently have a fridge full of my own dressing creations, there are a few that I rarely purchase. A vinaigrette is one of them. It literally takes just seconds to make and can be thrown together in the exact quantity you need. Fresh and fantastic every time with only a few pantry ingredients needed.
These cooler temperatures are producing another round of fresh garden greens and radishes. If you wonder about the sudden reappearance of lettuce at your Farmer’s Market, it is because most greens thrive in chilly weather. This is the perfect opportunity to take advantage of this spring vegetable! It won’t be back for long! A simple vinaigrette on tender greens, thinly sliced apple or pear, maybe some purple onion, some toasted pecans or walnuts, and a handful of dried cranberries make a perfect fall salad. Healthy, beautiful, and with a bit of roast chicken or bacon and crumbled bleu cheese, a satisfying supper. Light and easy, it will help off set the affects of that four cheese pasta I was telling you about. But we will worry about that later!! One Year Ago: Good Lookin’ Man Potatoes
Simple Vinaigrette
This recipe is really just a method, as most of my How To recipes are. As long as you have a fat (olive oil) and an acid (vinegar or citrus juice) you can’t go wrong. Although I personally never make one with out a sweetener. I just love that whole sweet and sour combination!
I don’t really ever measure, but just in case you need a point of reference, I have tried to include measurements, or at least ratios, to give you a jumping off point. Feel free to alter as your tastes determine. Start off with the large bowl you are actually going to serve the salad in. Directly into the bottom of the bowl, add about 1 teaspoon of Dijon mustard. This is totally optional. I like the flavor it adds and the mustard will allow your dressing to emulsify, but it can easily be skipped. Please note that if you don’t like mustard, you don’t really actually taste it in here. Next add your sweetener at about 2-1 or 3-1. So if you add 1 tsp of mustard, drizzle in 2 tsp or even 1 T of honey. Whisk together in the bottom of the bowl. Next add your acid. In this case, red wine vinegar. Any good vinegar or citrus juice will do. About 2 tablespoons.
 Whisk it all well. Finally, your fat. Extra virgin olive oil is perfect because you will taste the fruity flavor of it in this dressing. You need about 1/4 of a cup. Fat to acid is about 2-1, but add more vinegar if you like the tangy taste.
 Whisk it all well.
 Season with salt and pepper and then taste it.
If it is too creamy, add a few more drops of vinegar. If it is too sour, add just a bit more honey. Tweak it just how you want, but use small incerments. I like to do a final taste on an actual piece of lettuce. Then I know just how the flavor will be when I serve it. And you are done!! This whole bowl can set out on the counter for several hours until you need it. Just add the lettuce to the bowl and toss it together. This is enough dressing to lightly dress a 6-8 oz package of greens. Don’t forget that this vinaigrette is so easy to change. Use a citrus juice instead of vinegar. Try maple syrup and balsamic vinegar in place of the honey and red wine vinegar. Also, feel free to triple the amounts and store in the fridge to use for several weeks. Just remember to use a light hand at first. You can always add more if you need to!
Enjoy!
 Summer is drawing to a close. There. I said it. Sorry to burst your bubble, but regardless of what the temperature is where you live, the start of the school year is a not so subtle signal that the long days of water skiing and sunscreen are all but over. For me, even though my daughter started school two weeks ago, Labor Day weekend will always be my cut off. In Minnesota, Labor Day is the last day of the State Fair and school, inevitably, always began the next day. Also, you may think I am crazy, but the temp drops and it gets significantly cooler on the same day. Even though I now live in central IL, I just keep mentally telling myself I have just a few days left before I pull out my turtle necks.
That was a figure of speech, by the way. I haven’t worn a turtle neck since junior high…
In honor of the end of summer, I have a few recipes for you that use up the last of the in season produce. The one I am giving you today is so fresh and flavorful and…well…gorgeous, that you can’t help but devour it. So even if it is only 55 degrees at your house, you can still make this, close your eyes, and pretend that you are still at the cabin by the lake.
Panzanella salad, from what I have learned, is an Italian peasant dish. They are usually comprised of dried out leftover bread, tomatoes, and whatever vegetables from the garden you can come up with. This version is a bit less random and with the addition of feta, it is definitely Mediterranean. Some panzanella salads rely soley on the juices of the tomatoes, a drizzle of olive oil, and some salt and pepper to dress the whole thing, but this one has an actual dressing to toss it with. My point is, is there are flavors in this that you just aren’t fond of, then skip it. As long as there is bread and tomatoes, you can add whatever you like or happen to have on hand. Heck! Tomatoes, bread, maybe some garlic, olive oil and salt and pepper and nothing else would be pretty fantastic on its own! Those are my favorite ingredients anyway!
One Year Ago: Dippin’ Biscuits
Panzanella Salad
Adapted from Ina Garten
This dish is obviously beautiful, but the picture does not do the flavor justice. The light vinaigrette pulls all the flavors together and the result is so absolutely addicting, I have yet to ever have leftovers. It is a wonderful addition to just about any menu and can stand alone as a light lunch or supper. It goes great with Grilled Yogurt Chicken and makes it a full meal.
1 small french baguette, cut into 1 inch cubes
olive oil
salt and pepper
1 hothouse cucumber, cubed *see note
2 large tomatoes, cubed
2 bell peppers, cubed (1 yellow and 1 red is pretty)
1/2 purple onion, sliced into quarter rounds
4 oz block of feta, diced
Vinaigrette:
2 cloves minced garlic
1 tsp dried oregano
1/2 tsp Dijon mustard
1/4 c red wine vinegar
1/2 c olive oil
salt and pepper
Toss the bread cubes with a drizzle of olive oil and some salt and pepper and toast on a sheet pan in a 375 degree oven until golden brown, about 15 minutes. Cool. Mix all ingredients of the vinaigrette together and set aside until ready-can be made several hours ahead of time. 20 minutes before you want to serve it, toss all ingredients together with the dressing. Toss every ten minutes or so and serve.
*Note: Hothouse, or English, cucumbers, have a thinner skin and don’t need to be peeled or scored. The are skinnier that regular cucumbers and come shrink wrapped in plastic to protect them. They also have less seeds. If you can’t find them, or just want to use a regular cucumber that is just fine. Just peel it and maybe scoop out the center a bit so it is easier to eat and digest.
Grilled Yogurt Chicken
Brittany wrote this on 5 August 2011![]() chicken, garlic, gluten-free, yogurt
chicken, garlic, gluten-free, yogurt
 I have had this distant memory of grilled chicken sort of floating through my head for some time now. It was a previous recipe I had tried several years ago, but for the life of me I could not remember how to make it. I could vaguely recall ingredients including chicken, yogurt, garlic, and cumin. For some reason kebabs kept coming to mind and I definitely remembered that it tasted awesome. So now, deep into ‘the transfer’, which is what I have been calling the never ending process of putting all my recipes into my computer, it was nowhere to be found. The goldenrod colored sticky-note with writing in black pen that I have been looking for for months now, I was positive was gone.
Mmmm…but that chicken was so good! Maybe I could just try and create it from memory and tweak from there…
Then I saw this recipe in Bon Appetit developed by this couple. Alas! It jogged my memory and I quickly grabbed the first piece of paper I could find (which just happened to be in my pile of recipes waiting to be filed) and started scribbling down ingredients. Suddenly, I stopped and really looked at the paper. Of course, it was a goldenrod sticky-note. I flipped it over and you know what it said? Yogurt Chicken Kebabs. Chicken. Yogurt. Garlic. Cumin. Grill. No wonder I couldn’t remember anything else. That was all there was to the dish!!
So after an exasperated sigh and a very disgusted “Are you kidding me?” I created this. I like it much better than my first few attempts, so I figure it is safe to pass it on to you! Now for all you who are cringing and saying to yourself “Yogurt? And chicken? That is way to weird for me!”-just relax. Have you ever come across a recipe for fried chicken that had you soak it in buttermilk first? This is the same concept. While the yogurt does impart a bit of tangyness to the chicken, its main purpose is making it moist and full of flavor all the way through, not just on the surface. Unlike similar recipes, this one is quite subtle. The flavors are soft and suggestive, not an in your face spice fest! Garam masala, an Indian spice blend, is a common flavor used in recipes like this, but I like to pick and choose my spices individually. Well, that and the fact that garam masala can be hard to find and I wouldn’t use it nearly as often as I use the separate spices that are in it.
So now, I can toss my bright little sticky-note in the recycling bin, as the recipe is now in my computer. Phew! One down, a bazillion to go. One Year Ago: Banana Bran Muffins
Grilled Yogurt Chicken
This chicken is absolutely scrumptious. It is very easy to throw together and goes with just about anything. I kind of treat it like a good, plain chicken that has a bit of personality. Cold leftovers are spectacular sliced on a sandwich or chunked onto a salad.
4 boneless, skinless chicken breast
1 c plain, low fat yogurt (not vanilla!)
3 cloves of garlic, minced
1 small or 1/2 large, onion, cut into large chunks
hefty drizzle of olive oil-maybe a 1/4 c
1 tsp kosher salt
1/2 tsp pepper
3/4 tsp ground cumin
3/4 tsp ground cinnamon
3/4 tsp ground ginger
1/2 tsp ground cloves
1/2 tsp cardamom (optional-although I highly recommend it)
Combine all ingredients in a large zip top bag, squishing everything to mix it well. Marinade the chicken, in the fridge for AT LEAST 3-4 hours(for good flavor), but can be as long as overnight if you like. Grill on a well oiled grill over medium heat (indirect if charcoal), taking care to remove the extra marinade as you go. I just pull the pieces out of the bag with a tongs and use my other hand to grasp the outside of the bag and scrape them off as I go. The marinade will burn if there is too much. Depending on the thickness of your chicken, it will take about 4 minutes a side. Don’t overcook it! You want it firm, but not dry. Let it rest for five minutes to allow the juices to redistribute before you slice it.
How To: Grill Pizza & An Anniversary
Brittany wrote this on 21 July 2011![]() balsamic vinegar, basil, cheese, garlic, How To, tomatoes, whole wheat flour, yeast
balsamic vinegar, basil, cheese, garlic, How To, tomatoes, whole wheat flour, yeast
 Its here! Its finally here! We have arrived at the 1 year anniversary of this blog! Can you believe it? Thank you to everyone for stopping by and I hope that you will continue to do so in the future!
You may have noticed that Brittany’s Pantry is now on facebook! Click on the link and ‘like’ the page for updates on what I’m cooking currently, extra tips and links, and of course quick access to new posts. A Flikr Photostream is also a new addition so feel free to click here to check out my journey to understanding photography!
I mostly want to thank all of you who have encouraged me through this project! I have had a wonderful year (even with of five bouts of pneumonia and remodeling the kitchen-and house-I am supposed to be cooking in for this blog) and I have learned a lot! Blogging is such an interesting medium to me and the outpouring of support from all of you, my readers, is greatly appreciated! So now onto the food. I know, I know. Get to the good stuff, right?
Toward the end of my college education, I found myself on an all but deserted campus in the middle of the summer; living alone, cramming through a chemistry class I had to take but really didn’t want to be in, working until dinner every day, and then coming home to an empty house. My roommates were out and about for the summer and my fiancee was stationed in Hawaii on a nuclear submarine. I was in central Wiscnsin, missing my man, my friends, and a house with better air conditioning. To fill in the voids of alone time, earn a few extra credits (and to break-up my daily post-suppertime Food Network marathons-I had just discovered cable) I signed up for a night class. Outdoor Grilling. Yup. My university offered classes like that. Cool, huh? It lasted for two weeks, started an hour after I got off work, and finished just as the sun went down. The students were split into groups, each group was given 3 or 4 recipes and all the ingredients to make them, and then we were turned loose! We all completed our recipes and then filled a table with the finished dishes, every member of the class getting a taste of every recipe from that day. I left stuffed to my ears every night. I ate steak salad for the first time in my life, grilled fruits and then doused them in homemade chocolate sauce, learned a bazillion different marinades-and learned how to grill pizza. With the exception of the chocolate sauce (that was seriously so good our group drank the leftovers), grilling pizza was far and away the most eye opening food we made. It was easy, quick, made with few ingredients and in my opinion, the best pizza I had ever had.
I still feel that way about grilled pizza. Like many foods, it just seems to taste better made outdoors. Since it requires you to work quickly, it forces you to keep it simple. Here’s how to do it!
One Year Ago: Basic Wheat Bread
Grilled Pizza
1 lb pizza dough, purchased or homemade (see below for recipe)
roasted tomatoes, purchased or homemade (see below for recipe)
8 oz fresh mozzarella, sliced thin
1/4 c fresh basil, chopped
olive oil
cornmeal, optional
Pizza Dough
This recipe is adapted from my bread machine user manual. Awesome.
1 c warm water
2 T olive oil
1 T honey or sugar
1 tsp salt
1 c white whole wheat flour or whole wheat flour
1 1/2 c bread flour
1 tsp active dry yeast
Add ingredients in the order recommended by your bread machine and select the ‘dough’ cycle. Can be refrigerated overnight if needed or frozen for several months. Defrost in the fridge and let rest at room temperature for 30 minutes before using. Alternatively, mix all ingredients together in a large bowl, turn out onto a floured surface and knead gently until smooth and elastic, 8-10 minutes. Put the dough back in the bowl and drizzle with just a bit of olive oil, turning the dough so that it doesn’t stick. Cover with plastic wrap and let rise in a warm place until doubled in size. Punch down and proceed with recipe.
Roasted Tomatoes
Adapted from Ina Garten
12 Roma tomatoes, halved and seeds scooped out
4 T olive oil
1 T balsamic vinegar
2 garlic cloves, minced
1 tsp sugar
Salt and Pepper
Toss all ingredients together in a bowl and dump out onto a foil lined baking sheet. Arrange tomatoes cut side up and roast at 375 for 45 minutes to an hour, or until tomatoes are caramelized. Use immediately, chill for a few days, or seal in a plastic bag and freeze for several months. These are great on pizza, sandwiches, diced and tossed with pasta, orserved on a platter of antipasto.
So… Lightly dust a sheet pan with cornmeal-I like the crunch it gives the final pizza. Plop your lovely dough in the middle of the pan.
 Gently press into a large rectangle. The bigger you go, the thinner the crust. Just don’t go too thin or it will create holes when you put it on your grill and burn.
If the dough is so elastic that it just retracts back and won’t stretch out, let it rest for 10 minutes and try again.  Brush both sides of the dough generously with olive oil. Actually, I just drizzle a bunch on and smear it around with my hands and then flip and do it again. DO NOT FORGET THIS STEP! It isn’t pretty trying to remove un-oiled dough from a grill. Make sure you have all your toppings ready.
 Carry the whole pan outside to your well cleaned grill. Turn the burners down to low or use indirect heat if using a charcoal grill. Carefully, so as not to tear the dough-but with conviction!- lay the dough directly on the grates of the grill, quickly straightening it out to the correct shape.
 Watch your fingers! Its hot! Close the lid and let ‘bake’ for 3-5 minutes. The underside should be lightly browned and the whole thing slightly puffed. Carefully, and with a heatproof spatula or whatever happens to work for you-no plastic please-FLIP!
 Immediately top with tomatoes.
 And basil.
 And then the mozzarella.
 Admire your handy work…
 …and close the lid! The other side has been baking since you flipped it so you want to add the toppings quickly and get it closed so that the cheese has time to melt before the crust is done cooking. Hence, the low heat and toppings ready to go! By the time the cheese has melted, just a minute or two, your crust should be nicely browned on the other side.
 See?! Melty, wonderful, gooey goodness. Very carefully, with a sheet pan, or large cutting board ready, slide the pizza off the grill. Be careful! My husband is somewhat of an expert at this…
 Phew! Take a deep breath and dig in!!
 Variations:
-Saute chopped mushrooms in a bit of butter.
-Finely chopped sun-dried tomatoes.
-Puree roasted tomatoes or purchased sundried tomatoes in olive oil in a food processor. Add olive oil to make it as thick or as thin as you want, as long as it is spreadable. Spread this in the bottom, and then top with basil and cheese. This is out of this world good!
-Shredded fontina melts well and is awesome with nothing more with it than fresh basil.
-Add finely diced pepperoni or browned and crumbled Italian sausage.
-Cheese (mozzarella or fontina or heck!-sliced brie is good too) and a sprinkle of dried oregano. This is especially good as an appetizer, cut into smaller strips.
Note: Fresh sliced tomatoes are good, but the excess water makes the crust soggy.
Eat with your eyes first and gaze upon this salad. Doesn’t this look good? I thought so too. So when I glanced at the cover of Cooking Light Magazine and saw it, I immediately added it to my menu for the week. Beautiful to look at and delightful to eat, the flavor of this salad won’t disappoint. It goes together quick and you can just omit the ingredients you don’t like. Don’t want the calories of bacon? Leave them out. Seafood turn your stomach? Substitute chicken. There isn’t any dairy to weigh you down and it is so beautiful to look at, I was thrilled to pause and take its picture.
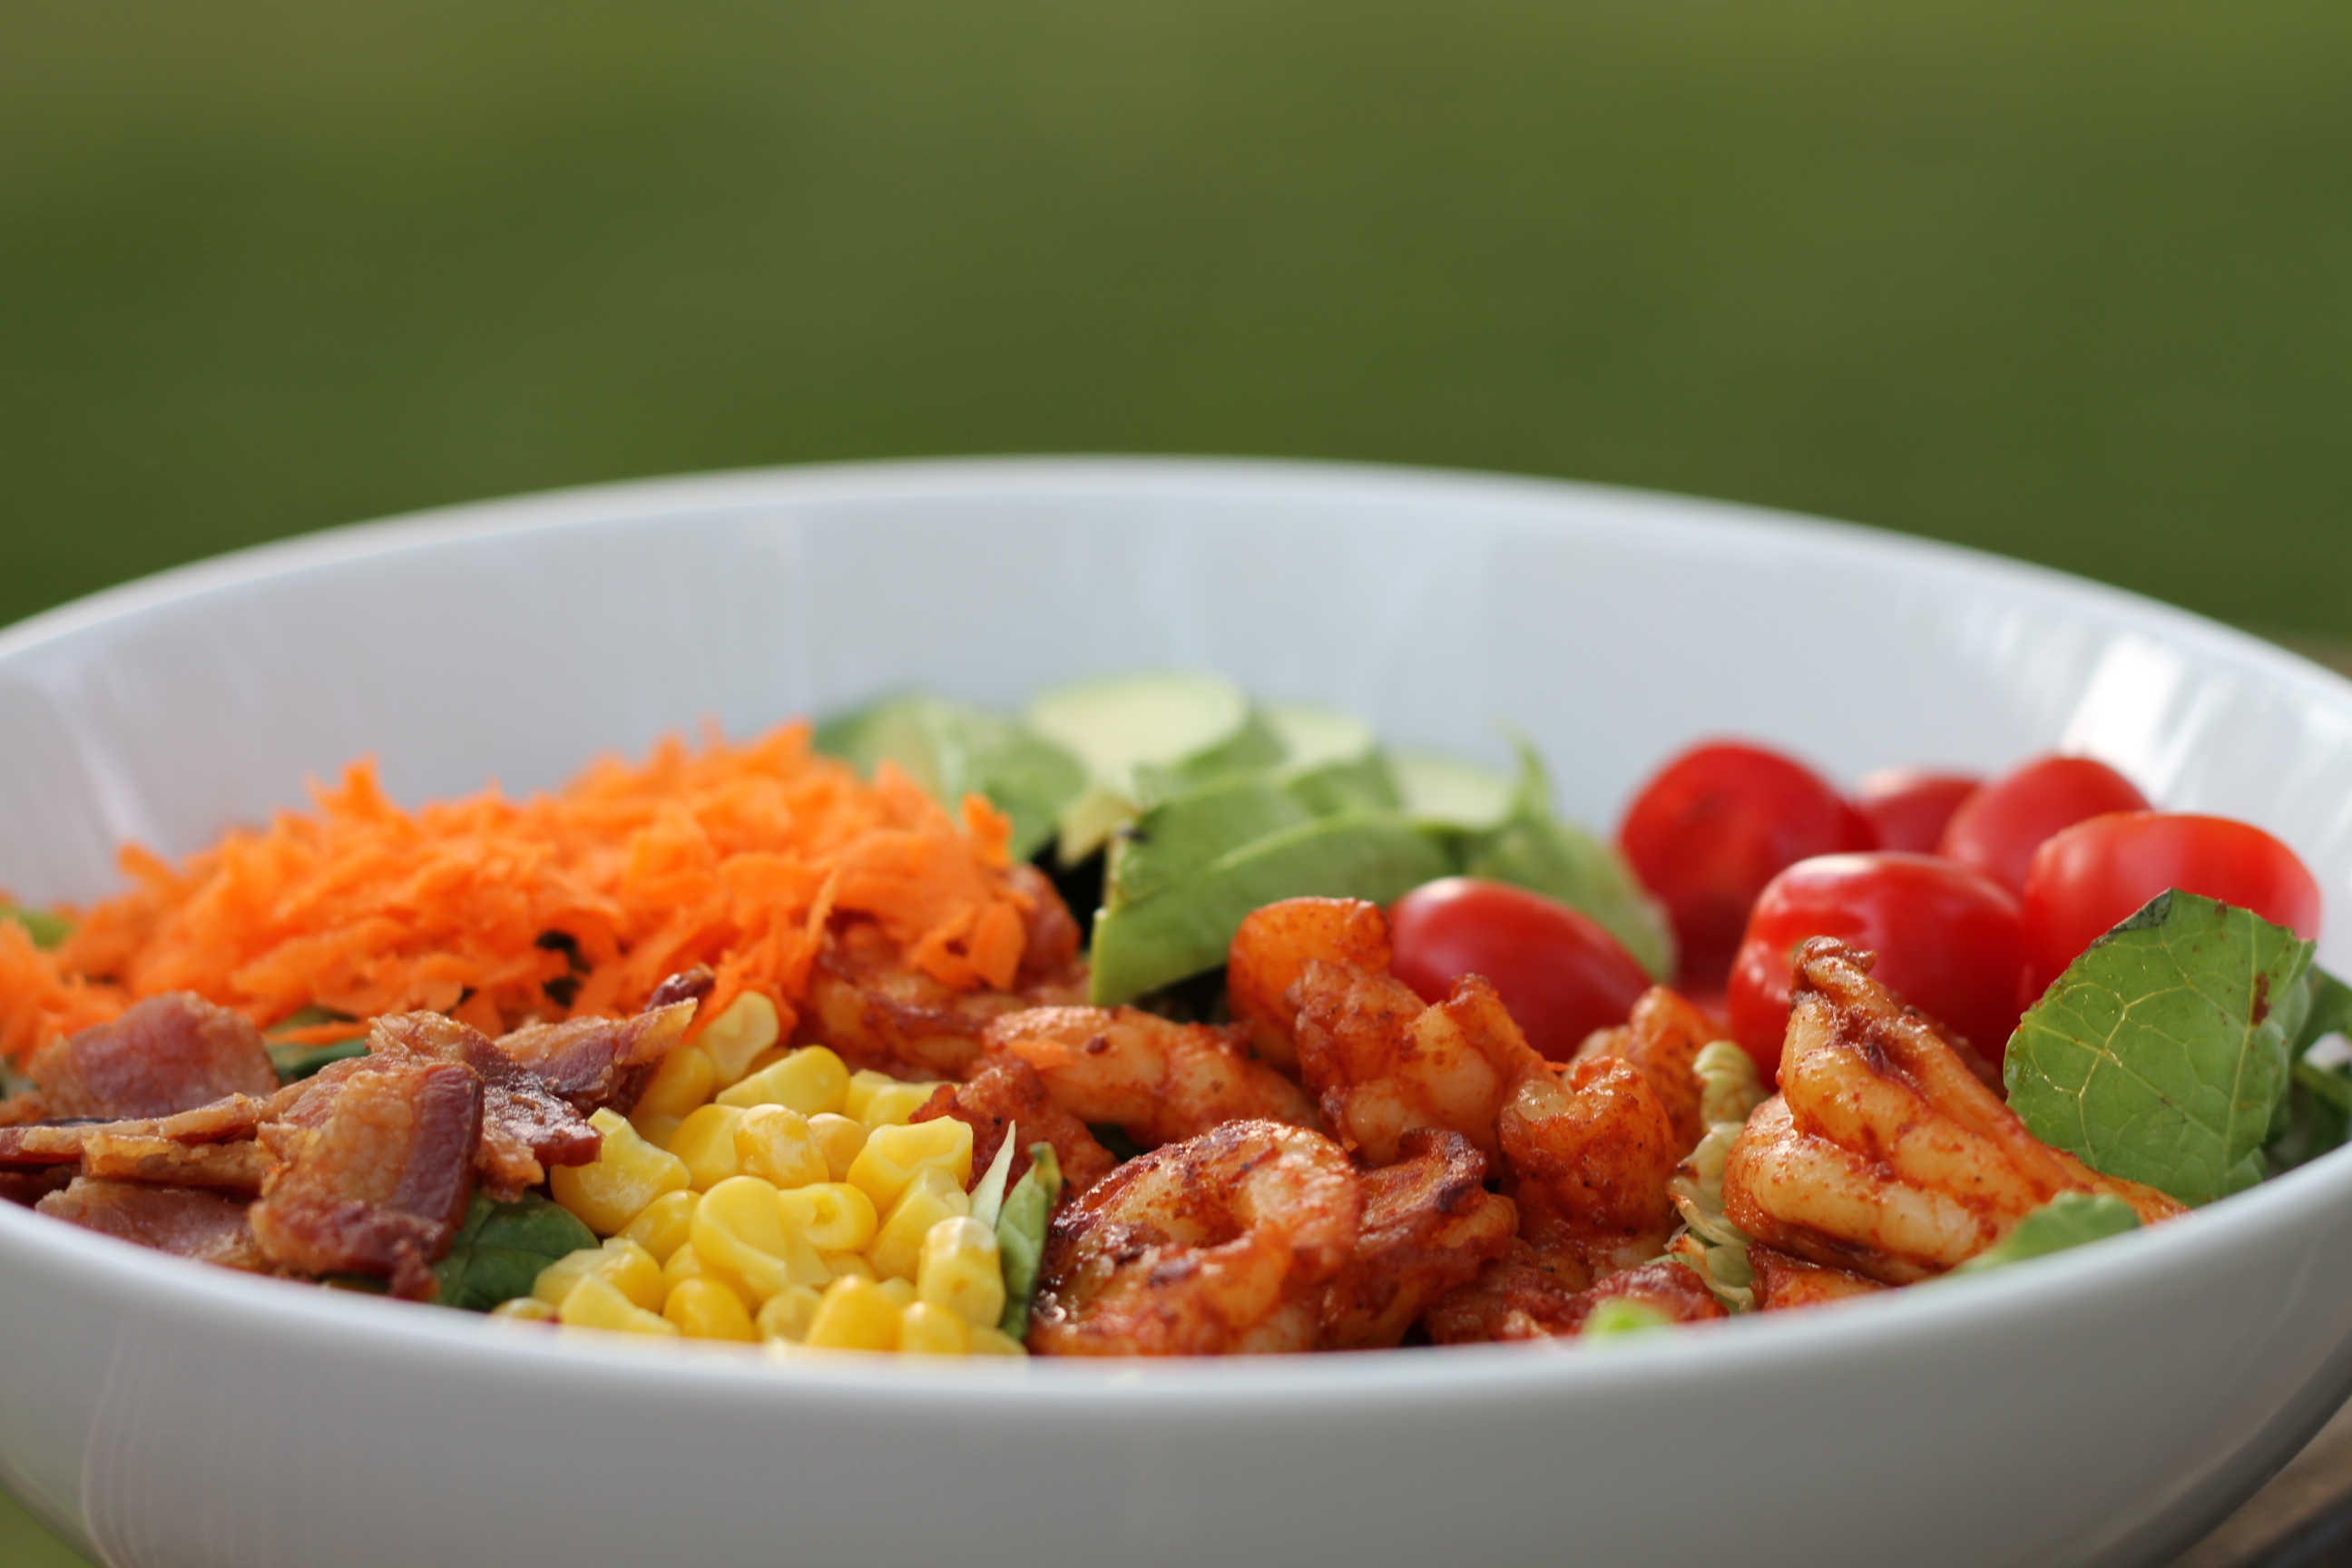
 And my daughter was happy to eat it.
 Shrimp Cobb Salad
Adapted from Cooking Light
4 slices bacon
1 lb large shrimp, peeled and deveined
1/2 tsp paprika
salt and pepper
olive oil
1 pkg romaine lettuce
cherry tomatoes
shredded carrots
frozen whole-kernel corn, thawed
avocado, peeled and sliced
Dressing:
juice of half a lemon
1/4 c olive oil
1 tsp Dijon mustard
1 tsp honey
Cook bacon in a large nonstick skillet over medium heat until crisp. Remove bacon from pan and crumble. Wipe the pan clean and drizzle in some olive oil and heat over medium to medium-high heat. Toss shrimp with paprika and just a bit of salt and pepper. Cook shrimp 2 minutes on each side or until done. While the shrimp cooks, mix dressing ingredients with a whisk. Build salad however you like and drizzle with dressing.
Sweet Veggie Pasta Salad
Brittany wrote this on 9 May 2011![]() broccoli, carrots, cauliflower, pasta, tomatoes
broccoli, carrots, cauliflower, pasta, tomatoes
 Do you really need a Fry Daddy?
That is what those things are called, right? The deep fryers that people give out as wedding gifts and that to my knowledge, nobody actually purchases to use in their kitchen? Raise your hand if there is one taking up space in the back of your pantry, top cupboard, or storage closet!
I do not have my hand raised. My husband and I were one of the lucky couples who had friends and family that exercised restraint and only gave practical wedding gifts. Of course it may have been the fact that Michel’s address at the time was the USS Topeka (not much room for storage in a submarine and they really frown upon keeping things like blenders and toasters in your rack) and my address was the same as 3 other girls just off the UW-STOUT campus. And may I just say, praise God for having best friends/roommates who were neat and organized! Recognizing our unique circumstances our guests were absolutely lovely and we got everything we needed; nothing more. Well, that is if you don’t count the neon blue sign in the shape of a moon that I got from my brother. With his trademark crooked grin he claimed it was for mood lighting. What a romantic…
Anyway, after watching a home improvement show that included cleaning out the kitchen cupboards (yes, they had a Fry Daddy) I thought to myself, “Why are they still holding on to that?” It had been a wedding present and they had kept it for decades, never using it once. If this sounds familiar, I am here to set you free. Two little words that will make your life sooo much easier.
Good Will. Yes my friends, it is time to embrace spring! And as long as your are cleaning the fridge and wiping down the baseboards, I implore you to empty your kitchen cupboards too. Thinking of all the unused items and wasted space in your kitchen makes me a little claustrophobic. It is OK for you to donate something that you will never use! Really! I promise! Don’t bother keeping seven of the same spatula or that really nice Precious Moments serving bowl from Aunt Mildred. Its time. Listen to Michael Jordan and Just Do It!
And by the way…
As long as you are digging around in your pantry, pull out the ingredients to make the dressing for this pasta salad! While there are bazillions of pasta salad recipes out there, no one wants to go to a pot luck dinner or summer BBQ and eat a salad filled with strange ingredients leaving people to wonder, “What the heck is in this??” This has familiar ingredients that appeal to everyone, has beautiful color, and an unexpected twist that can be refreshing next to an endless sea of potato salads and hot dogs. And although I love my Margarita Pasta Salad, sometimes you need to do something a little different. Yes, I admit, it looks a little bit boring. Didn’t your Mother ever tell you that you should never judge things by their appearance?! But don’t worry. The dressing is the redeeming feature; surprisingly sweet and only a little tangy. It makes for an addictive side dish that pairs wonderfully with just about anything you can think of. And best of all, no dairy! Meaning it can be served chilled or at room temperature.
I even photographed it in a Tupperware container, just to show you how great it travels. Well, OK…more because that is how I stored it in my fridge and less for travel, but you get the point. Sweet Veggie Pasta Salad
Adapted from Ashley Dennis
Feel free to use any bite-sized pasta for this recipe. I had the spiral stuff, so that is what I used. And I was out of grape tomatoes, but I usually add them too.
Dressing:
1/4 c sugar
1/2 c canola oil, olive oil, or a mix of the two
1 tsp dry mustard
1/2 tsp onion powder
1/3 c red wine vinegar or other sweet vinegar
salt and pepper to taste
1 lb bite sized pasta (rotini, medium shells, macaroni, penne, penne rigate, rigatoni, etc) cooked according to package directions
carrots, diced
grape tomatoes
broccoli, cut into small, bite-sized pieces
cauliflower, cut into small, bite-sized pieces
purple onion, diced (optional)
Combine all dressing ingredients and whisk together. Pour over pasta and veggies. Toss well.
Egg Ribbon Soup & Sniffles
Brittany wrote this on 11 April 2011![]() chicken broth, eggs, parmesan cheese, pasta
chicken broth, eggs, parmesan cheese, pasta
 As much as I wish our family could really enjoy the weather right now (it is past 80 degrees here in central IL), it is proving rather difficult. My kids have been sick since last Tuesday, and now I am afflicted. I am quite certain that this is just a spring cold; or in Eli’s case, his 6th bout with croup since August. No serious illness here. But Oh! How I wish we were all well so that I could be cooking up a storm! Spring has sprung and I want to dive into all it has to offer! Especially if that means we get to prepare and/or eat it outside.
I suppose it is good that I have been taking care of little ones instead of basking in the April sunshine. My favorite place to be this time of year is our screen porch and it is presently filled with furniture cast-offs from our remodel. Until we have a yard sale, it is a no go!
So in the interest of getting healthy, I made soup. Now, you all may remember my previous musings on soup. I really don’t like it. It is my least favorite thing to eat, although I really like to make it. I blame my parents for raising me as a ‘meat and potatoes’ kind of gal. Although, ironically, they both love soup…
Anyway, this soup had always struck me as something that might be worth trying. The other day, I remembered this recipe that I have had, literally, for over a decade. It was cut from a magazine-not sure, but possibly Gourmet???-and has been floating around from Minnesota, to Wisconsin, to Hawaii, to California, to Minnesota, and now to Illinois. Yummmmm. And it was worth the wait. It tastes exactly like I thought it would and my family agreed. We, yes me too, slurped it right up. I cooks up in no time and it was the perfect soup to get some nutrients into my ill family! I know it looks weird, but it is crazy good. You can of course make this without the fresh parsley, but don’t be tempted to skip it. It adds a freshness that cuts through the rich broth and really balances out the flavors. Parsley also contains Vitamin C, something we all need when we are sick or not, to help stave off infections. Bring on the healing!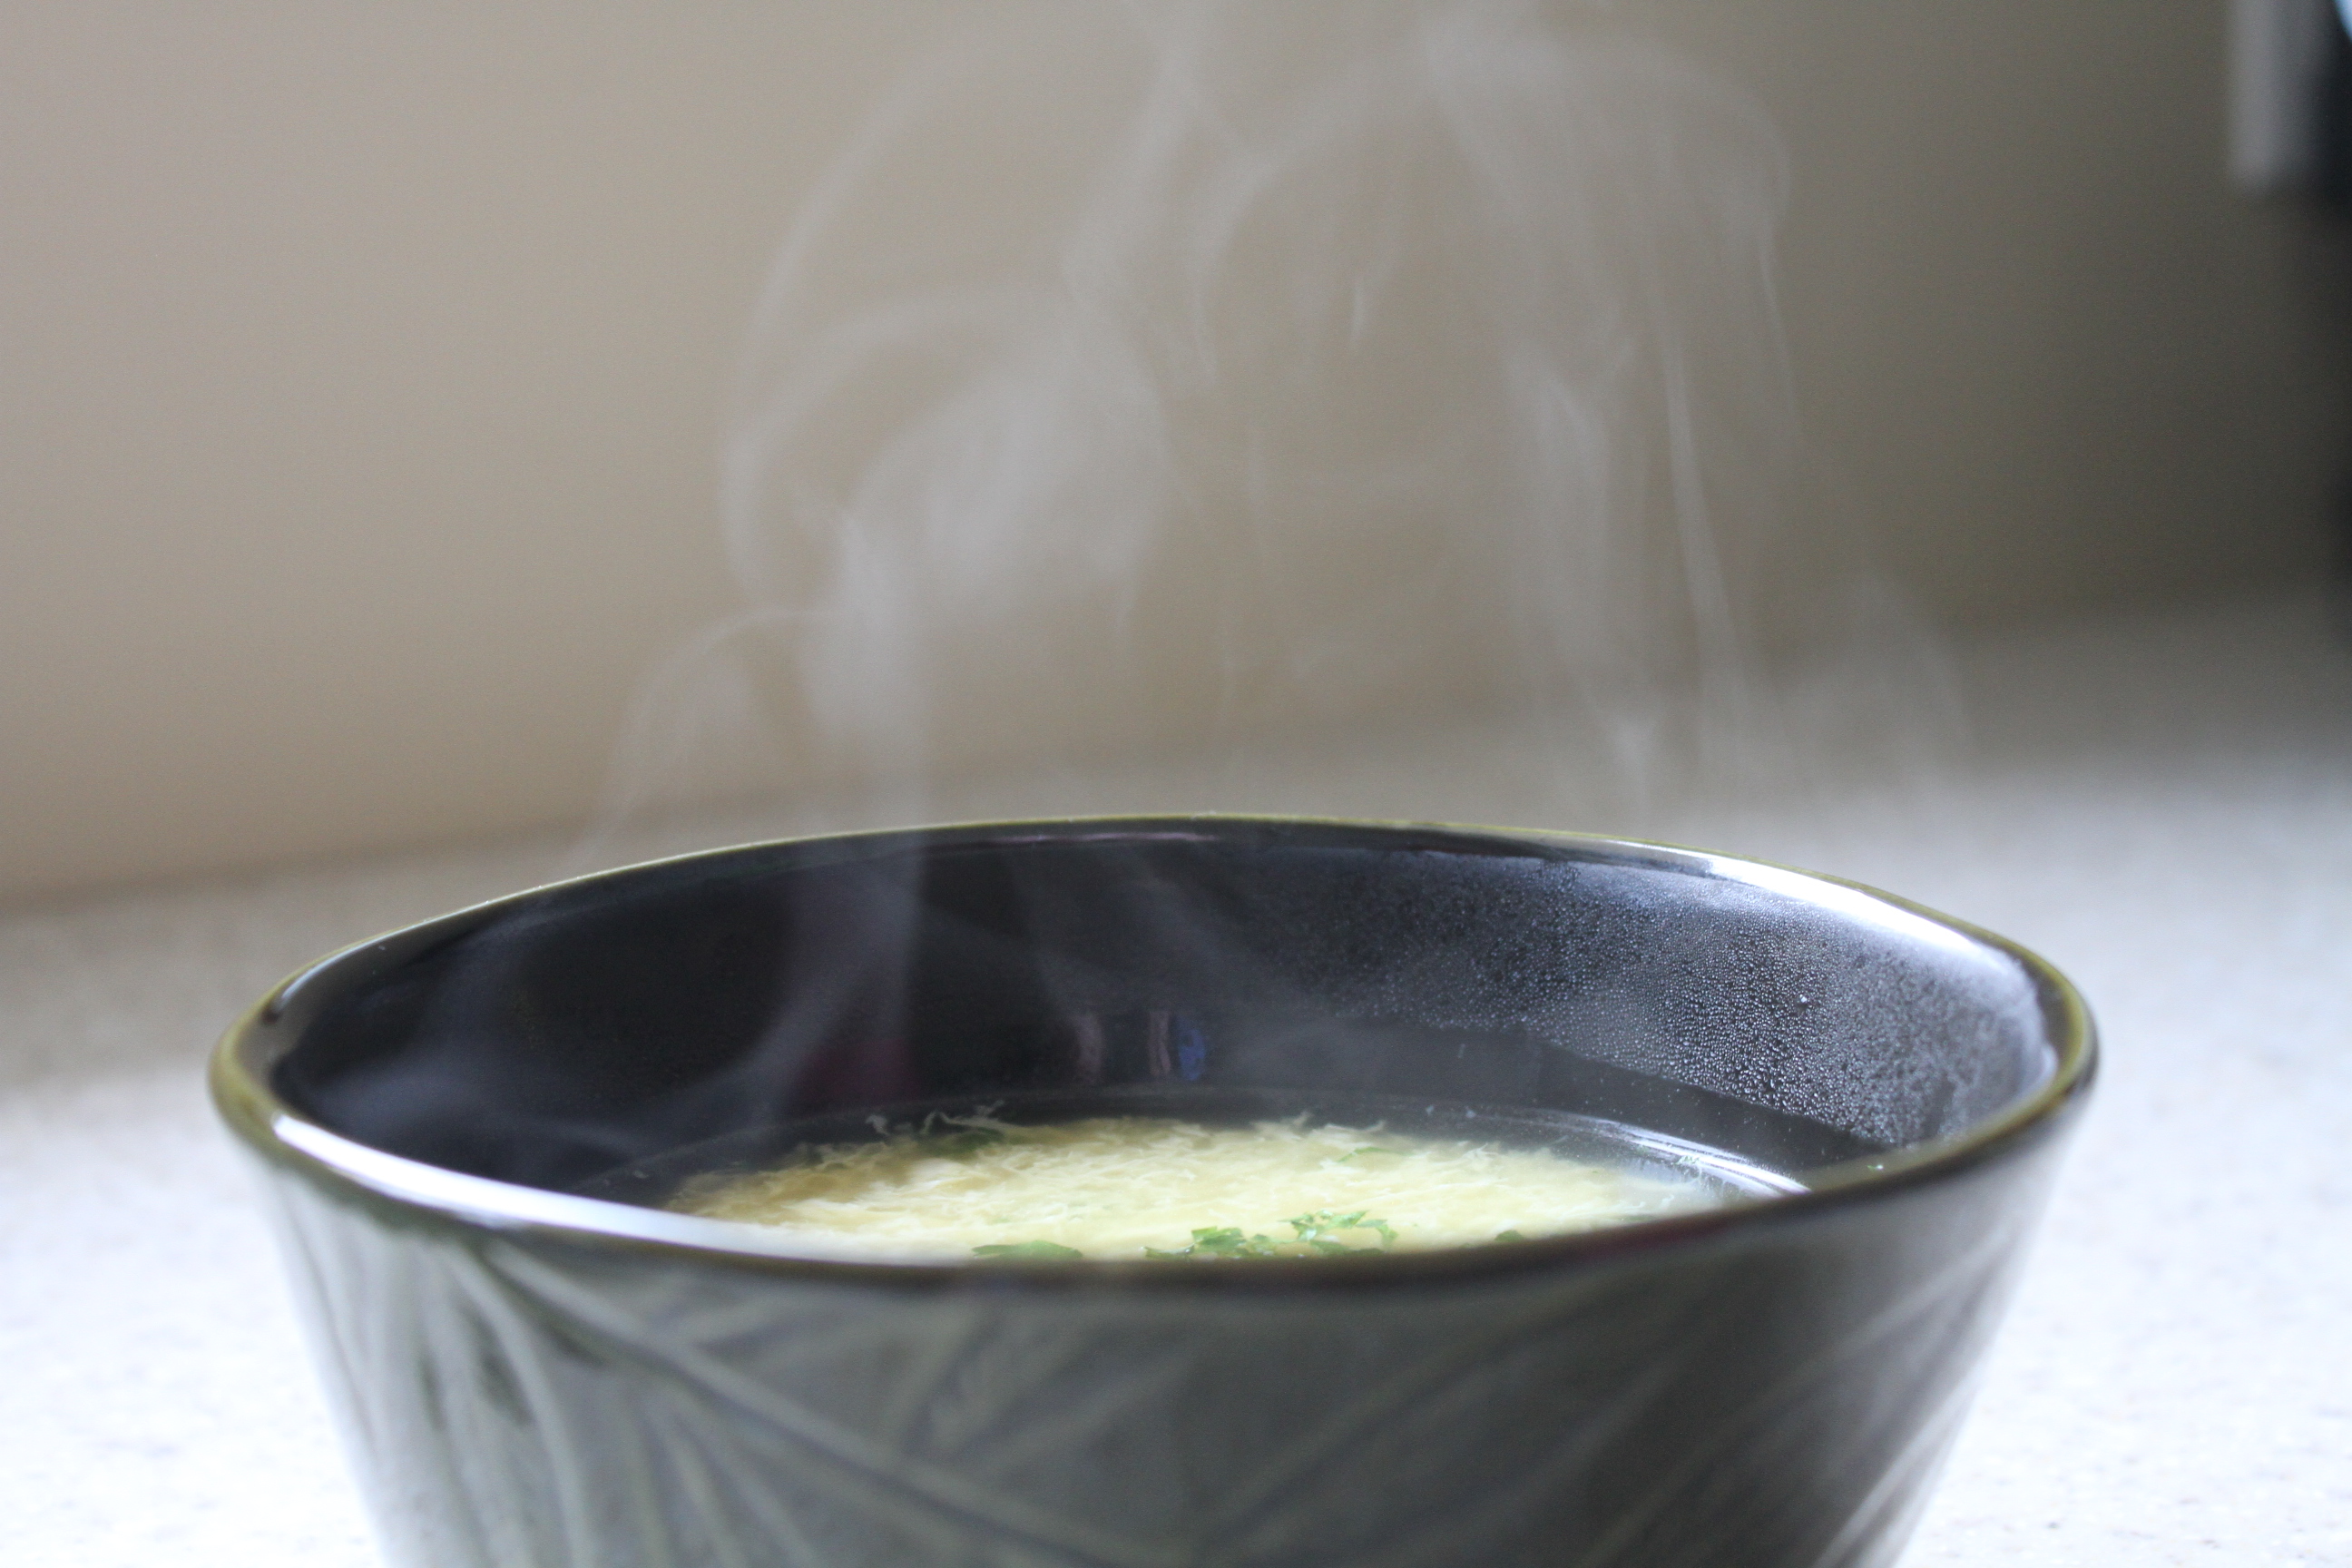
 Egg Ribbon Soup
If I remember correctly (it has been over 10 years), the original version of this recipe was from a chef that used to whip this up when she got home from a late shift and was hungry. It was a quick and satisfying meal that required very little effort. Rock on, random chef. Rock on.
4 cans (7-8 c) of good quality, low sodium chicken broth
3/4 c tiny pasta, such as acini di pepe or orzo
3 eggs
3 T Parmesan cheese
fresh black pepper
3-4 T chopped fresh parsley
Bring chicken broth to a simmer in a large sauce pan and add the pasta. Let cook until just al dente, stirring occasionally. Meanwhile, in a small bowl, whisk together eggs, cheese. Add black pepper to taste. When pasta is cooked, slowly pour the egg mixture into the simmering soup in a long thin stream, stirring the soup the whole time and forming little ‘ribbons’ of egg. Toss in the parsley and serve. Pass extra Parmesan cheese if desired.
Homemade Ketchup-It is so easy!
Brittany wrote this on 7 April 2011![]() gluten-free, tomatoes
gluten-free, tomatoes
In my last post I mentioned that I had made ketchup for my son’s birthday party, and while the reviews were mixed (there may or may not have been some self proclaimed picky eaters there) I am excited about sharing it with you.
 Why? It is just ketchup after all. Just a common, cheap condiment that is in every home in America. That is all true. But to me, homemade ketchup is one of those things that is unexpected no matter who you may be serving. It is inexpensive, so easy, and very quick to throw together. Not to mention that you can make it days in advance. So why not surprise your guests, or just your spouse and kids, with something special?! Of course if you are serving Alice Waters, Ina Garten, or Jamie Oliver, they wouldn’t bat and eye lash and I would be seething out here in Illinois, wondering why I hadn’t been invited to dinner!! But assuming, you won’t be cooking for either of these or any other food legends, it is a decidedly fun and nostalgic addition to a menu.
Summer, the season of perpetual grilling, is almost upon us. This recipe has such wonderful flavor, it tastes great with grilled sausages, outstanding on burgers, practically sinful on a hot dog, and of course, a perfect pairing with thick-cut potato fries. I ate it on a meatball slider instead of BBQ sauce and have been dreaming about how I will use it in the coming months. I mean, my dreams are always filled with food, but then again, whose aren’t, right? What? Not you? Just me? All right then.
 Homemade Ketchup
Adapted from Giada De Laurentiis
1 (15 oz) can tomato puree or tomato sauce
1/2 c apple cider vinegar
3 T tomato paste
1/2 c brown sugar
2 tsp salt
1/2 tsp onion powder
pinch of cinnamon
Combine all ingredients in a small sauce pan and simmer over med low heat, stirring occasionally, until reduced and thick. Cool to room temperature and chill. This is best made the day before, but it isn’t necessary.
Vegetable Couscous
Brittany wrote this on 26 January 2011![]() cheese, corn, green beans, parmesan cheese, pasta
cheese, corn, green beans, parmesan cheese, pasta
 I should start by saying that this is not what I planned on blogging about today. Eli’s lunch, I mean. My original intention was to post a recipe I just tried for Enchilada Pie (Wowzer its good!), but that is temporarily postponed due to the construction dust that was all over the lens of my camera that just won’t seem to wipe off. When I did get it clean enough, dinner was over and the leftovers were in the fridge. And there is the fact that I just felt like telling you about a dish that is so everyday in our house, it never really occurred to me to tell you about it. Until today.
And any dish that uses pantry ingredients is my friend these days!
Sometimes I make this as a side dish for dinner but today, I made this for my toddler for lunch. I do that on a regular basis because it is quick, healthy, and pretty darn tasty. This is a great idea for all the parents out there with small children. Perfect for little fingers to pick up and eat. For those of you unfamiliar with couscous, let me be frank. BUY SOME! It is the fastest carb you will ever find. It is actually tiny little grains of pasta and they are so small, hot water is all you need to make it. No cooking involved. How great is that?! Vegetable Couscous
This is January so the veggies that go into this are frozen. In the spring when asparagus is in season, it is outrageously good when sauteed in olive oil and garlic and used in this recipe. If the asparagus is grilled, even better! Use whatever vegetable you like, fresh or frozen, that is in season at the time. Spinach, cherry or grape tomatoes, corn, peas, or a mix like I do here. It all tastes wonderful.
2 c water
1 c whole wheat couscous
2 c cooked veggies, cut into bite sized pieces
2-3 T olive oil
1/4 c grated parmesean cheese
salt and pepper to taste
In a large bowl, microwave the water until boiling. Add the couscous, give it a quick stir and cover the bowl with plastic wrap. Set aside for 5 minutes or so, or until all the water is absorbed and the pasta is soft. Fluff with a fork and add the rest of ingredients. Taste for seasoning.
Note: This is also great cold and would be fantastic to bring to a summer pot-luck. A greek version with chopped tomatoes, fresh mint and crumbled feta would be stellar! For a quick soup, add a scoop or two to a bowl and pour in a can of good quality chicken broth. Heat till serving temp. My husband is eating exactly that as I type this.
Chicken Salad
Brittany wrote this on 20 January 2011![]() capers, chicken, gluten-free, mayo, parmesan cheese, sour cream
capers, chicken, gluten-free, mayo, parmesan cheese, sour cream
 My soon to be famous chicken salad. At least, I think so.
Chicken salad, I assume, is a staple in most homes, gracing the lunch boxes and sack lunches of American children everywhere. I make it quite regularly in my own home, but I can’t recall eating it even once when I was a child. Tuna salad? Yes. I still mix canned tuna with a spoonful of mayo and slap it on bread. Yummmm. Although my taste has developed into something more sophisticated and I add fresh spinach and sliced tomatoes now. But chicken salad? Never. A recent conversation with my Mom revealed the answers to the mystery. She ate it all the time when she was a kid, but never made it for her own family because chicken salad for 8 people got to be kinda expensive. She confessed that now that is just her and my Dad at home, they eat it all the time! I was like, WHAT?!
The first time I had chicken salad was when I was in high school and I was eating lunch at a friends house. And to be honest, I wasn’t sure what the fuss was all about. Kinda tasteless, it was just shredded chicken and mayo with some chunks of celery in it. Blegh! Well, no more people! Shake off the boring chicken salad of your youth and embrace flavor! Step out of the mold and make something sassy! That is what I did! I just started mixing different flavors together and about a zillion batches later-voila! Now, this is what I throw together when, like the other night, I have leftover rotisserie chicken that needs to be eaten. In fact, in the summer, when those roasted chickens from the deli go on sale, I buy one just to make this chicken salad.
Be creative when you eat this! When tomatoes are in season, slice off the top, scoop out the inside and fill it with this salad. Wow! So good! Pile it on top of spring mix, fill a croissant, or (our favorite) add grapes and wrap it up in a whole grain tortilla. Sometimes for lunch, I just put the bowl in the middle of the table and we scoop up bites with whole grain crackers. And if you really want to, go ahead and add diced celery. I won’t look.

 Chicken Salad
I always make this on the fly, no measuring or specific amounts. Feel free to improvise too.
3-4 c cooked chicken, shredded or chunked
1/2 c light sour cream
1/2 c canola mayo
(equal parts is what you are going for-add more or less mayo and sr cream depending on if you like your salad super creamy or more dry)
1/4 c grated parmesan cheese
1/4 tsp onion powder
1/4 tsp garlic powder
1 T capers, drained
Grapes, halved, optional
Combine all ingredients in a medium bowl. Adjust seasonings with salt and pepper.
 You may have noticed by my previous blog entries that I don’t do the whole New Year’s healthy eating resolution deal. Personally, I think that eating healthy food, regular exercise, a good nights sleep, and plenty of stress relieving activities are all things that we should be doing all the time. It isn’t just a random decision that we make on Jan 1st and then start groaning inwardly with guilt about before Valentine’s Day. I don’t recall ever making a real New Year’s resolution. Perhaps because I knew that if I didn’t stick to it, it didn’t really matter to anyone but me. No one noticed and no one cared. So why do it? Yup, I have a bit of an attitude.
That said, I think that anything that gets a person to eat better, exercise, stop smoking, budget better, etc. is fantastic and a great thing. So whatever day is on the calendar and you decide to make changes in your life for the better, I wish you good luck and support. Just remember that every day is a new day. There are no mistakes in tomorrow.
So on that note, I am posting one of my favorite, uber healthy recipes. Is that how you spell uber?
This salad recipe is from my dear friend Laura, and although she is probably unaware, I have been making it repeatedly ever since she gave me the recipe. Like, a lot. It is one of my family’s favorites and it is perfect for the middle of January for several reasons. All of the ingredients are readily available year round, there is virtually no prep, and it is satisfying enough for dinner but easy on your hips. This recipe got me eating nuts in my salads again, something we all should be doing. Good, heart healthy walnuts. If, like my siblings, you are allergic to walnuts and they make your tongue itch (weird, but true) feel free to add almonds instead. But I cannot stress enough that the beauty of this combo is when you have all the elements. Its creamy, crunchy, sweet, salty, tangy, and yes, very good for you. Put it at the top of your list for this winter and feel fantastic about it!
Note: There are no poppy seeds in my dressing for a very good reason. I didn’t have any. Just so you know…

 Laura’s Salad
Leftover dressing lasts for weeks in the fridge. Its is also good brushed over chicken.
Dressing:
1 T Dijon mustard
1/4 c sugar
2 tsp finely minced onion
1/3 c canned, jellied cranberry sauce
1/4 c white wine vinegar
1/2 c oil (I use 1/4 canola and 1/4 extra virgin olive oil)
1 T poppy seeds, optional
In a small bowl or jar, blend the sugar, cranberry sauce and the vinegar. If you do this first, the sugar dissolves easier. Add the rest of the ingredients and shake or whisk until well blended.
Salad:
dark greens, such as spinach, spring mix, or both
dried cranberries
walnuts
feta, crumbled
grilled chicken, diced
Build your salad and enjoy!
 I needed something to throw together for lunch and I was kinda sick of sandwiches. After reading a bunch of different blogs today, I had a craving for Shrimp Quesadillas. My experiment was a tasty one.
Shrimp Quesadillas
1/2 pound of shrimp, peeled deveined and tails removed
1 T taco sauce
1 clove garlic, minced
1/4 tsp cumin
1/4 tsp chili powder
salt and pepper
Heat 1 T of olive oil in a medium skillet and add garlic. Heat for 30 seconds or just until fragrant. Add the rest of the ingredients. Cook over medium heat until liquid starts to evaporate and shrimp are pink and just cooked through, about 3 minutes. Remove shrimp to a cutting board and roughly chop. Set aside.
Build your quesadilla with shredded monterey jack cheese and shrimp. Add onions and peppers if desired.
Broccoli, Bean & Cheddar Soup
Brittany wrote this on 11 November 2010![]() broccoli, cannellini beans, cheese
broccoli, cannellini beans, cheese
 I tried this soup a few weeks ago and really liked it. I recently passed the recipe on to a friend of mine and decided I should share it with all of you too! It is adapted from the Eating Well website; a fantastic source for simply good food that is good for you. Its inexpensive, super fast, super easy, and great with a hunk of crusty bread. Best of all, no cream! You can eat your fill without the guilt and still enjoy a thick and creamy soup.
Broccoli, Bean, and Cheddar Soup
1 14-ounce can reduced-sodium chicken broth, or vegetable broth
1 cup water
1 lb broccoli crowns, trimmed and chopped (about 6 cups) or 1 large bag frozen broccoli florets, thawed
1 14-ounce can cannellini beans, rinsed and drained
1/4 teaspoon salt
1/4 teaspoon pepper
1 c shredded cheddar cheese
Bring broth and water to a boil in a medium saucepan over high heat. Add broccoli, cover and cook until tender, about 8 minutes. Stir in beans, salt and pepper and cook until the beans are heated through, about 1 minute. Transfer half the mixture to a blender with half the cheese and puree. (Use caution when pureeing hot liquids.) Transfer to a bowl. Repeat with the remaining broccoli mixture and cheese. Alternatively, blend in the pot with an immersion blender. Serve warm.
Love a Good Recipe?

Then you’ve come to the right place! I’m Brittany, and I share tested, trusted recipes you’ll love. I prepare & photograph food, obsess over the perfect recipe, and enjoy grins of delight when I serve up something awesome. Enjoy!


