 Brittany's Pantry
 Hi all!
Just a quick post to clue you in to one of my most favorite comfort foods. Gaze upon the Open Faced Tuna Melt.
Now, for any of you reading this who happen to be my siblings, I realize you may think of this dish as unremarkable. We did, after all, eat these with some regularity while growing up. But sometimes it takes distance and time to really appreciate those things in your life that are surprisingly special. I have always loved making these and my husband and kids love them just as much as I did. I swear it is the cheese. Somehow, things become extraordinary when you melt cheese on food, transforming a plain old tuna sandwich into a lunch worthy of a blue plate special at your neighborhood diner. The addition of avocado to the already hearty healthy fish, whole grain bread, and fresh garden tomatoes make this a good for you lunch that takes very little time and still manages to somehow feel indulgent and fun. Make no mistake. The flavor will make you-or your siblings:)-feel special.
One Year Ago: Hot Apple Cider
Two Years Ago: Apple Crisp, Remoulade Sauce
Open Faced Tuna Melt
This serves three, but obviously you can adjust it to make as many as you need!
2 cans tuna packed in water, drained
1/4 c canola mayo, or to taste
black pepper
Mix the above three ingredients together in a small bowl, adding more mayo if you like it really creamy. The pepper is important. It makes such a huge difference so add as much as you like! So now, build your melt!
Whole Grain Bread
Tuna Mixture
Sliced Avocado
Sliced Tomatoes
Sliced Cheddar, Colby, or Co-Jack
Place your melts in a toaster oven on broil, or broil on a sheet pan in the oven JUST UNTIL THE CHEESE MELTS! Enjoy!

Orange Cream Smoothie & A Blogaversary
Brittany wrote this on 22 July 2012![]() cream, gluten-free, orange
cream, gluten-free, orange
 Wow! Has it really been two years since I started blogging? Two years of recipes and a whole lot of food? Two years of home renovations (Oy), watching my eldest start school (boo), and welcoming a new baby (yeah!)? A year ago I gave the blog a new look, made a bunch of changes, and ventured into the world of photography. This year? *sigh* I am exhausted! Between the heat, swimming lessons, loss of sleep, travel, and the need to get my tonsils out (weird, but true) I am thrilled to be able to continue to post great food for all of you! Hence, today’s simple-but scrumptious-recipe is how I am celebrating.
Before I continue, please know that I send my heartfelt thanks to all of you. From the bottom of my heart, I am so grateful for you, my readers. Your support, encouragement, comments, ideas, questions, and random raves about the recipes here keep me smiling. You, along with my husband and kids, make every moment I spend in the kitchen and on my computer absolutely worth it. Even on those days when I am typing one handed, baby on my hip, 7 different batches of cookies cooling on the counter, a full dishwasher, and a stack of books to read to the kids…worth it. So…umm…thanks.
Enough of the mushy stuff! On to the food! Forever ago, years and years actually, I was at a friends house and she was desperately trying to get rid of the last of an entire case of oranges. Her answer was to peel them and puree the sections in a blender with vanilla ice cream. It worked. We sucked that down like Darjeeling! So good. So fresh. Was it a drink? Dessert? Smoothie? Who knows. Who cares! She doesn’t know this, but ever since that day, I have been drinking vanilla ice cream and orange juice together. Tart and sweet. Refreshing and pretty much like drinking a creamsicle. The perfect way to celebrate just about anything.
One Year Ago: Grilled Pizza
Two Years Ago: Basic Wheat Bread, Three Lemon Chicken, Turkey Meatballs, Margarita Pasta Salad
Orange Creamsicle Smoothie
Fill a glass with vanilla ice cream. New York Vanilla is the BEST! Pour orange juice over. Slurp.
Strawberry Lemonade
Brittany wrote this on 17 June 2012![]() gluten-free, lemon, strawberries
gluten-free, lemon, strawberries
 Man, oh man. I am one happy camper. I am sitting here typing this at my kitchen peninsula and eating a snack and drinking the Strawberry Lemonade you see in this picture. Although my beverage is not in my favorite tall glasses from World Market but instead is in a plastic cup we brought home from a restaurant last February when we took a vacation to the water park. There is a picture of a dog on it wearing a spotted party hat and it is making a water ring on the counter dangerously close to the cookbook I was reading. The cookbook is The Joy of Cheesecake and I was trying to choose a recipe to experiment with for Father’s Day. But anyway….
The title of this post is how I was going to start explaining this recipe to you and then a thought kind of occurred to me: I use those adjectives a lot. I bet I say something along those lines about almost every recipe. And truthfully, I hear the gentle, teasing voice of my very good friend (Yes, it is you, Dede!) every time I say the word fabulous (which means you are on my mind a lot!). But in this case, it works. How else am I supposed to convey to you the absolutely refreshing, clean, heavenly drink that is this lemonade? Delightful? Crisp and sweet, yet tangy? Addictive-because the four of us (Lane didn’t participate) chugged an entire pitcher in a less than an hour? I am at a loss. When I set out to create this, I honestly didn’t think it would be very successful. Or nearly this good! I figured it would take me forever to figure out the right combination, but thankfully, it didn’t. I have tweaked and adjusted and poked at the ingredients until I got what I am quite certain is going to be your new favorite summer drink! It certainly is at our house.
This lemonade is made with simple syrup, something I always have in my fridge. I have mentioned it before in a previous post or two but it is definitely worth mentioning again. Please do not let that extra step deter you from making this! The flavor is so quintessentially summer, you won’t want to stop drinking it! Sipping it while swinging in a hammock is recommended but not essential. Truly fabulous!
 One Year Ago: Chocolate Chip Blonde Brownies & Pan Fried Tilapia
Strawberry Lemonade
Straining the strawberry puree is an optional, but I think necessary, step. It is the most labor intensive part of the whole recipe. Except maybe cleaning the strainer.
3 c quartered and hulled strawberries
1/2 c sugar
2 c cold water
Puree above ingredients in a blender and strain into a large pitcher through a fine mesh strainer.
Add:
1 1/4 c freshly squeezed lemon juice (from about 4-5 lemons)
1 c simple syrup, recipe below
3 c cold water
Mix everything together and taste. Add another cup or two of water if the mixture is too thick. Serve cold over ice.
Hint: A simple, inexpensive hand reamer will make it much easier to juice the lemons!
Simple Syrup
This is barely a recipe but I will post it anyway. This will last nearly indefinitely in your fridge so make a big batch and use it for everything! I use it mainly for sweetening iced tea but it can be added to anything you want to sweeten without the fuss of trying to dissolve sugar in it. Mix it into drinks, drizzle it over fresh fruit, brush it on the layers of a cake to keep it moist-endless possibilities!
3 c water
3 c sugar
Mix in a small saucepan and bring to a boil to dissolve the sugar. Cool and store in the fridge. You can use any amount of sugar and water as long as it is equal parts.
Homemade Granola Bars
Brittany wrote this on 3 June 2012![]() almonds, apricots, cherries, chocolate, cranberries, honey, oatmeal, pistachios, wheat germ
almonds, apricots, cherries, chocolate, cranberries, honey, oatmeal, pistachios, wheat germ
 At the end of April my youngest sister came to visit, meet her newest nephew, and run a half marathon. Yeah, we like to test the physical endurance of our guests every now and then. Look! Aren’t they cute together?
 Nearly every spring since we moved to central IL my family, my husband, and sometimes friends, have run at least one of the races during the Illinois Marathon weekend. Usually the half marathon is the murderously torturous event of choice (Have I ever mentioned that I hate to run?) and this year my sister ran it for the second time. Mike ran it too-his third half marathon overall. Such craziness. I am actually kind of the odd one out. Between my husband, my sisters, all my sisters-in law, and some of my brothers, you would think I would join in too. Well forget it! You will never break me!!
But I digress…
Even though I don’t run, I have a deep respect for all of the severely misguided athletes that do. In fact, the spirit of racing is one of the things that make that race weekend one that we excitedly look forward to every year. The race finish line is at the fifty yard line inside the U of I stadium so it is as exciting for spectators as it is for runners. Isn’t that neat? The runners round a curve and the whole stadium is there before them with songs like Eye of the Tiger urging them on for those last fifty yards! It totally would make a person want to run…almost. My responsibilities include things much less sweaty. Like picture taking, runner chauffeuring, and cooking for body fueling-with the exception of the two years (’06 and this past spring) that I had just given birth a few weeks before. I stayed home then. But anyway, for my part, I like to research different foods that are good for pre-race fueling and post race recovery so that I know I am cooking something that is just what their bodies need. A few years ago when my other sister and her friend ran the full marathon, I really felt the pressure. I didn’t want to be responsible for runners that ate five pounds of BBQ Ribs the night before-not good running fuel-or worse, *gasp*, were hungry! “No one around here goes hungry!” I declare out loud, slamming my fist on the kitchen counter! These granola bars have made an appearance several times, as well as being part of our normal snacking repertoire year round. Mainly because they are fun to make, easy to freeze, you can pick your flavors, and..well…they are awesome. Oh yeah, and good for you. I recommend taking the time to just make a double batch. Kind of like a marathon granola bar making day. Blasting Eye of the Tiger is optional.

 One Year Ago: Fried Corn & Mocha Chocolate Chip Scones
Homemade Granola Bars
Adapted from Ina
In addition to having plain old granola around, these are fantastic to pull from the freezer for a quick breakfast, snack, or road trip munchie. Feel free to mix and match whatever kind of fruit and nuts you like. So far, these two combos seem to be universally pleasing and particularly gorgeous. Aren’t the colors awesome? And, I might add, they are addictively good.
Fruit & Nut
2 c rolled oats (not quick cooking)
3/4 c sliced almonds
3/4 c shredded coconut
1/2 c wheat germ
Place the above ingredients on a dry sheet pan and toast in a 350 degree oven for about 10 minutes, stirring occasionally. Beware! The coconut has a tendency to burn so watch it! When it is done, carefully pour into a large mixing bowl and reduce the oven temperature to 300 degrees.
Add:
1 c shelled pistachios
3/4 c dried cranberries
1/2 c chopped dried apricots
Toss all dry ingredients together.
Meanwhile, in a small saucepan, melt together:
4 T butter
3/4 c honey
1/3 c brown sugar
Once it is melted, bring to a slow boil and cook and stir it for about a minute.
Add 1 tsp vanilla and pour over the contents of the bowl. Stir carefully-its HOT!-until everything is coated and even. Pour into a greased 9X13 pan and with wet hands, pat mixture down to lightly flatten evenly. Bake for 20-25 minutes or until lightly golden brown. Cool completely before cutting. Twelve or sixteen bars seems to be the perfect size. Granola bars can be individually wrapped in plastic wrap, and frozen in a gallon freezer bag for up to 3 months.
Chocolate Cherry Almond
Make the bars the same as above but increase the almonds and coconut to 1 c each. Add 2 c of dried sour cherries to the mix instead of the cranberries, apricots and pistachios. Proceed with the recipe just as above and when the bars come out of the oven, sprinkle the top evenly with dark chocolate chips. I used about a cup or so, but it is up to you as to how thick you want the chocolate. Wait a minute for them to melt and then spread evenly over the top. Cool completely before cutting.
Fruit Dip: Oldie But A Goodie
Brittany wrote this on 23 April 2012![]() cream cheese, gluten-free, grapes, marshmallow creme, strawberries
cream cheese, gluten-free, grapes, marshmallow creme, strawberries
 Sometimes I find myself hesitating to blog about one thing or another because I am afraid it is too basic, to simple, or too well known. I always wonder if you are all giving a collective sigh and eye roll. Please believe me when I say that I am not trying to insult your intelligence or your prowess in the kitchen! For instance, take my recipe for Crispy Bars-and please excuse the pictures taken with my old camera. Everyone has made some version of them at some point in time. They certainly are not a new idea. But I try to remind myself that everyone has different levels of experience in the kitchen. Or for that matter different levels of desire as to what they want to do in the kitchen. Some people like to experiment with food and some people don’t make anything without a recipe. Others only bake while some can make a mean pot of soup but nothing else. My point is, that every recipe I post goes out to a certain type of cook. I have a mental image of that target individual who each recipe would be perfect for. One-Bowl Chocolate Cake & Cheeze-It Chicken? The busy family trying to get dinner on the table on a Wednesday night. Pasta W/ Zesty Bolognese is a great freezer meal for the steadfast, make-ahead, menu planner. And for those of you who want something a little different, yet totally decadent? Rum-Raisin Rice Pudding. See what I mean?
So who is today’s recipe for? Hmmm. It could be for any of you out there who are always looking for something quick and easy to bring to the office to share or a church pot-luck. Or maybe it is for those of you who are looking to build up your repertoire or basics. This is also perfect for anyone who automatically will make and eat anything that contains cream cheese! I am raising my hand for that one…
 Regardless, those are my reasons for posting a recipe so easy, so simple, so common, and quite possibly one you already know. Actually, if it hadn’t been for my 4-H Cafeteria experience, I might still not know this recipe. Fruit dip was not something we made in our house. So when I found out that this bowl of deliciousness was made with only two ingredients-no measuring!-I was thrilled. And I have been making it ever since. Yes, I have been eating this with a spoon fruit for the past 18 years. I make it for parties, pot-luck dinners, and just to snack on. In fact, in college I used to make a batch, grab a fork and a huge bag of grapes, and stab and dip and devour my way through study sessions. I do not recommend this for those of you wanting to keep your girlish figure. 😉

 One Year Ago: Breakfast Burritos
Fruit Dip
If your are not serving this to company the whole batch mixes up and then fits right back into the marshmallow fluff container. No need to dirty more dishes!
1-8 oz block of cream cheese-low-fat is fine
1-7 oz container marshmallow fluff
Combine ingredients in a bowl using an hand mixer. This dip goes great with grapes (my FAV), strawberries, blueberries, and pineapple. It is also good with sliced peaches when they are in season.
Lime Sherbet Punch: Something Green
Brittany wrote this on 28 March 2012![]() ginger ale, pineapple juice
ginger ale, pineapple juice
 My son, who turns three in just a few short days (gasp!) requested a green drink for his birthday. His two favorite colors are green and blue and he reminds us of this several times a day. In this case, I was thrilled to comply since one of my favorite warm weather drinks happens to be made with lime sherbet. Green! Score! I have actually mentioned this drink in a previous post but never gave you the recipe so I thought I would share it.
Have I ever told you that I love drinks with ice cream in them? Years ago when my family used to celebrate Christmas at my aunt and uncle’s house, they served a punch with huge scoops of sherbet in them. I had never seen this before and thought it was pure genius!!! Creamy and refreshing, it fast became one of my favorite ways to make a party drink! And besides-its just fun!
In addition to a green drink, Eli asked for a green and blue dinosaur cake. What I ended up doing was making two sheet cakes, one vanilla, one chocolate, and stacking them. Both of the recipes were Ina’s and the vanilla cake was the base for her flag cake, found here. Her chocolate sheet cake recipe is found here. This was the first time I made either of them and I really liked them, especially the chocolate. I stacked the sheets together with a sour cream butter cream in the middle and then I cut out the shape of a dinosaur. This is what it looked like before the final frost:
 The final frost was kinda messy. I added a few details to complete it but you get the idea. He LOVED it and requested the head as his piece.
Blue dinosaur with green decorations and a green drink. He was one happy camper!
Lime Sherbet Punch
Adapted from Food Network
1 quart lime sherbet
1 liter gingerale
1/2 of a 46 oz can of pineapple juice
Combine all ingredients in a large pitcher. Serve very cold. Obviously, you can double this recipe.
Strawberry Orange Pineapple Smoothie: Leftovers
Brittany wrote this on 13 March 2012![]() honey, orange, pineapple, strawberries, wheat germ, yogurt
honey, orange, pineapple, strawberries, wheat germ, yogurt
 When I say leftover smoothie I mean a smoothie made with leftovers, not a smoothie that was not finished and then saved for later. I should be more clear with my post titles…
This smoothie, as with all smoothies, is just dumped in a blender and whirred away! Usually I think smoothie recipes are kind of silly. They are a smoothie after all-the kind of meal that you just sort of figure out what you will put in it as you go along. Unless, like in this case, the combo is maybe a bit different or it uses unexpected ingredients. Right now, my Mom is experimenting with avocados in her smoothies (so goooood) so I will keep you posted on her discoveries. But this one is fun because I decided to use my favorite flavors from the smoothie place at the mall. I had some leftover fruit from making Pineapple Upside-Down Cake and immediately wanted to make this. I am normally kind of a banana and berries kind of smoothie gal, and I honestly have no idea how I ended up ever ordering a smoothie with pineapple in it. It was probably a mistake. But it tastes so good, it is all I ever order anymore. And bonus! Zipping it up at home in my own blender is healthier and just as good!
 The bubble that formed at the top of this drives me crazy. Just sayin’.
One Year Ago: Cranberry-Mustard Relish & Cranberry Sauce W/Port
Strawberry-Orange-Pineapple Smoothie
In a blender:
1 c nonfat vanilla yogurt or two large scoops of frozen yogurt
1/2 c chunked fresh pineapple
1/2 c chunked strawberries
1/2 c orange juice
1 T wheat germ
1 T honey, or to taste
Whiz away till smooth.
Roasted Sweet Potato Fries
Brittany wrote this on 29 February 2012![]() gluten-free, sweet potatoes, vegetarian
gluten-free, sweet potatoes, vegetarian
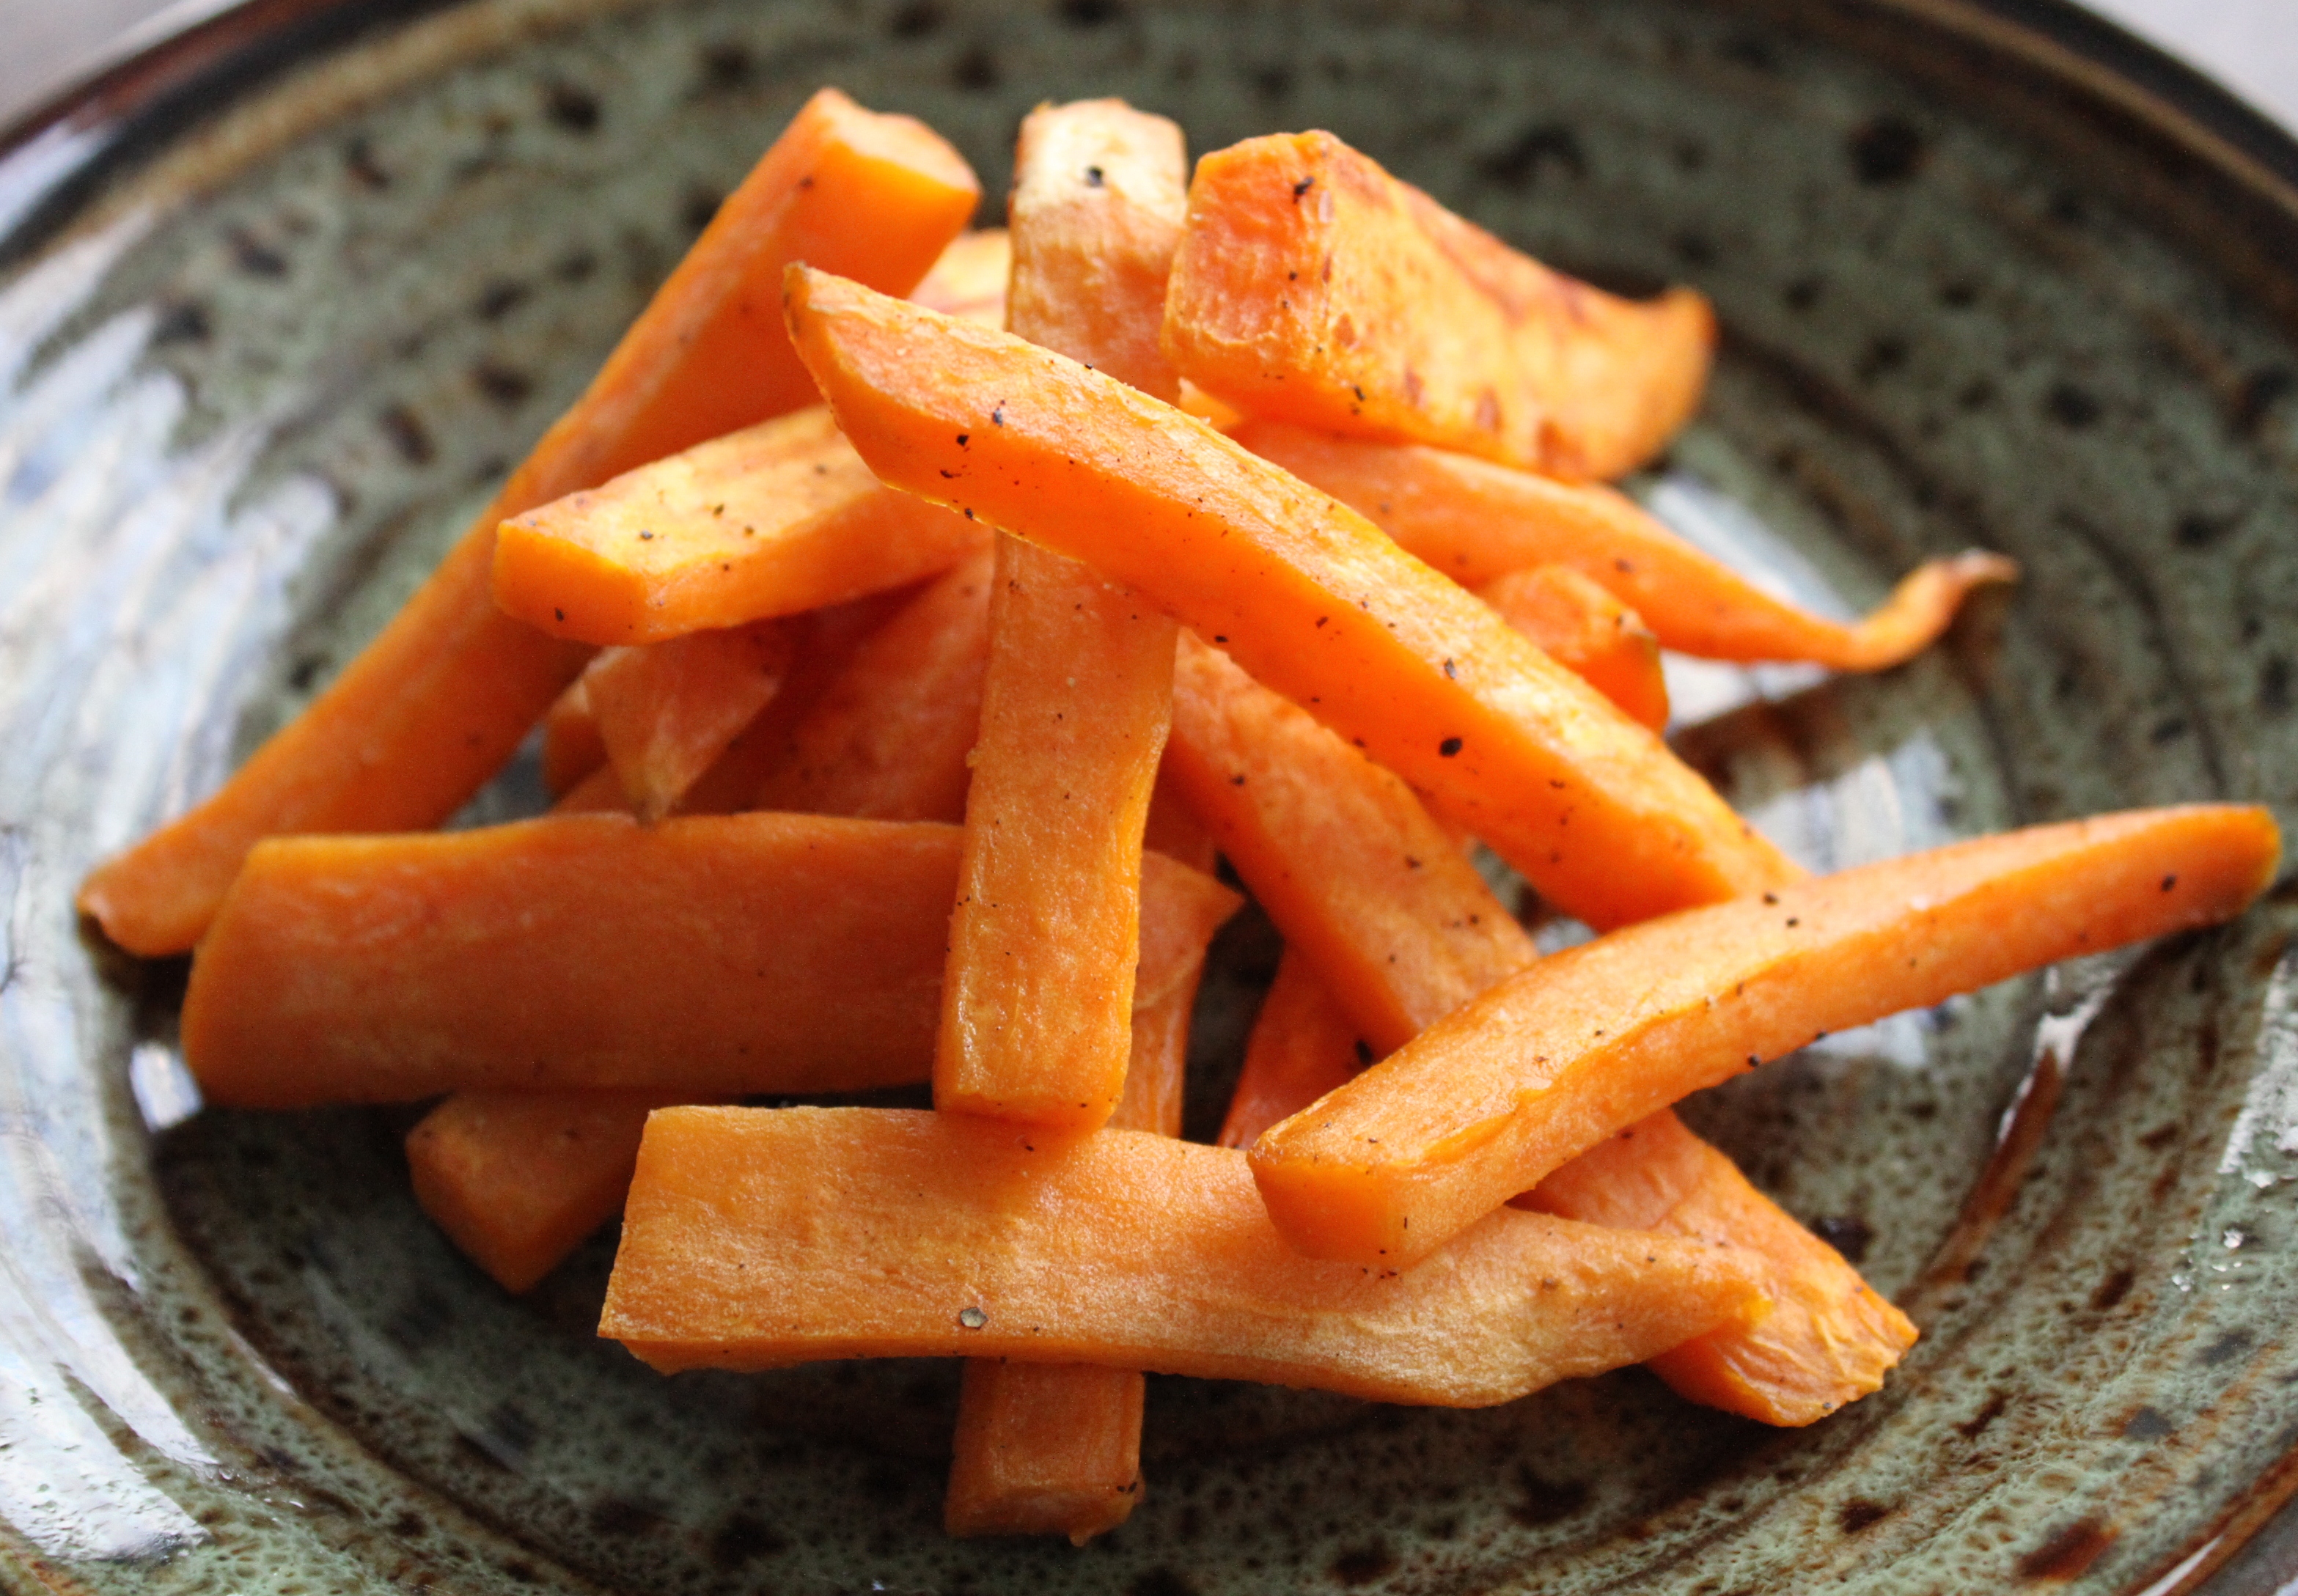 Ah. Sweet potatoes. That vitamin packed veggie that can be sweet or savory and seems to be the favorite of babies everywhere. They also happen to be a major player at our house. I have mentioned these before, but thought I would give them their own post. These ‘fries’ are simple and go with just about everything. Although, I guess I do tend to serve them with things like fried fish with remoulade and brats and hot dogs fresh off the grill. They go awesome with pork chops too. Sometime I will share the lime mayo that I like to eat them with but for now, here are just the basics.
These are done just like everything else I roast. Olive oil, salt and pepper, and a high heat. The beauty of these is that they practically beg to be experimented with. Cut into a handy shape for snacking makes them perfect for kids. Actually, my kids eat the leftovers with their fingers-straight from the fridge. Yum. If you want to jazz things up (Go on! Live dangerously!) feel free to sprinkle them with the tiniest dusting of chile powder, onion powder, and/or brown sugar. Don’t get too overzealous with the sugar. They will burn long before they cook so go sparingly. Chinese five spice powder is or purchased grill seasoning is good too. More often than not, I like them plain.

 Sweet Potato Fries
Yes these are called fries, but don’t actually expect them to be crunchy. That comes from deep frying in oil; a much less healthy option. Instead, enjoy how the sweetness, how incredibly good for you they are, and how quickly they cook!
2 large sweet potatoes (or however many you want) peeled and cut into ‘fry’ shapes
olive oil
salt and pepper
additional seasoning if desired
On a sheet pan toss the potatoes with a drizzle of olive oil and a sprinkling of salt and pepper. Roast at 450 until tender. Length of roasting time depends on how big you make your fries, but it won’t take long! Don’t forget to check on them.
Note: Using half russet potatoes and half sweet potatoes is quite scrumptious.
 So you know it had to happen. Hot Chocolate #3. I may have mentioned my hot chocolate obsession before, and if you missed that, it may have occurred to you if you have ever browsed through the list of Snacks & Drinks and noticed Hot Chocolate #1 and #2. I drink it ALL THE TIME and almost always order it when I am out and about. Making the good stuff at home has become a bit of an obsession of mine and although I really love my version #1, I am always looking for a different flavor. I created this version and have been calling it crock pot hot chocolate or campfire hot chocolate all day, but in the end, it is just version #3. It does kind of taste like something I drink while camping, but I have no idea why. And it would be really easy to throw it in a slow cooker and let it sit in the background. Either way, it isn’t too sweet and the flavor is different from my other recipes so you can pick which one you prefer. One of these days I will find the right combination of melted chocolate and milk and cream and my life will change, but for now, cocoa is what I am working with. In the meantime, I try not to discriminate against any hot cocoa and like to switch it up depending on time and who I am serving. This recipe is a bit bigger and does great when you want to have it available for a larger gathering. The best part? I like to leave the leftovers in the fridge and drink it as I need to. Yes, I said need, not want! 🙂 Ha! It is like having hot chocolate on tap. Just a minute in the microwave and I am good-to-go. I’ll think I’ll go fix myself another cup…

 One Year Ago: Freezer Coffee Cake
Hot Chocolate #3
Feel free to use all milk in this recipe. I think it is rich enough with only half milk and it is better for you. That said, ultimately, it is all about being rich and creamy! You decide!
In a large sauce pan, or slow cooker, whisk together:
1-14 oz can sweetened condensed milk
1/2 c cocoa powder
pinch of salt
Add:
2 tsp vanilla
3 c water
3 c milk
Whisk everything together until incorporated and heat on medium low until very hot, whisking occasionally. Don’t let it burn! Alternatively, heat over low or high in the slow cooker, whichever you have time for, until very hot. Store leftovers in the fridge, stirring well before reheating. Drink will last 4-5 days in the fridge.
Black Bean Salsa
Brittany wrote this on 31 January 2012![]() black beans, gluten-free, lime, onions, radishes, tomatoes, vegetarian
black beans, gluten-free, lime, onions, radishes, tomatoes, vegetarian
 If you happen to be looking for a new recipe for the upcoming sporting event this weekend, well, your search is over. For me personally, it is less about the actual game (I don’t even know who is playing) or the halftime show (the last time I watched it Janet Jackson had a ‘wardrobe malfunction’-which we missed because the TV was on mute-and I was alone at a party with a crowd of people all over the age of 65 and who all ate way more than me-seriously) or the commercials (I never seem to be around when they are on) and it is really just about the food.
This black bean salsa is just a bit different from your normal kind of salsa. Now don’t freak out, but the secret ingredient is radishes! I know! I know! It is kind of weird, but when you think about it, it makes a lot of sense. Radishes are crunchy and kinda spicy-perfect for a salsa! And unless they ask, I have yet to have someone ever guess they are in there. All together, this makes an extremely healthy snack. Kind of a nice change of pace in the midst of salty, heavy, greasy party food! Radishes love cold weather so I make this for no reason at all in the spring and fall when I can find them at the Farmers Market. And even though there are canned tomatoes in this recipe, I only use them in the winter when tomatoes in the grocery store are not worth buying. So whatever recipes you are making this weekend, add this to the line-up! It just may become you new favorite, guilt-free indulgence!
 One Year Ago: Five-Minute Meatloaf
Black Bean Salsa
Recipe adapted from Rochelle McKenzie, my lovely Sister-In-Law who changed my husbands life forever by serving this salsa to us almost ten years ago! Many thanks, chica!
2 cans black beans, rinsed and drained
4 green onions, chopped
4-5 large radishes, trimmed and minced
2 cans petite diced tomatoes, drained, or two large tomatoes, diced
2 cloves garlic, minced
1 jalapeno, seeds and ribs removed, minced fine
2 tsp cumin
2 T chopped cilantro (optional)
1 T lime juice (fresh is better, bottled is fine)
1 T extra virgin olive oil (optional)
salt to taste
Combine all ingredients in a medium bowl. This tastes better after it has sat for a day, but still all good. Just taste it before you serve it to see if it needs salt. Serve with tortilla chips.
It has been raining here. A lot. And for days. It is wet, damp, drippy, grey, dark, cloudy, and frankly a little sad. My kids have colds and I am not feeling too hot myself. Naturally, I have been living off of hot chocolate.
 As previously mentioned in the post Hot Chocolate #1, I am a fan. I really love hot chocolate. Make it a peppermint hot chocolate and I am good to go. But when it comes right down to it, I am not discriminatory so I like to try new things. So far, Hot Chocolate #1 is the formula I have been using as a base for experimentation. I really like the dark, not-to-sweet flavor of cocoa powder. In the interest of variety, I added some chai tea bags to the recipe to see what would happen. And it was oh so nice. The spice is not overpowering, and it is much easier than going out and actually purchasing all the different spices you need to create the flavor of chai. This is just special enough that it is deserving of a Christmas mug, but not so complicated you can’t enjoy it any day when the temperature takes a dip. Merry Christmas!
One Year Ago: Mini Corn Muffins
Chocolate Chai
This recipe is just a slight adjustment to the first hot chocolate recipe. Enjoy!
In a medium saucepan stir together:
1/2 c sugar
1/3 c cocoa powder
pinch of salt
1/3 c hot water
Whisk to combine ingredients over medium heat until it comes to a boil. Keep stirring and boil one minute to dissolve the cocoa powder and sugar. Add: 4 c of milk (I use 3 c of 1% and 1 c of cream or all whole milk) and 6 chai flavored tea bags! Heat gently and slowly over medium low heat until it is hot and at serving temperature, stirring occasionally. Let the tea bags steep another 5 minutes in the hot cocoa. Remove the tea bags, carefully squeezing the excess liquid from them. Serve with whipped cream.
Roasted Shrimp-Who knew?
Brittany wrote this on 8 December 2011![]() gluten-free, shrimp
gluten-free, shrimp
Actually, Ina. Ina knew. Of course I am talking about the incomparable genius of Ina Garten. A woman you may have heard me mention once or twice. Of course there is a reason that me and so many others are dedicated followers. Her recipes and philosophy in the kitchen are straight forward, simple, and dedicated to making any food taste the best it can be. For example, today’s post is about shrimp cocktail, but I followed Ina’s advice and roasted the shrimp instead of boiling it like most recipes (and grocery store deli counters) do. Small change, but absolutely fantastic. The shrimp itself had such incredible flavor, you could eat it just the way it was. Who needs cocktail sauce?
Well, as it turns out, most people do. Shrimp cocktail may be a bit dated, but it is still a major party favorite. It seems to be one of those things that everyone still serves, and everyone still devours. Me included! My kids ate so much during our recent Christmas party, I had to cut them off lest they make themselves sick! Of course plain shrimp is still extremely delicious and if that is the way you roll, maybe just be a tiny bit adventuress and try a new dipping sauce. But if you really want to take your appetizers up a notch, give roasting a try. You may never go back again! I got the idea for roasting the shrimp from Ina, but I didn’t look up a recipe or anything. I just roasted it like I would anything else. The two sauces were quite spectacular and it was nice to have something acidic and spicy alongside something sweet, cool, and creamy. Both were very good but either on their own would be just fine!
One Year Ago: Honey Buns
Roasted Shrimp Cocktail
When I served this, people kept asking me what I had done to the shrimp. When I told them I just roasted it, they couldn’t believe that I hadn’t marinated it or seasoned it with something special. Leftovers are fantastic cold the next day over a salad. This recipe serves quite a few people so adjust your amount of shrimp accordingly.
3 lbs shrimp, peeled and deveined, tails left on
salt and pepper
olive oil
Toss shrimp with a drizzle of olive oil and a quick pinch of salt and pepper. Turn gently to coat the shrimp evenly. Place the shrimp on a sheet pan in an even layer and roast in a 400 degree oven for about 10 minutes, or until shrimp is just pink and firm. Be careful not to overcook it! Serve warm or at room temperature.
Bloody Mary Cocktail Sauce
Adapted from Rachel Ray
1 T fresh lemon juice
1 (14 oz) can crushed tomatoes
1 T horseradish
1 T Worcestershire sauce
1 tsp hot sauce
1/2 tsp celery salt, or more to taste
2 T vodka, optional
black pepper to taste
Mix all ingredients together and serve with cooked shrimp. Sauce last up to three days in the fridge. Please note that this tastes fantastic without the vodka!
Tangy Mango Sauce
From Family Circle
1/2 c mango chutney-I like Major Greys brand
1 c plain yogurt, fat free is fine
2 T fresh lime juice
Mix all ingredients in a bowl and serve with cooked shrimp. Sauce will last 2 days in the fridge.
Parmesan Dip & Butternut Squash Crostini
Brittany wrote this on 4 December 2011![]() butternut squash, lemon, mayo, parmesan cheese, sage, sour cream
butternut squash, lemon, mayo, parmesan cheese, sage, sour cream
 Well, it is done. A fast and furious hour and a half long cocktail party that I have been pondering the menu for for the last year, came and went. As Selma from Night Court once said, “I laughed. I cried. It became a part of me.”
OK. So I didn’t cry. But it did remind me again how blessed I am to live in a neighborhood full of such fantastic people. Wonderfully kind and generous couples who not only make living two states away from our nearest relative so much easier, but who also adore my children. We are the youngest couple in our group by about 20 years, but the Lord knew what He was doing when we moved to this neighborhood, unknowingly giving our kids a dozen ‘grandparents’ to and hug and praise them. This makes it not just a duty to host them this year, but a joy as well. And the best part? When it was all done, I got to finish off the night with dinner and dessert at two more houses! Win win!

 I apologize for some of the pictures. It was late and I didn’t have a chance to photograph everything. The food I did catch was in the process of being devoured so it is a bit untidy!
So what did we eat? Nothing all that fancy, but hopefully it was at least interesting!
Rosemary Orange Mixed Nuts
Crostini W/ Ricotta, Butternut Squash & Sage
Crudites W/ Creamy Parmesan Dip & Green Goddess Dip
Roasted Shrimp W/ Bloody Mary Cocktail Sauce & Mango Sauce
Lemon & Herb Deviled Eggs
Apricot, Fontina, & Proscuitto Bundles
Gougeres (French Cheese Puffs)
Pickles & Olives
White Cranberry Spritzers
Pop, Wine, Champagne
The Cranberry Spritzer recipe is from Cooking Light and you can find it here. The flavored syrup is made a day or two before and all you have to do is add the rum and club soda just before you serve it. Perfect when entertaining a crowd! The Gougeres, or cheese puffs, are an Ina Garten recipe and you can get it here. I actually made them several days before, froze them, and then reheated them in he oven for 8 minutes just before serving. They were perfect! The proscuitto bundles,pictured above, were exactly what they are called; just a dried apricot with a piece of fontina cheese on top and the whole thing wrapped in just a bit of proscuitto. Super easy, and can be made the morning of the party then just covered and chilled. They are sweet, salty, and wonderfully creamy. The green goddess dressing for the veggies was really good, but not blow your mind spectacular. That said, I will definitely serve it again and I got the recipe for it here. The Parmesan dip however was the overwhelming favorite.
 Parmesan Dip
From Gourmet
1 c sour cream
1/4 c mayo
1 c grated Parmesan cheese
2 T lemon juice
salt and pepper
Mix all ingredients in a bowl. Can be made a day ahead of time. Serve with assorted veggies.
We will cover roasted shrimp another day, but here is the recipe for the crostini. And wowzer, was it good! Beautiful to look at and perfect for any fall or holiday party!
 Butternut Squash Crostini
Adapted from Bon Appetit
1 large french baguette, sliced on the bias 1/4 inch thick
1 medium butternut squash, peeled, seeded, and diced small
2 T chopped fresh sage
salt and pepper
1 T brown sugar
olive oil
1 c fresh ricotta
Zest of 1/2 lemon
Toss the squash, sage, brown sugar, some salt and pepper and a good drizzle of olive oil in a medium bowl until coated. Spread into a single layer on a sheet pan and roast at 425 degrees until soft. Set aside. Mix together ricotta and lemon zest and set aside. Recipe can be made ahead of time up to this point. Refrigerate everything for up to one day. When ready, warm squash just a bit in the microwave. Toast the bread on a sheet pan in a 400 degree oven just until golden brown. When ready to serve, spread a generous amount of ricotta on each baguette slice and then top with 4 or 5 pieces of squash.
Sweet & Savory Mixed Nuts
Brittany wrote this on 2 December 2011![]() almonds, gluten-free, orange, peanuts
almonds, gluten-free, orange, peanuts
 Every year my neighborhood gets together and does a progressive Christmas dinner the first weekend in December. Appetizers at one house, soup and sandwiches at another house (although one year we did pastas!) and desserts at a third house. Everyone decorates their houses and all the lights are on and we visit and eat and laugh! It is fairly low key and a great chance for everyone to relax without the stress of gifts or family and just catch up and have a great time. This year, now that our house is mostly done (our dining room chairs were delayed in delivery so we won’t have any until Monday-oops!) I finally get to host part of the dinner! The previous four years of events have set the bar pretty high so I hope everyone enjoys it! I have the first course so expect some great recipes and fun pictures in the next few days! But today, I am cooking and cleaning and trying to figure out which platters to put everything on!
Almost every recipe I am making can be done ahead of time, or at least part of it. We are going for stress free here people! Between my complicated pregnancy, family illnesses, and the fact that my husband is at work 14 hours a day all equals easy, make-ahead appetizers! I’ll post the full menu later, but for now, here are some savory roasted nut snacks that I was testing out. I am still unsure which recipe I am going to serve, but they are both so good I wanted to post them here for you to choose! I have no idea where either recipe came from, as they were scribbled down in the margin of a notebook, so the creators are out there somewhere! Both are quick, very easy, and perfect for a crowd. Both recipes can easily be doubled if you think you will be snitching before the party starts! Or just whip up a batch to munch on while you wrap presents and watch Elf! That may or may not be what I was doing late last night…
Savory Rosemary Orange Mixed Nuts
2 c mixed nuts
1 T butter
2 T sugar
1 T fresh rosemary, finely chopped
Zest of 1 orange
fresh ground pepper to taste
Melt butter in a small saute pan. Add rest of ingredients and toss continually over medium heat until nuts are fragrant, about 3 minutes. Spread on a baking sheet to cool. Sweet and Spicy Mixed Nuts
2 c mixed nuts
1 egg white, beaten
1/4 c brown sugar
2 tsp paprika
1/2-1 tsp cayenne pepper, or to taste
Mix all ingredients together in a bowl and then spread on a baking sheet lined with parchment paper. Bake at 350 for about 12 minutes, or until coating is set. The nuts will still be just barely moist when stirred. Cool completely and break apart if needed.
Sun-Dried Tomato Dip
Brittany wrote this on 28 November 2011![]() cream cheese, mayo, tomatoes, vegetarian
cream cheese, mayo, tomatoes, vegetarian
 This post has been in the works for several days now. I had planned on posting it Friday, but just ran out of time. No, I was not out shopping at 3am. I don’t do the whole ‘Black Friday’ thing and usually get most of my shopping done long before the end of November. I have just been busy with cooking and baking and company. My parents were in town for the holiday-the first time they have ever been here for Thanksgiving!-and we were watching movies, eating, putting together puzzles, eating, bowling on the Kinect, eating, and decorating for Christmas. I like to use the people who come to visit me as test subjects for new recipes. Muwah-ha-ha-ha! I know the two mornings in a row that I made doughnuts trying to get things just right was particularly hard on my Father. I’m sure he ate them all so as not to hurt my feelings. So chivalrous.
One recipe I served them was certainly not a tester. I have made this dip countless times before and since it is kind of red and green, figured it fit right in with the holidays! I love this recipe for several reasons, not the least of which is the fact that you can make it a day before you serve it and it lasts for several days after that. It is tangy and sweet and unbelievably simple. It is a great dish to bring to a pot luck holiday party and definitely a recipe you want to have in your repertoire. In addition to being great for this time of year, it is also wonderful in the middle of summer. In fact, I make this year round and usually serve it with Caramelized Onion Dip. The two together make a great pair to snack on as guests arrive for a BBQ or on a buffet for your holiday open house. Infinite thanks go out to Ina Garten for the recipe! This recipe, as well as the Onion Dip come from her first cookbook, The Barefoot Contessa Cookbook. I have been cooking and baking from it for years and it makes a great gift if you are looking for something for the foodie in your life!
 Sun-Dried Tomato Dip
1/4 c sun dried tomatoes packed in olive oil, drained and chopped
1 block (8 oz) cream cheese, room temp
1/2 c sour cream
1/2 c mayo
hot sauce to taste, 5-10 dashes
pinch of salt
several generous grinds of black pepper
2 green onions, white and green parts, chopped
Pulse all ingredients except the green onions, in a food processor just until everything is combined. Add onions and pulse just to mix. Serve with veggies, crackers, chips, or my favorite, slices of crunchy chewy baguette.
Note: If you don’t have a food processor, just make sure you have your tomatoes chopped fine and then mix everything in a bowl with a hand mixer. Also, this tastes just as good if you choose to use low fat cream cheese, sour cream and/or mayo.
Love a Good Recipe?

Then you’ve come to the right place! I’m Brittany, and I share tested, trusted recipes you’ll love. I prepare & photograph food, obsess over the perfect recipe, and enjoy grins of delight when I serve up something awesome. Enjoy!


