 Brittany's Pantry
Super Quick Peanut Butter Cookies-GF & DF
Brittany wrote this on 19 April 2014![]() gluten-free, peanut butter
gluten-free, peanut butter
 Peanut butter is a funny thing.
You can turn it into a savory sauce for noodles, no-bake confections for the holidays, or the ever classic favorite, straight up peanut butter cookies. Speaking of cookies, peanut butter needs little in the way of help to bake up as such. The following recipe is a kind of classic formula that has recently become popular again due to the demand of gluten-free, dairy free, and grain free recipes.
But this isn’t some fancy schmancy new development. I remember making something like this when I was a kid and maybe rolling them in sugar before baking? Not sure. But throwing together treats with few ingredients is old hat in the foodie world and these cookies are a prime example. They just happen to be naturally gluten and dairy free. Which, in turn, makes them great for the masses, just in case you need something that covers all your bases with guests.
In the end, what is really important here is that they taste good. They taste awesome, actually, and may just replace your classic peanut butter cookie. They are just so much more….peanut-ty…than other cookies. Like, the essence of peanut butter in cookie form. I still kind of marvel that you can put so few things together and have them bake up so perfectly cookie-like. Because they are so wonderfully simple, they are the perfect platform to use in other applications. For example, I highly recommend putting a scoop of chocolate and vanilla swirled ice cream between two of these. I mean, its just…*sigh*…outrageously good. Crumbled up and added to a bowl of vanilla frozen yogurt? Also not a terrible idea. Neither is using them as a scooper for applesauce.
Do YOU do anything special with your peanut butter cookies?
 One Year Ago: How To: Basic Quinoa
Two Years Ago: Freezer Fajitas
Three Years Ago: Banana Chocolate Chip Muffins & Mexican Rice W/Black Beans & Pasta W/Zesty Bolognese
Gluten-Free Peanut Butter Cookies
I have never tried making this with almond butter, but I have no doubt it would be fantastic.
1 c creamy peanut butter
1 c sugar
1 large egg
3/4 tsp baking soda
Combine all ingredients in a medium bowl. Drop by rounded teaspoonfuls onto a sprayed or parchment covered sheet pan and bake at 350 for 9 minutes. The cookies should be just barely golden around the edges. Let cool on the pan until set enough to remove with a spatula.

Honey Cardamom Snack Cake
Brittany wrote this on 5 April 2014![]() honey, sour cream, whole wheat flour
honey, sour cream, whole wheat flour
 A year or so ago, my friend Thea and her family stopped by to visit on the way through town. Aside from the fact that I have know her more than 20 years and she remembers what I looked like in the mid 90’s, she is a professional baker. She has been mostly special occasion cakes for the last 8 years, but recently opened up a store front, giving the general public a chance to enjoy her creations on a day to day basis. Needless to say, we talk flour, butter, sugar, and eggs whenever we are together.
On this particular visit, I was baking something. For the life of me I canNOT remember what it was, but I assure you, it wasn’t cake. Of all the things to feed a professional baker, I avoid baked confections as much as possible. Usually I lean toward things like creme brûlée, fruit bars, and puddings. Whatever it was I was making, Thea walked into the kitchen, sniffed, and her eyes lit up. “Are you using cardamom?” was her immediate question. Yes, I told her. Why? “It is one of my favorite spices,” she declared. “But it is so under-used!’
I agreed. Even though it is a warm flavor with an almost herb-y quality to it, and is often mixed with Christmas spices, you don’t often see it used completely on its own. I happen to love it. I add it to my plain banana bread, shortbread cookies, and most recently, as the feature flavor in snack cakes!

 As you can see, my two year old wasn’t willing to wait until I was done photographing. The honey is the only sweetener in this recipe so please please PLEASE use local, raw honey if you have the chance. The flavor is incomparable to the stuff from the grocery store. It also gives it the perfect level of sweetness. Paired with a simple, sour cream snack cake base and the warmth of the cardamom, it is just homey. If you want to use it as a dessert, fresh strawberries and sweet whipped cream are outstanding with this cake. But generally, I just like to pick it up and take a bite.
Thea would approve.


 One Year Ago: Loaded Black Bean Quesadillas
Two Years Ago: Cream Cheese Banana Bread
Three Years Ago: Honey Carrots & Non-Traditional Shepherd’s Pie & One Bowl Chocolate Cake
Honey Cardamom Snack Cake
This tastes great on day two so whip it up when you have time and enjoy as an after school snack!
1/2 c (1 stick) butter, room temp
1 c honey
2 eggs
1 tsp vanilla
1 c white whole wheat or whole wheat flour
1 c all purpose flour
1 1/2 tsp ground cardamom
1 1/2 tsp baking powder
1/2 tsp baking soda
large pinch of salt
3/4 c sour cream
Preheat the oven to 325.
Using a hand or stand mixer, combine the butter and honey until creamy. Add the eggs and vanilla and beat until smooth. In a separate bowl, combine the dry ingredients and add half of the mixture to the honey mixture. Mix slowly until starting to combine, and add half the sour cream. Still mixing slowly, add the last of the dry ingredients and the last of the sour cream. Mix until just barely combined, finishing by hand and scraping down the bowl at the end. Pour batter into a greased and floured 9 inch cake pan and bake for 40-45 minutes or until a toothpick inserted in the center comes out clean. Let cool on the counter for 10 minutes or so, and then turn out onto a rack and let cool the rest of the way. Slice into wedges and serve!
Mission Fig Bites
Brittany wrote this on 26 February 2014![]() almond butter, chocolate, figs, gluten-free
almond butter, chocolate, figs, gluten-free
 I never had Fig Newtons growing up.
If it wasn’t a generic brand or purchased in bulk (Hydrox cookies all the way!!), I didn’t eat it. In high school on the bus to a swim meet, a friend of mine passed me my first Fig Newton. Now, I learned a lot of things from my fellow chlorine addicted athletes. They taught me how to whistle, what a fish tail braid was, and introduced me to the benefits of facial moisturizer. But these? I was a bit underwhelmed, to say the least. What was all the fuss about? I knew what they were of course, the 80’s and 90’s being filled with the slogan, “A cookie is just a cookie, but Newtons are fruit and cake.” Remember that? Yeah. They don’t tell you that you need three glasses of water handy just to get one of them down. Dry, tasteless, and with a weird figgy crunch, I never saw the need to eat one again.
After this, I assumed I just didn’t like figs. Fast forward a few years to me eating a slice of pizza at a vineyard in Temecula CA. I don’t remember the specifics, but the super thin crispy crust, roasted fresh figs, arugula-and maybe some cheese?-had me hooked. Obviously I was missing out.
When I found this recipe in this cookbook, I raised my eyebrows. Lots of foods taste good dipped in chocolate (peanut butter, strawberries, bacon…) but figs? You have to draw the line somewhere and I assumed it was well before this combo. But I love little bites of things I can make ahead of time and if it is good for me, even better. So I gave them a try. And you know what?
Eureka! The sweetness of the figs is more than enough to satisfy any sugar craving, so naturally, my kids devoured them. They found the crunch of the fig seeds highly entertaining…My husband inhaled his share, confessing that he has always loved figs and then asking why I didn’t cook with them more often. Apparently, they were a hit. The few people I passed them along to went wild for them as well, despite my constant skepticism about wether they would appeal to most people. I mean, I liked them, but I’ll eat just about anything and therefore tend to try not to use myself as a chocolate barometer. I can’t wait to tuck them into goodie containers during the holidays and these are SO going on my list of treats to send along with dinner when I have a friend in need. My daughter took one in her lunch today. I’ll think of it as this generations version of a Fig Newton…

 One Year Ago: Sweet Potato Hash
Two Years Ago: Strawberry Avocado Salad W/Honey Lime Vinaigrette & Bite Sized Cinnamon Rolls
Mission Fig Bites
Recipe adapted from Giada DeLaurentiis
I am not a calorie counter, but I noticed that these little babies are only about 60 calories a piece. Yippee!! Fortunately, the figs in them are so sweet, I only need to eat one!
3 c roughly chopped dried mission figs, stems removed (about 14 oz)
2-3 T almond butter
1 bag good quality dark chocolate chips
1 T vegetable or grape seed oil
In a medium microwaveable bowl, dump in the chocolate chips and pour the oil over top. The oil makes the chocolate just a tiny bit easier to dip and gives the set chocolate a smooth and shiny appearance. Melt them together in 30 second intervals, stirring after each one and stopping just before completely smooth. Stir vigorously until the last lumps are out, being careful not to overheat. In the meantime, combine the figs and just 2 T of the almond butter in a food processor and let run until combined and chopped together. If the mixture won’t hold together when you pinch it, add the last tablespoon of almond butter. This will depend on how dry your figs are. When it is done, use a teaspoon to scoop out a ball the size of a large grape. Press and squeeze the mixture into a ball, rolling it gently into an even circle. Dip it in chocolate-a fork is best for this-letting the excess chocolate run off. Use a toothpick to slide the balls off the fork and onto a wax or parchment paper lined sheet pan. This will keep the tops perfect and smooth. If you don’t care if they are pretty, just plop them down onto the pan. 🙂 Let cool for about an hour for the chocolate to set and harden. Store in an airtight container on the fridge for a week or two, or freeze for up to 1 month!
Rocky Road Crispy Bars
Brittany wrote this on 8 February 2014![]() cereal, chocolate, gluten-free, marshmallows, peanut butter, peanuts
cereal, chocolate, gluten-free, marshmallows, peanut butter, peanuts
 In some ways, I can’t even believe I am posting this….
This recipe was born strictly out of my need to eat something sweet and chewy. There is no grand idea or occasion, just me making bars four times this week in an effort to put together something that sounded good in my head. Thats it. Reason enough, I guess. Yes?
Rest assured, these are good. Very good. Crispy, crunchy, chewy, chocolatey goodness. A dressed up version of the classic Crispy Bar. These would be awesome to serve at a kids party-if there were no nut allergies, of course. But I have seen many adults get excited when they see them too so don’t limit yourself as to who to make them for. Because sometimes, even little and seemingly insignificant times, like a wednesday, call for a Rocky Road Crispy Bar.

 One Year Ago: Buttermilk Cremes
Rocky Road Crispy Bars
1-16 oz bag marshmallows (note: this is the big 1 lb bag, not the regular size)
4 T (half stick) of butter
1/2 c creamy peanut butter
1-12 oz box crispy rice cereal
1 c peanuts
1 c semisweet or dark chocolate chips
3 c (half of a regular 10 oz bag) of mini marshmallows
In the largest microwaveable bowl you have, melt the large marshmallows, butter, and peanut butter in 30 second intervals, stirring between times until smooth and creamy. Add the crispy rice cereal and quickly stir and fold together until combined. Ad the mini marshmallows, peanuts, and chocolate chips and stir until evenly distributed, using buttered hands at the end if that is easier. Press the whole mixture into a buttered 9X13 pan and let sit until room temperature. Cut into squares. Keep sealed in an airtight container for up to three days.
 I had no idea that this recipe was going to be such a pain in my tush.
 I was making guacamole and margaritas for a meeting this past week and was going to test a few of my spicy mexican cookie recipes so that we would have something sweet to nosh on after the salty stuff. Mexican cookies, much like Mexican hot chocolate, are basically a cinnamon spiced chocolate cookie. If you frequent Caribou Coffee, you saw the Spicy Mocha make an appearance this year. It has a spice mix added that has cinnamon and chili in it and will clear your stuffy nose right up!! Yowza. Zippy! It is quite fantastic and when I can make it to a Caribou, I treat myself. When I make cookies though, I prefer to give it a bit of a kick with some heat so that you really know you are eating something other than a standard chocolate cookie. I narrowed it down to two recipes, but neither was exactly what I was looking for. Eventually, in an effort to avoid the 13 tries it took me to get the oatmeal raisin cookies just right, I started from scratch and crossed my fingers.
The result? I ate so much chocolate and ingested so much cayenne and cinnamon that I gave myself a headache and took to driving around town and harassing my friends so that they would eat them instead because my tastebuds were fried and I could no longer tell the difference between one cookie and another. Major antioxidant overload. Thankfully I hang out with opinionated and honest people so I knew just what to do to finish off this recipe. Now you can make them too and share in the spicy triple chocolate experience. Add a cup of coffee (or tea if that is your poison) and you will be oh so cozy and warm. Never mind the snow falling outside the window.
 One Year Ago: Pomegranate Glazed Carrots
Two Years Ago: How To: Poach Chicken & Weeknight Apple Pie
Three Years Ago: Oatmeal Pancakes & Giada’s Chocolate Chip Cookies & Chicken Salad
Triple Chocolate Mexican Cookies
These are wonderfully chewy without being cake-y. Kind of like a sturdy, round brownie. Obviously you can adjust the spice level to your liking as everyone prefers different levels of heat. Doubling the amount of cayenne tastes awesome, but makes it hard to eat more than one.
5 oz unsweetened chocolate, chopped
1/2 c (1 stick) of butter
1 c brown sugar
1/2 c sugar
1 tsp vanilla
2 eggs
1/2 c all purpose flour
1/2 c white whole wheat flour-or another 1/2 c of all purpose
1/2 c cocoa powder
1/2 tsp baking soda
1 T of cinnamon
1/2 tsp of chili powder
1/4 tsp cayenne
1/4 tsp of black pepper
1 c mini chocolate chips
Preheat the oven to 325 degrees. Put the chopped chocolate and butter into a medium glass bowl and microwave in 30 second intervals, stirring between each time until just barely melted. Set aside.
In the bowl of an electric mixer, combine the sugars, vanilla and eggs until smooth. With the mixer on low, slowly add the melted chocolate and combine. Scrape the bowl until the chocolate is all incorporated. Add the dry ingredients and mix just until combined. Add the chocolate chips. Scoop by rounded teaspoonfuls onto a lined or greased sheet pan and bake for 11 minutes. Cool slightly before removing to a cooling rack. This recipe makes exactly 3 dozen and these freeze wonderfully. Otherwise keep sealed in a container at room temp for up to three days.
Homemade Instant Hot Cocoa Mix
Brittany wrote this on 6 January 2014![]() chocolate, cocoa, coffee, gluten-free, milk
chocolate, cocoa, coffee, gluten-free, milk
 So…um….yeah. This weather sucks lemons.
Before we get to todays recipe and my witty ramblings, I want to point out the handy dandy little icon on the top right of this page. YES! The rumors are true! Brittany’s Pantry has joined INSTAGRAM!!! Do you know what this means, faithful readers? It means that you now have photographic visual aids to keep up to date with my kitchen, my cooking, my failures, and yes, my pantry! So click on the link to join me and while you are at it, check out Brittany’s Pantry on Pinterest, Facebook, and Twitter!
So. Between the church cancelations, school closings, impassable roads, and dangerous cold here in central IL, it is safe to say that we are kind of stuck in the house for a bit. I’ve made soup, roasts, stews, baked desserts, and I am finally breaking free from the comfort food coma and heading in a lighter direction tonight; Roasted Fish with veggies and Baked Garlic Brown Rice. I am still using the oven to give that warm, cozy feeling to the main floor of the house, but with something a little healthier than a baked/chicken/pasta/cheese/cream/bread crumb/butter type of casserole. But this meal is no less comforting. The rice is going to make the house smell deeeee-VINE ( a kind of…pre-requisite for food made during a winter storm) and the rest will be hot and tasty. *sigh* I can’t wait for dinner.
Between meals that could sustain olympic swimmers with their sky-high calorie count, you need to sip something just as warming to your soul. For me, that will always be hot chocolate. If you are a long time reader of this blog you know my obsessions with hot chocolate. I have no less than three different recipes for it in archives here and I am always looking for different versions. No matter what kind I make, it is always from scratch. I am a bit of a snob when it comes to hot chocolate and I haven’t bought anything in a packet in years. Why would you when you can make it sooooo much better yourself?
That said, I am the mother of three and sometimes, I just need the convenience of the already mixed up instant stuff. Luckily, my Mom is the mother of six and wouldn’t ya know-she used to make her own! This is not a revolutionary idea, but strangely, I don’t know many people who do this. The monetary savings are enormous, but that aside, it just tastes better! And the fact that I know exactly what is in it gives me that same warm fuzzy feeling that drinking it does. Sometimes I make different versions of this that contain actual grated chocolate instead of cocoa powder, but my master version does not. The cocoa powder adds incredible chocolate flavor while allowing you to control the level of sweetness. Is it the best hot chocolate in the world? No. But it is cheap, easy, super fast, adaptable, and last a long time. That is a major success in my book and definitely earns it a spot here to be shared with all of you. I have made a ridiculous number of versions of this over the years and the main goal has always been to create a mix that doesn’t actually taste like a mix. It should be rich. It should be chocolatey. It should make you go ‘Mmmmmmmmmmm’ (like Will Farell does in elf when he adds the booze to his coffee thinking it is maple syrup) instead of ‘Mmmm-Hey! I can taste the preservatives and high fructose corn syrup in here. Can you?’
Because that is most defiantly NOT comforting.
So when it comes to a hardy, non-perishable mix, this is what I use. When I was a kid, my Mom used to make this in huge double batches (6 kids, remember?) and store it in an empty gallon ice cream pail. Come to think of it, we stored a LOT of stuff in ice cream pails. They seal tight on the top and they have a handle. What could be better? Snack mix, cookies-all kinds of things. Either way, my batches aren’t doubles, but we do store ours in an gallon ice cream bucket too. It tastes even more nostalgic that way. In the picture above, the last of the mix-we had been using it quite a bit before the weather cooperated enough for me to photograph it-in a quart tupperware container. A gallon plastic bag works great as well, for mixing and for storing. Obviously this would be fantastic gifted to friends and family around the holidays, but when the weather turns ugly, it is a handy thing to have tucked in your pantry.
And that is very comforting. One Year Ago: My Go-To Sloppy Joes
Two Years Ago: Forgotten Kisses (Peppermint Meringue Cookies)
Three Years Ago: Honey Waffles & Filet Au Poivre & Fettuccine W/Spinach Alfredo & Shrimp Quesadillas
Homemade Instant Hot Cocoa Mix
This is OK made with hot water, but it is MUCH better made with milk. Use whole milk if you are being particularly indulgent, but I have made it with skim and it is still lovely and creamy. A heaping spoonful added to cup of coffee gives you a nearly perfect mocha. Feel free to add Tablespoon or so of cinnamon to the batch to make a spiced hot chocolate mix.
Sift together:
2 c powdered sugar
1 c cocoa powder (dark is fine)
Add:
2 c powdered milk
1 c powdered non-dairy creamer
heavy pinch of salt
Combine ingredients well and store in an airtight container. When ready to use, fill whatever size mug you are using about half full of mix and fill the mug with hot water or hot milk.
Outrageous Caramel Dip
Brittany wrote this on 27 December 2013![]() apples, caramel, gluten-free
apples, caramel, gluten-free
 I stumbled across this recipe on another food blog and the picture of an apple doused in hot caramel dip drew me in. Actually, ever since I was pregnant with my second, caramel has been at the top of my ‘eat it’ list. I haven’t been a very big caramel fan in the past, but ever since Eli, it started tasting really good. And that yummy taste hasn’t waned. Unfortunately.
I really love this cold, creamy dip for apples. But friends, I am telling ya. Todays dish is a whole other ball game. A horse of a different color. Totally different dip, people. I can see it making a legend out of you. It is that kind of recipe. You bring it to a party or get together just once, and you will forever thereafter be known as the-one-who-brough-that-amazing-caramel-dip. I am not exaggerating in the least when I say that it tastes best when devoured with a spoon, but if people are watching, you generally want to be a bit more civilized and use an apple slice or pretzel. If you happen to be among family who will love you no matter what, just put the bowl in the middle of the table with a handful of spoons and announce, “Dessert is served!”

 Two Years Ago: Leek & Potato Soup
Three Years Ago: Sweet Cream Biscuits
The BEST Caramel Dip
Recipe adapted from Bless This Mess
This is good with pretzels, but even better with apple slices. Warm it up and douse your vanilla sundae or hot pancakes with it!
1/2 c (1 stick) butter
1/2 c brown sugar
3/4 c light corn syrup
1-14 oz can sweetened condensed milk
1 tsp vanilla
Put the first four ingredients in a small, heavy bottomed sauce pan over medium/medium low heat. Stirring constantly, melt all the ingredients together and bring to JUST below a bubble. It will scorch if it gets too hot, but you want to go just until the brown sugar is melted. Remove from heat and store at room temperature for a day or two or in the fridge for up to two weeks. Caramel will become extremely firm when cold, but setting it out at room temperature will make it pliable enough to dip. This also freezes great so make it ahead if you need to, or freeze half for later.
 Did you ever try a food or a certain dish that those around you at the time couldn’t believe you had never had it before? Were you in college when you took your first bite of cold pizza while surrounded by cold pizza eating veterans? Maybe you were introduced to Cool Whip at a friends house in Junior High. Perhaps your In-Laws were the first to ever put a plate of tuna noodle casserole (with crushed potato chips on top) in front of you at the supper table. And don’t tell me you have never had lime green jello with pineapple floating in it and carrots shredded on top!! The last one seems to be some kind of old lady right of passage in Minnesota.
*Side Note* I asked my husband this question and after some thought, he replied, “When I was in Japan (on leave) the lady at the cafe couldn’t believe I had never had fried balls of squid before.” I gave him a bland look and kept typing…
Back on track with the subject at hand here, what I mean to say is this dessert was one of those for me. The first time I ever had this, I was 16 and working in the 4-H building at the MN State Fair and I was making it for 400 people. I was also the only one who had never had it. It is a fairly common dessert, I was told, but I had never heard of it, let alone eaten any before. And ooooooooooh man was I missing out. If you have never had it, it really does take like a chocolate eclair!!!! I don’t know what kind of magic the pudding and cream work on the graham crackers that make it taste like pastry, but however it happens, its delightful.
If this recipe, or one similar, is common knowledge to you, and you grew up eating this at potlucks and church functions, well then all I can say is that I am jealous. Jealous of the years I missed out. As it is, I rarely make it because it makes a full 9X13 pan and I cannot. say. no. when I eat this. I try to only make it for a crowd and the holiday season is the perfect time. You have to make it ahead of time and it requires no last minute steps. I recently served it two weekends in a row at two separate occasions, and sadly, there was little left either time. I have been trying to figure out how to justify making it for the third time in two weeks, but until I do, these pictures will have to suffice. Granted, its no jello and carrot salad. But definitely better than cold pizza.


 One Year Ago: White Chocolate Cranberry Swirl Cheesecake
Two Years Ago: Potato Gratin
Three Years Ago: Hot Chocolate #1 & Indian Summer Chili
Chocolate Eclair Dessert
Adapted from the MN 4-H Cafeteria Archives
With most recipes, I prefer to use real whipped cream, but the store bought kind help this dessert hold its shape better. If you are in a pinch, go ahead and use a can of store bought chocolate fudge or dark chocolate frosting. But I highly recommend making it yourself. It makes all the difference!
1 box of honey graham crackers-the cinnamon ones have too bold a flavor
1-5 oz box of instant vanilla pudding mix-french vanilla and cheesecake flavors are OK too
1-8oz container of whipped topping
1 can chocolate frosting (if you are really desperate) or see recipe below
Prepare the instant pudding mix 1/2 c of milk shy of the package directions. For most brands, this is 2 1/2 c of milk total. Whisk and chill. When smooth and thick and cold, gently fold in the container of whipped topping. Line the bottom of a 9X13 baking pan (glass, ceramic or whatever) with whole graham crackers, cutting or breaking to fit if necessary until completely covered. Pour half the pudding and cream mixture over the crackers, spreading flat. Add one more single layer of whole graham crackers, filling all spaces. Pour on the second half of the pudding mixture and top on last time with whole graham crackers. Do NOT try and save time frosting it now. Uber messy. Cover and chill several hours until very cold, THEN frost with chocolate fudge frosting. Chill until ready to serve and cut into large squares with a sharp knife. Lift out each piece using a second spatula to help slide them off on to the plates. This way they will stay perfect and square! Store tightly sealed in the fridge for up to two days.
Chocolate Frosting
I can’t even remember the last time I bought frosting from a store. And why would you when you have this one to use? This frosting is dark and chocolatey, which is a flavor must for this recipe, but feel free to use in on any 9X13 sized cake you are making! The cocoa adds amazing dark chocolate flavor but is much easier that chopping and melting a block of chocolate.
1/4 c (4 T) soft butter
1 c cocoa powder, preferably sifted (1/2 regular cocoa and half dark cocoa is quite fantastic in this recipe)
3 c powdered sugar
1/3 c milk, or more
Mix the first three ingredients, adding a splash of the milk to help them go together. Keep adding tiny splashes of milk until it gets to the consitencey you are looking for. Beat with a whisk till smooth. Leave it nice and thick but just barely spreadable. You don’t want it too soft on the dessert. Remember, it will firm up when you chill the whole thing, hence, easy to cut!
Cherry Pistachio Butter Cookies
Brittany wrote this on 15 December 2013![]() cherries, pistachios
cherries, pistachios
 Aren’t these festive? So pretty on a white plate! Let me tell you about them….
Essentially, someone made a cross between a russian tea cake, shortbread, and holiday fruit cake-minus the booze. The result? A pale green (yet mint free, for all of you who have mint aversions, and therefore avoid green confections) crumbly kind of butter cookie that taste delightfully nostalgic. I don’t really know why, but the green pistachio pudding mix in the cookies are probably the reason.
For the record, my Mom never ever ever made instant pistachio pudding for us when we were kids, but something about it tastes like coming home. Add in bright red maraschinos and you have a down right merry little cookie. They are quite sweet looking (pun intended) on a dessert tray at a party and kids seem to gravitate toward them especially. I mean these are green cookies, people! How can that NOT put you in the Christmas spirit?!

 One Year Ago: Creamy Penne W/Shrimp
Two Years Ago: BBQ Chicken Sandwiches & Quick Coleslaw, Fillet of Beef, The Best Carrot Cake Ever
Three Years Ago: Puppy Chow, Chewy Ginger Cookies, Blueberry Sour Cream Coffee Cake Muffins
Cherry Pistachio Butter Cookies
Adapted from iheartnaptime.com
This dough is pretty tolerant so be brave and let your kids help roll these.
1 c (2 sticks) butter, softened
1 box (3 oz) instant pistachio pudding
1 2/3 c flour
1/2 c maraschini cherries, finely chopped
After you finely chop the cherries, fold them into a double layer of paper towels and press the excess liquid off of them. They need to be pretty dry when you mix them in. Using a hand mixer or stand mixer, combine the first three ingredients until smooth and combined. Gently mix in the cherries JUST until evenly distributed. Scoop the dough into small teaspoon sized portions, roll between your hands to make a smooth ball, and gently press to make a slightly flat hockey puck shape on a sprayed or lined sheet pan. Bake at 350 for about 10 minutes, or until the edges are just lightly browned. Cool and sprinkle with additional powdered sugar if desired.
Christmas Munch
Brittany wrote this on 9 December 2013![]() cereal, peanuts, pretzels, white chocolate
cereal, peanuts, pretzels, white chocolate
 This may come as a surprise, but there is a bit of a story that goes with this recipe. I know. Shocker, right?
Years ago, during a pre-children Christmas get together, my husband and I were catching up with a bunch of his cousins. We were stuffed to our ears with holiday food and had retired to the couch to digest, chit chat, and take turns trying to master Guitar Hero. My cousin-in-law set a bowl of some kind of snack mix in front of me and I nearly fainted from just the thought of another bite passing through my lips. Strike two was the fact that it appeared to be covered in white chocolate; not my favorite food. If it isn’t swirled into a cheesecake, whipped into buttercream, or mixed with dark chocolate and espresso, I generally avoid it. White chocolate isn’t actually chocolate at all, but I’ll stay off that soapbox until another day!
Needless to say, I smiled politely and declined.
But this cousin was sneaky and she knew the power of a Cheerio, peanut, and M&M combo. She innocently left the bowl there and what happened next was nothing short of shameful. I ate it. All. Every crumb. It was seducing with its creamy sort of sweetness and addicting crispy crunch. The sweet and salty combination just kept wooing me, pulling my fingers back for just one. more. bite.
I never forgot that day. It has haunted my holiday dreams for more than a decade and about a year ago, I caved and emailed said cousin. Did she possibly remember that snack mix, and would she be willing to part with the recipe? Of course! was her reply, and I anxiously awaited the time of year when it is again acceptable to repeatedly serve unhealthy foods to friends and family. A time of year when one batch of something is large enough to be used for a dessert buffet, a snack for that work meeting, after school munchies, and the unexpected treat that you now realize you forgot to make for you kids school holiday celebration. It stays fresh and crunchy for several days so make sure you plan to throw this together on a family candy making day. It looks beautiful in clear cellophane bags tied with ribbon. It also makes a great gift for teachers, church volunteers, neighbors, or just a quick sweet treat to whip up that the kids can help with. Fun, festive, and hauntingly good.
It tastes even better when you eat it while playing Guitar Hero. Chillin on our screen porch.

 One Year Ago: The Best Creme Brûlée
Two Years Ago: Bon Bons, Roasted Shrimp & Peppermint Chocolate Chip Cookies
Three Years Ago: Honey Buns
Christmas Munch
Recipe adapted from Katie Arcand
2-12 oz-bags good quality white chocolate or 24 ounces of white chocolate chopped-NOT ALMOND BARK
3 T vegetable or canola oil
4 c Cheerios or other toasted oat cereal
4 c Rice Chex or similar cereal
2 c small twisted pretzels
2 c salted, roasted peanuts
1-12 oz bag plain M&M’s in festive Christmas colors
In a medium glass bowl, microwave the white chocolate and oil in 30 second intervals, stirring between times to distribute the heat. Be careful that you don’t let the chocolate burn! If only a piece or two of chocolate are yet unmelted, stir vigorously and the mixture will become smooth. Meanwhile, gently toss the remaining ingredients together in a super duper large bowl. Divide the mixture between two if needed. Pour the melted chocolate over and carefully mix until everything is lightly coated. Spread the munch out on two sheet pans that have been lined with wax or parchment paper. Cool until set and break into smaller pieces. Store tightly sealed.
Ruby Bars & Thanksgiving Inspiration
Brittany wrote this on 24 November 2013![]() apple butter, cranberries, oatmeal
apple butter, cranberries, oatmeal
 I call these bars Ruby Bars because if their color (obviously) and I will tell you that they are filled with a cranberry and apple butter sauce. Intrigued? I was too. I am so excited to share this recipe with you, but before I do that, I have a quick little round-up of Thanksgiving ideas! Just in case the influx of holiday magazines, Pinterest boards, recipe flip books at the grocery store registers, and family traditions have completely robbed you of inspiration!
Appetizers
 Lemon & Herb Deviled Eggs– You won’t believe how lovely these are. Just different enough to be interesting, but not weird enough to scare off your relatives.
 Caramelized Onion Dip– There are certain places I am not allowed to show my face without this dip in my hands. Its that good. Make it the day before you need it to save yourself some time.
 Instant Hummus– Guilt free snacking while you try to keep the kids fingers out of the jello salad.
 White Sangria–Mmmm. Light, fruity, and the perfect pre-drink to a turkey dinner.
 Hot Apple Cider– Classic for a reason.
Main Menu
 Pomegranate Glazed Carrots– So good, they should have been at the first Thanksgiving.
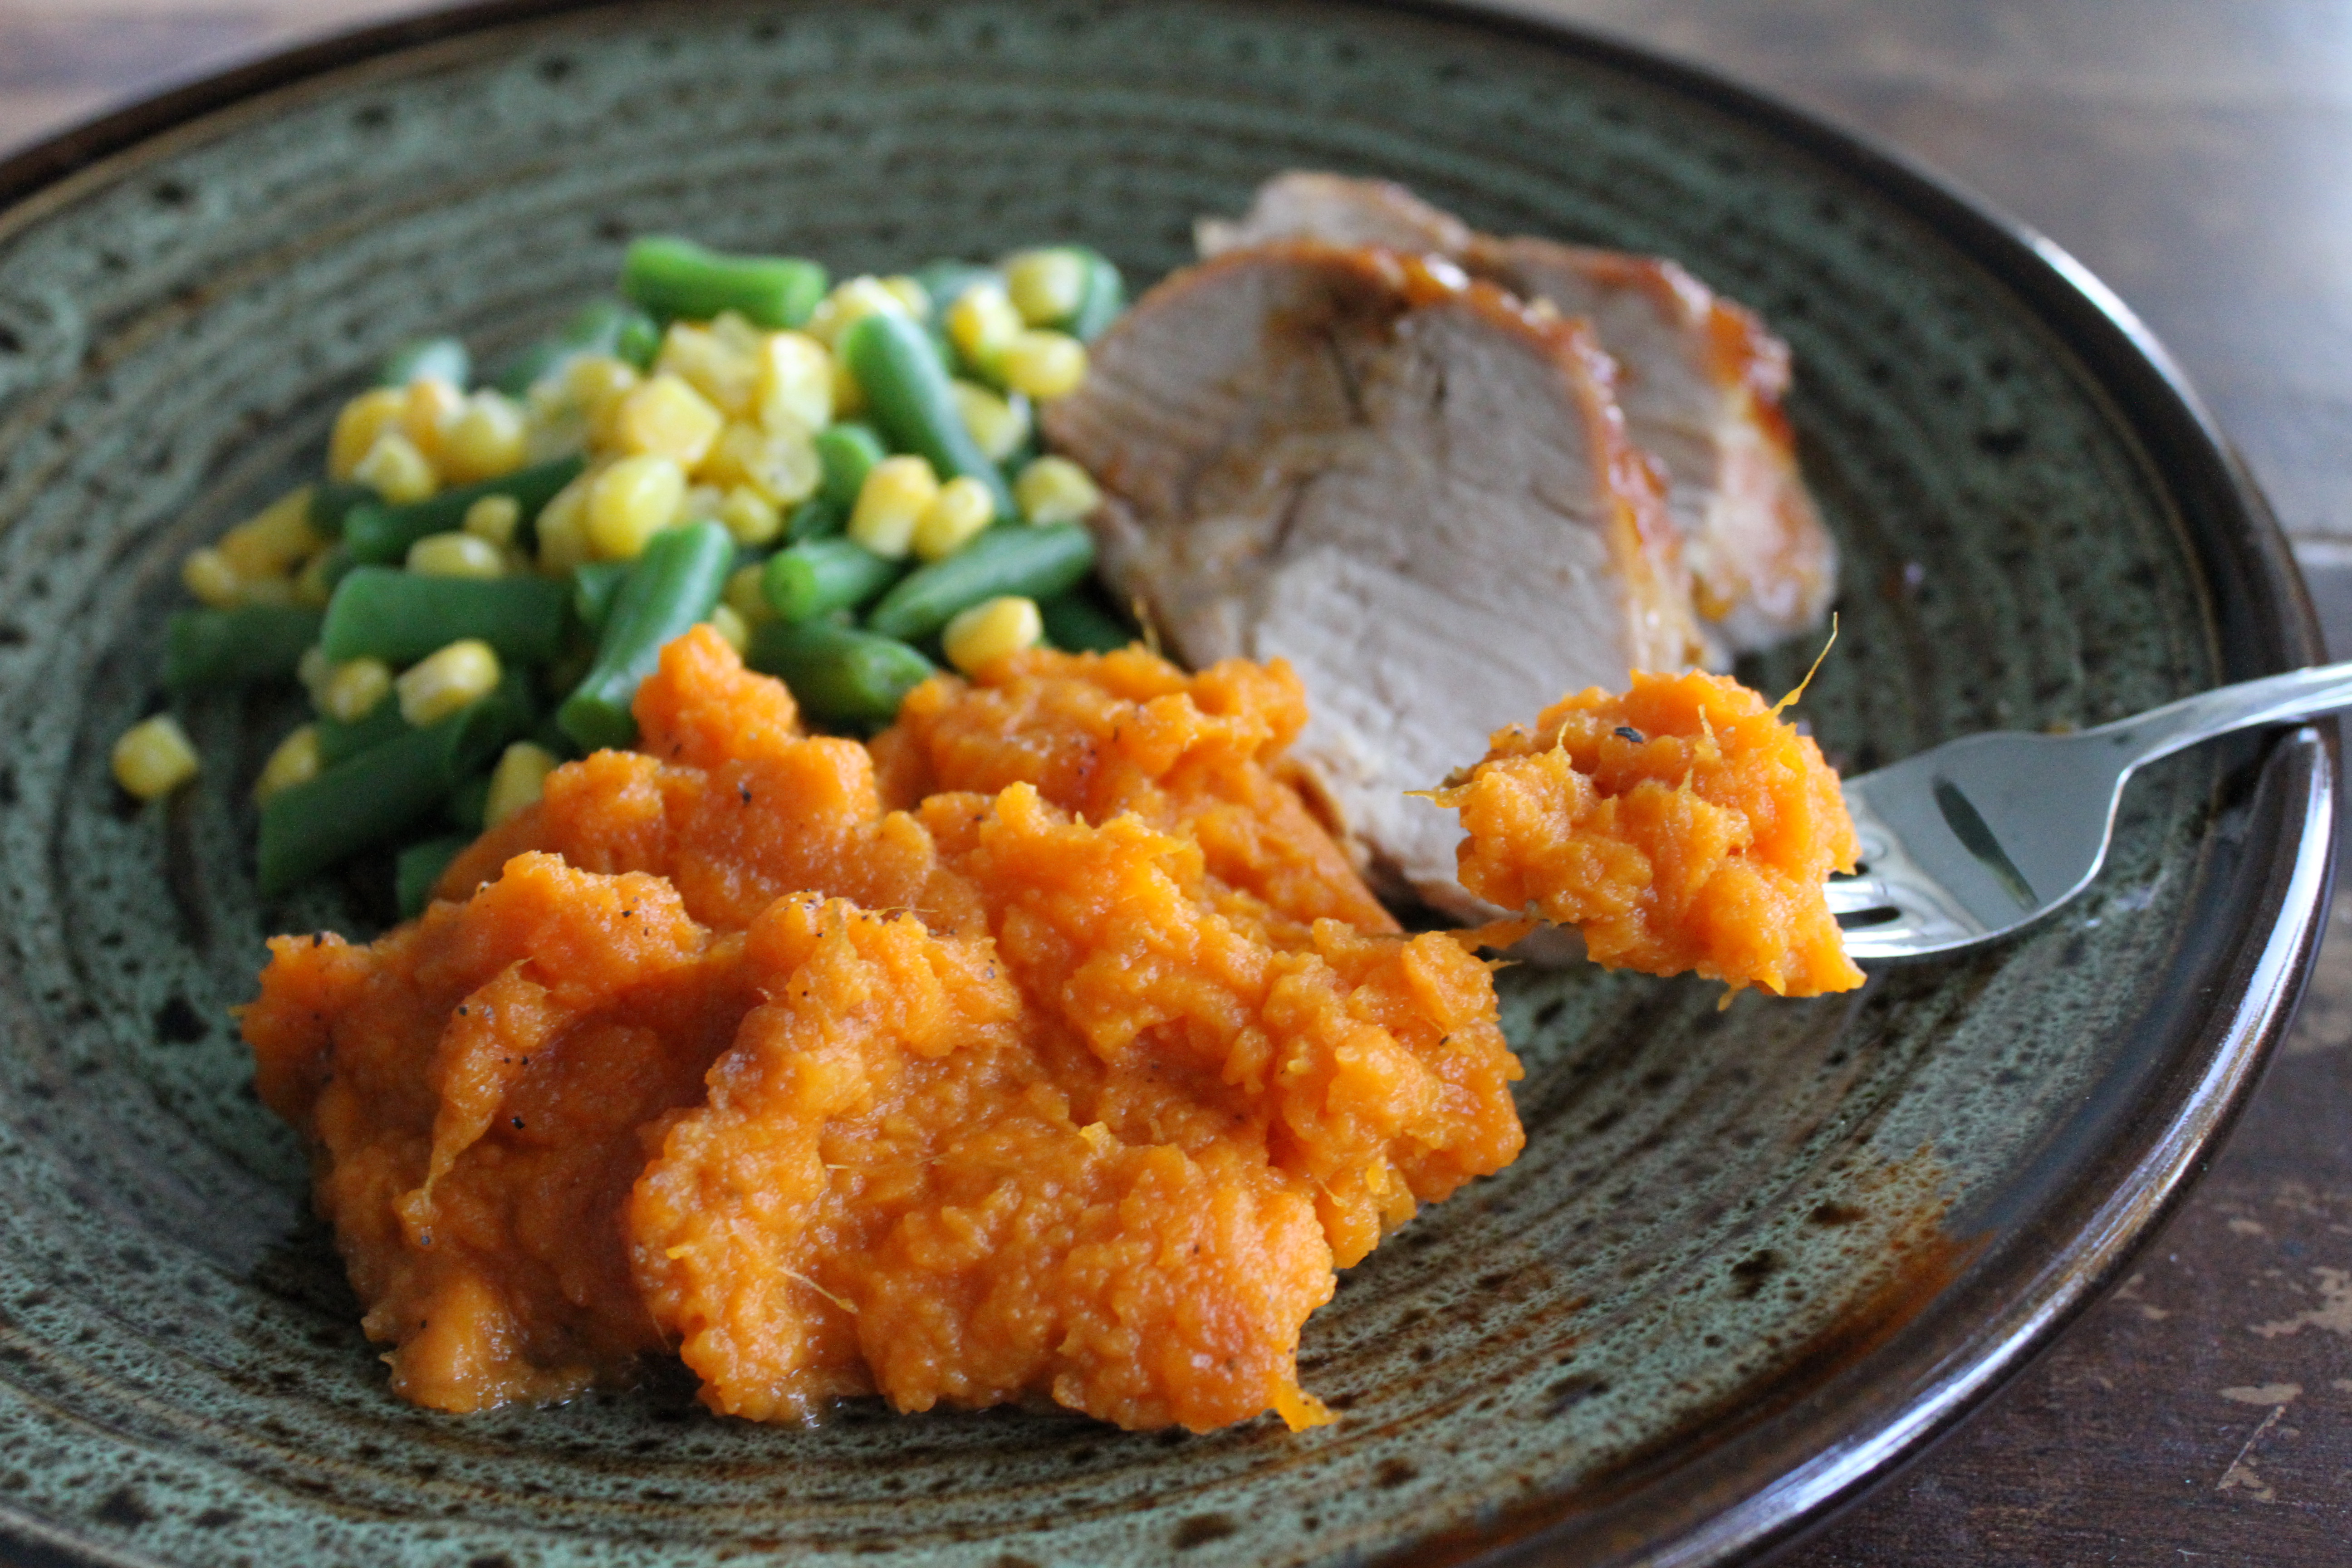 Mashed Sweet Potatoes– Because you need them in your life.
 Baked Garlic Brown Rice– A spectacular alternative to potatoes when you want to add a starch.
 Classic Buttermilk Biscuits– The name says it all.
 Maple Orange Cranberry Sauce– Make this today. It will last for a good week in the fridge!
 Roast Broccoli– A healthy side that adds gorgeous color to your plate with minimal effort.
Dessert
 Plum Crunch– Just say yes.
 Cranberry Maple Pudding Cake– You and your guests will be talking about this until next summer.
 Rum Pumpkin Pie– Its pumpkin pie with rum, people. Need I say more?
 The Best Carrot Cake EVER– Not a fan of pumpkin pie? You won’t miss it with this on your plate!
And now onto our feature recipe!!
 This is such an amazing recipe, I don’t know why it took me so long to share it here. If you are someone who loves to make seasonal recipes but the thought of making a pie-wether from scratch or not-nearly causes you to swoon, this dessert is for you. In fact, when you bring it down to science, 98% of those who have eaten this in my presence actually prefer this to pie. To PIE, people!! Better than pie!
It follows your basic layer bar kind of format. You make an oatmeal butter cookie type of dough, put some of it in the bottom of the pan, pour in a filling, and sprinkle the last of the dough on top, making a crunchy, bar sort of deal. These go together just like the Oatmeal Caramel Bars that I can never stop eating. So naturally, I was drawn to this recipe. Add in the fact that it contains one of my favorite ingredients, i.e. apple butter, and I was pretty much helpless to resist.
What I wasn’t prepared for was the way the apple butter changes the flavor of the cranberries. They lose the ‘in your face’ sourness and mellow out to just taste like good, tangy, cranberries. It is quite lovely. A small hint of the spices but not enough sweetness to be too rich. Which is nice because there is plenty of that in the crust. Butter + oats + sugar = chewy and crunchy heaven. All together it is a stellar match. So not only are they a beautiful ruby color, but they are a great at Thanksgiving, Christmas, and on into the New Year.
 Two Years Ago: Sun Dried Tomato Dip
Three Years Ago: Corn Casserole
Ruby Bars
Adapted from Pillsbury
My test subjects spanned more than a dozen people over the course of several years and no matter what I did or suggested, they were split 50/50 on wether or not they liked these bars with whipped cream. Serve some on the side and let your guests be the judge! I find that the store bought apple butter works best in this recipe because it tends to be a bit more spicy, but anything that you like would be great.
Filling:
1-12 oz-bag fresh or frozen cranberries
1 c sugar
zest of 1 orange
1/4 c of OJ
1/2 c apple butter
2 T butter (optional)
1 tsp vanilla
In a medium sauce pan, combine the cranberries, sugar, orange zest and orange juice and heat over medium low heat. Once the sugar starts to melt, turn the heat up to medium and simmer, stirring occasionally, until the fruit pops and it starts to thicken. You can use the back of a spoon to help break up the fruit if you need to. Remove the sauce from the heat and stir in the apple butter, vanilla, and the butter, if using. Set aside to cool slightly.
Crust:
3/4 c butter, softened
1 c brown sugar
1 1/2 c all purpose flour
1/2 tsp baking soda
1 1/4 c quick cooking oats
Preheat the oven to 400 degrees. While the filling cools a bit, combine all crust ingredients with a mixer, hand mixer, or wooden spoon. Press 2/3 of the mixture into a sprayed 9X13 pan. Pour the filling over the crust and spread evenly. Sprinkle the remaining crust over the filling and pat slightly. Bake for 25 to 30 minutes, or until golden brown. Cool completely in the pan before cutting into bars or they will fall apart when you try to serve them. Serve with or without whipped cream.
Maple Nut Cookies
Brittany wrote this on 20 November 2013![]() pecans
pecans
 I love it when I find a recipe that I have made several times before and then kind of forgot about. And a Christmas cookie to boot!!!
Its like…well…Christmas! Discovering a little surprise package. Oh look at this! A great cookie recipe! Tucked away in the catacombs of my cookbook collection, it was just sitting there. Quietly waiting for me to bring it back after years of neglect. I’ve been searching out a lot of those recipes that were-um, pre-blog, if you will. Tasty recipes I made, tweaked, served, and loved, and then just took a break from them for a bit. Then some smell or thought or different dish triggers my memory and I suddenly think, “Hmmm. Whatever happened to that one cookie/bar/bread/chicken dish I used to make?” Much like my closets, I feel my archives are always in the need of weeding. I don’t like holding onto something that I am never going to use. Either it is a good recipe, or its out. It is also why I like to go back through my personal boards on Pinterest and clean them out. But everyone does that, right? Don’t all of YOU scan your pins and think to yourself, ‘Self? What in the flagnog* was I thinking pinning a recipe for a dish that contained browned butter?’ DELETE. That is totally common. Right? RIGHT??
What I am particularly fond of regarding these cookies is that they mirror a buttery, crunchy shortbread but are not as fussy. This recipe for Maple Pecan Shortbread is spectacular and classic with a mild maple flavor. But today’s cookie recipe has fewer steps, a very pronounced maple flavor, but with that same satisfyingly crispy and crumbly texture that shortbread has. It is also a great recipe for kiddos to help with. Smashing cookie dough with a fork dipped in sugar or letting glaze randomly drip all over dessert are both tasks that are right up their alley. The visual texture and color contrast makes them perfect for a dessert buffet, cookie tray, and a leading candidate for a pretty Christmas gift box for a neighbor.
Just so darn pretty, dontcha think?
*Flagnong will make sense to anyone who saw the movie Monsters vs Aliens.


 One Year Ago: Classic Mashed Potatoes (Oooooooh baby!)
Two Years Ago: Sweet Potato Casserole & Maple Orange Cranberry Sauce
Three Years Ago: Spiced Tea
Maple Nut Cookies
Adapted from Pillsbury
These can be baked and sealed and stored in the freezer if you want to get ahead with your Christmas baking, but don’t glaze them until you are ready to serve them! They last about 48 hours in a sealed container on the counter before they start to lose their crunchiness. But the taste is still great!
Cookies:
1 c pecan halves, toasted *see note*
2 sticks (1 c) butter, softened-preferably unsalted
1/2 c brown sugar
1/2 tsp maple flavoring
1 egg
2 c all-purpose flour
sugar for pressing
Icing:
3/4 c powdered sugar
1 T milk
1 tsp maple flavoring
Preheat the oven to 350 degrees. If you haven’t yet, toast the nuts now. Cool slightly and chop finely.
In the bowl of an electric mixer or a large mixing bowl if using a hand mixer, beat the butter and brown sugar together until fluffy. Add the egg and maple flavoring and scrape the sides of the bowl, combining the ingredients well. On low, add the flour and chopped pecans until just combined. Using a teaspoon or small scoop, portion the dough into 1-inch balls and roll between your hands until smooth. Place balls on a greased or parchment/silpat lined sheet pan. Dip a large dinner fork into plain white sugar, and press the dough balls flat in a criss-cross pattern, as you would traditional peanut butter cookies! Bake for 11-12 minutes, or until just barely golden brown at the edges. Cool slightly on the pan, then remove to a cooking rack to cool completely. Meanwhile, combine the icing ingredients, being very careful not to over pour the milk! Whisk together until smooth and just able to drizzle. If the icing is a bit stiff, add the milk by a few drops at a time until drizzle-able. Glaze the cookies sparingly by sweeping a spoon back and forth over the top. If your kids are helping, well, then, just stand by with a damp rag. Enjoy!
*Note: To toast the pecans, or any nuts you need toasted for a recipe, spread on a sheet pan in a single layer and bake in a 350 degree oven for 5 minutes. Toss the nuts and toast for another 5 minutes, being careful not to let them burn! WATCH CLOSELY! If you can smell the toasted nuts, THEY ARE DONE!!! Alternatively, you can put them in a dry pan on the stove over low heat, tossing occasionally until fragrant.
Snickers Salad
Brittany wrote this on 1 November 2013![]() apples, chocolate, marshmallows, peanuts
apples, chocolate, marshmallows, peanuts
 This dessert came to mind as I was thinking ahead to the candy that was about to invade our house. It falls solidly into the category of, Why don’t I make this more often? But also into the column of, Because I would eat it all in one sitting and have to lie to my children about why it was all gone.
This is in no way healthy. And yet it is so wonderfully nostalgic of neighborhood pot luck gatherings you can’t help but sneak it in around the holidays. Obviously it would be a hit with the kiddos, but the grown-up paring of tart apple and sweet caramel will have the adults smiling as well. Ultimately, it is quick, easy, and so so so fun. What better way to morph all that Halloween candy into something more interesting than brownies with chopped M&M’s, Snickers, Butterfingers, Raisinets, MilkyWays, Tootsie Rolls, and Starbursts stirred in?! So grab those last few apples from the crisper drawer and ask your kids to start unwrapping the candy. If you tell them it will be smothered in pudding and whipped cream they may be more cooperative in donating them for the family dessert.


 Two Years Ago: Chocolate Croissant Bread Pudding
Snickers Salad
Recipe from the MN State Fair 4-H Cafeteria archives.
I have seen this made before without the diced apple, but I have no idea why you would want to omit it. It makes this salad and the tartness cuts through the sweetness of the rest of the ingredients. Granny Smith are perfect for this because the green color looks great in the dish, and they are firm enough to stand up to mixing and serving. This recipe is easy to make in ANY quantity (I have personally made it for several hundred people at a time) and I try to stick to basic equal ratios between pudding, whipped cream, and marshmallows. For example, if you use 2 c of pudding, then use 2 c of whipped cream and 2 cups of marshmallows. You can always add the candy and apples by eye. I am not a huge fan of using ready made whipped cream, but it doesn’t break down as easily in this recipe as the real stuff does so here, it is warranted.
1 large tart/sour apple, cored and diced, such as granny smith
1 box (3-4 oz) instant vanilla pudding (you could also use french vanilla or cheesecake flavors)
1 1/2 c cold milk
1-8oz container whipped topping
2 regular sized classic Snickers candy bars or 6 fun sized from your kids Halloween bag, chilled
2 c mini marshmallows
Vigorously whisk together the instant pudding and milk in a large bowl until well combined, smooth, and starting to thicken. Chill for half an hour. Pudding should be extra thick! Meanwhile, cut the cold candy bars lengthwise down the middle, and then across into small, bit sized pieces. You should get 8 pieces out of a fun sized Snickers bar. They cut much easier when they are cold and they don’t stick together when you mix them in! Add the container of cool whip to the pudding and fold gently together. It is ok to leave some streaks in there since you are going to mix it more anyway. Add the apples, marshmallows, and candy and gently fold until combined. Chill or serve immediately. This dessert salad lasst for several hours and even overnight. Just note that the marshmallows may get a bit soft after a day and the more it is handled, the more they will break apart. The flavor doesn’t suffer though!
The Ultimate Apple Butter Recipe
Brittany wrote this on 7 October 2013![]() apple butter, apples, gluten-free, rum
apple butter, apples, gluten-free, rum
 Ok. Last apple recipe for awhile. I can’t help it. They have kinda dominated my kitchen for the last two weeks. And can I just say check out the serious sunshine in the photo above shining in my screen porch windows and onto my breakfast plate! I love fall!
So yes, I have been canning, freezing, baking, cooking, roasting, and eating apples. I confess that I had actually sworn off making apple butter this year. One, I was on GO mode and apple butter just takes too long to make. Its not the labor involved, its the waiting! Secondly, I have made a LOT of apple butter over the years and even though it is all good, none of my versions have ever been ‘the one.’ I like all kinds of apple butter so how do you pick one that tastes the best? You don’t! You just wander aimlessly, eating all the apple butter you can find and exclaiming, ‘Oh! I like this one! ‘ or ‘This one is super yummy too!’ or even ‘This is so good I could bathe in it!’ But none of them really stood out.
Until now. I realized the error of my ways. I needed two things. Rum and vanilla.
Now, I am kinda classic when it comes to apple butter, but when I was elbow deep in the sticky, turn-my-fingernails-brown apple trenches, my friend posted this recipe. I read the title (Vanilla Rum Apple Butter) rolled my eyes and exclaimed out loud, “FINE! I’ll make apple butter! Twist my arm, why dontcha…” About 5 minutes later, it was in the crock-pot and cooking away. The only change I made for that batch that was different from her original recipe, was to add some brown sugar (my apples seriously lacked flavor) and mine were peeled because I was using this handy dandy contraption mentioned in the last post. Other than that, I made them the same, crossing my fingers that the lack of spices you usually see in apple butter wouldn’t be missed.
So…um…yeah. Not missed at all. It was so amazingly yummy, a friend of mine said she “…could slather that on my face, its so good.” Another said she would eat it scraped off the floor if necessary. While that certainly wasn’t called for (although once I did eat spinach artichoke dip that I had scraped off the oven door…) I was thrilled that they liked it so much. As I stared at my seemingly never ending pile of apples, I decided to rinse out the crock pot and do it all over again, but this time I would add the spices I so so love in apple butter.
The result?? The Ultimate Apple Butter Recipe! It is rich and full flavored and balanced and lovely. I will never make apple butter any other way ever again. And here it is for you!
 I can not really stir it yet, but there it is piled in my crock pot and nestled on the counter amongst empty canning jars, full canning jars, and a very sad looking banana…
 Ten hours later and it stirs to mush. Ready to puree!
 Smooth like buddah!
One Year Ago: How To: Caramelize Onions
Two Years Ago: Salmon Nicoise
Three Years Ago: Overnight Apple Cinnamon Oatmeal
Ultimate Apple Butter
My recipe is inspired by this recipe. The flavor isn’t as traditional as mine, but it is ah-ma-zing.
Some kinds of apple butter are so spiced they kind of reach up and smack you in the face. I prefer to actually taste the apples instead of just smearing cinnamon paste on my toast. If I could thin this down, I would suck it through a straw.
apples, cored, peeled and chunked small about 10 cups-enough to fill a standard 4 quart slow cooker (any NON-tart, soft apple is good for this but use whatever you have)
1/2 c spiced rum
1 c pure, no sugar added, apple cider
1/2 c brown sugar
3 tsp cinnamon
1 tsp ground ginger
1/2 tsp cardamom
1/2 tsp ground cloves
2 tsp pure vanilla extract
Pile the apples in the slow cooker, adding more if needed to fill it to the top. Add the rest of the ingredients on top, EXCEPT THE VANILLA! Stir it a bit if you can, but don’t worry if you can’t. Set the lid on tightly and turn the pot on low. After an hour or so, stir it if you can as it starts to cook down to distribute all the spices and coat all the fruit in the rum! 🙂 Leave it on low, until the apples get so soft that it breaks up as you stir it, at least 8 hours. It will depend on what kind of apple you use and the ripeness of the fruit. When it is mushy, stir in the vanilla and puree using an emersion blender, or transfer to a blender or food processor and puree in batches. Can it or freeze it and enjoy!
Spicy Ginger Syrup
Brittany wrote this on 1 October 2013![]() ginger, gluten-free
ginger, gluten-free
 Uhg! Sometimes I hate how behind I get with blogging! But, alas, ones time to deal with 5 pecks of apples is limited. Canning, freezing, baking, testing, tasting, experimenting, and saucing. Love it all. If you have forgotten, I love fall. Love it. Love love love love it. Jeans and a sweatshirt are my go-to outfit anyway, so bring on the weather that allows me to wear it everyday and be appropriate. Heh heh.
And may I just say, there is something about cooking with apples that just brings out the season. Dontcha think? I can make apple crisp in June, but it doesn’t have the same affect on me. Like grilling in February-mmmmmmm……nope! Tastes good, but doesn’t make you stop and take a deep breath of outdoor air with as much pleasure as it does in July. Also, if you are grilling outside in February and you are anywhere North and you take a deep breath, your nose hairs freeze so it is just a better idea all around to wait until summer.
Speaking of seasons, today’s recipe is a kind of bonus recipe. Not necessarily something you will make all the time, but defiantly worth whipping up during the colder months. The Spicy Ginger Syrup will make your house smell good, yes, but its versatility is its charm. I can’t wait to discover how you guys and gals will use this! I keep adding to my list (almost daily) of ways to use it up, but mixing it into drinks seems to be the hands down favorite around here. I have gone through several versions of this recipe, trying to get the spicy/sweet balance right, and my dedicated friends have graciously been taste testing and reporting. It is rough living in my neighborhood, I tell ya…
This would be outrageously popular to give as gifts during the holidays. But I wanted to share it now, because it lends itself so much to this time of year. Make it now, and you will find ways to enjoy it all the way to New Years.


 One Year Ago: Open Face Tuna Melt
Two Years Ago: Pumpkin Pie Muffins & Hot Apple Cider
Three Years Ago: Apple Crisp & Remoulade Sauce
Spicy Ginger Syrup
Adapted from Martin Yan (Yes! The Yan Can Cook guy!)
As you can see from the photos above, this stuff is just beautiful in a jar. The everyday reality is that it sits in my fridge in an airtight rubbermaid container, looking plain and unassuming. Oh! How looks can be deceiving! Please see below for the list of delicious ways to use up this golden wonderfulness! Be sure to add your own ideas or successes to the comments!
1 c peeled and coarsely chopped fresh ginger root
2 c water
2 c sugar
pinch of cayenne (optional)
In a blender, combine the ginger and 1 c of water. Blend until nearly smooth and pour into a medium saucepan. Add the rest of the ingredients and bring to a simmer, stirring occasionally. The ginger will have a bit of heat on its own, but the extra punch of the cayenne gives it a really nice kick. If you aren’t sure, hold off on it. You can always add it in later if you like. Heat the syrup just until the sugar is all dissolved and then remove from the heat, letting the syrup sit for 30 minutes more. Strain through a fine mesh strainer and store in a fridge in a tightly sealed container. This will last for months and months! Use in any of the ways listed below, or try your own!
* Add a splash to apple cider, hot or cold
* Stir some into a cup of hot tea-BONUS! Ginger is known to settle an upset tummy! This would be great for a sick child or expectant mommy!
* Swirl it around in a tall glass of ice tea or simply sparkling water with lots of ice-so refreshing!
* Drizzle it over vanilla ice cream
* Vodka + ginger syrup + ice = the new favorite drink in my neighborhood
* I am told it is also good with rum…
* A little bit over some roasted pears for dessert is amazing
* Stir some into your next batch of homemade applesauce
* Drizzle this over a pan of apple crisp, either before you top it with crunch and bake it, or after, just before you dig in
* Add some to your morning oatmeal
Love a Good Recipe?

Then you’ve come to the right place! I’m Brittany, and I share tested, trusted recipes you’ll love. I prepare & photograph food, obsess over the perfect recipe, and enjoy grins of delight when I serve up something awesome. Enjoy!


